What to do if BIOS update fails: urgent troubleshooting guide
Facing a BIOS update failure? This urgent troubleshooting guide covers quick fixes, a step-by-step diagnostic flow, and safety precautions to recover your system without data loss.

BIOS update failures are usually caused by power loss, interrupted flashing, or an incompatible firmware image. Secure power (prefer AC, disconnect peripherals as needed), then try BIOS recovery or a USB rescue drive. If it still fails, stop and seek vendor guidance to avoid bricking the motherboard. Proceed with caution and document steps taken for support.
Why BIOS updates fail and why it matters
BIOS updates matter because they fix security gaps, support new hardware, and improve system stability. When an update fails, the consequences can range from a failed boot to a completely unresponsive motherboard. If you are troubleshooting, you want a clear path forward that minimizes risk and preserves your data. What to do if bios update fails is often a matter of following manufacturer-approved recovery steps rather than attempting unverified methods. According to Update Bay, most failures come from power instability, a corrupted flash, or an incompatible firmware image. This is why you should ensure power stability, select the correct BIOS version for your exact motherboard model, and use vendor recovery tools. With a calm, methodical approach, you can often recover without professional service. Remember that each maker (Dell, HP, Lenovo, Asus, MSI, Gigabyte, etc.) has a slightly different recovery flow, so consult the official guide for your specific device.
Quick signs your BIOS update failed
When a BIOS update fails, you may see warning messages during boot, a blank screen, a failure to POST (Power-On Self Test), BIOS beep codes, or a rollback to a previous version. Some systems display a “ flashes failed ” or a boot loop, while others simply refuse to start. The symptoms help narrow down the cause: power loss during flash, a corrupted image, or use of an incorrect firmware. If you notice any of these signs, stop attempting further updates and start a structured recovery process. The presence of a black screen or continuous restart cycles often indicates a bricked attempt, which is riskier the more you retry.
Safety first: backups and precautions
Before attempting any BIOS recovery, back up important data. Although BIOS operations should not affect your files, a failed recovery can require a reflash that could put data at risk if the system becomes unstable. Connect to a reliable power source, preferably a UPS, and avoid updating BIOS on battery alone. Disable fast startup and hibernation where possible to prevent partial states during recovery. Gather tools: a USB drive that’s clean, a known-good BIOS file, and access to your motherboard or laptop vendor’s recovery utilities. Document serial numbers, motherboard model, and BIOS version before you start so you can reference them if you contact support.
What you need before you start: recovery tools, USB drives, and BIOS image selection
First, identify your exact motherboard or system model and revision. Download the correct BIOS file from the official vendor site and verify the checksum if provided. Prepare a USB drive formatted with the correct file system (usually FAT32). Some manufacturers offer a dedicated recovery button or a BIOS flashback feature that allows flashing without a full OS boot. Create a bootable recovery media if required. Keep a notepad handy to track every action you take; this helps if you need to involve support later. Do not mix BIOS files across models, as an incorrect image is a common cause of failure.
Diagnostic flow overview: mapping symptoms to causes
Symptoms guide the diagnosis: blank screen, beep codes, or partial POST indicate particular failures. If you hear a power-on beep but no display, the issue might be a corrupted flash or misconfigured BIOS settings. If the display works but freezes during POST, it could be a compatibility issue with a hardware component. A power loss during flashing often results in an incomplete flash that leaves the BIOS in an unusable state. Map symptoms to likely causes, then apply the least risky fix first (e.g., BIOS recovery) before attempting re-flashes.
Step-by-step fixes for the most common failure
- Secure power and access recovery mode: Connect to reliable power, disable sleep, and initiate BIOS recovery if your motherboard supports it. 2) Use the vendor’s USB recovery drive: Create a bootable USB or use a dedicated recovery method described by the manufacturer. 3) Flash the correct BIOS image: Ensure the image matches your exact model and revision; verify checksums if provided. 4) Clear CMOS if recovery fails: Power down, unplug, and clear the CMOS by removing the battery or using a dedicated jumper. 5) Reboot and verify: Enter BIOS to confirm the new version, then load defaults and reconfigure. 6) If the device still won’t boot: Seek official support or service.
What to do if the first fix doesn't work: advanced options and why caution matters
If basic recovery fails, you may need advanced options such as BIOS Flashback or vendor-specific recovery modes. These methods can vary by vendor and could void warranties if misused. Do not attempt multiple risky flashes in succession. Instead, document the problem and contact the manufacturer’s support with your model, revision, and exact error messages. A professional service may be required if the motherboard is bricked or the BIOS chip is inaccessible.
Preventing BIOS update problems in the future
Prevention reduces downtime. Always ensure a stable power source during updates, use the vendor-recommended recovery tools, and only install BIOS updates that explicitly list your motherboard model. Avoid updating during storms or on unstable networks that could cause interruptions. Keep backups of your essential data and maintain a current recovery plan. Consider enabling BIOS flashback or dual-BIOS if your platform supports it to recover more easily from failed updates.
When to seek professional help and warranty considerations
If recovery attempts fail or you’re unsure about the correct BIOS image, seek professional help. A certified technician can perform advanced recovery procedures without risking further damage. If your device is under warranty, contact the manufacturer before proceeding with aggressive recovery attempts that might void coverage. Document all steps you took and keep receipts in case warranty coverage is invoked.
Steps
Estimated time: 60-90 minutes
- 1
Secure power and prep recovery media
Connect the system to a reliable power source. Disable sleep/hibernate. Prepare a USB drive with the official recovery tool or bootable BIOS rescue image per the manufacturer’s instructions.
Tip: Use a UPS if available to prevent power loss during operation. - 2
Enter BIOS recovery mode
Power on while holding the designated key or use the vendor’s recovery button to invoke BIOS recovery. Follow on-screen prompts exactly as described in your motherboard manual.
Tip: If your model supports BIOS Flashback, use that feature to avoid OS boot issues. - 3
Flash the correct BIOS image
Download the exact BIOS version for your model and revision. Verify the checksum and copy to the USB drive, then run the recovery tool to flash the image.
Tip: Do not use BIOS files from other models. - 4
Reset CMOS if needed
If recovery fails, power down, remove power, and reset the CMOS using the battery or a jumper. Wait a minute before re-powering.
Tip: Keep the motherboard manual handy for CMOS steps. - 5
Reboot and verify
Enter BIOS to confirm the version, reset to defaults if necessary, and reconfigure settings. Test boot with a small initialization to confirm stability.
Tip: Take notes of changes you make for future reference. - 6
If issues persist, contact support
Document error messages, model numbers, and BIOS versions. Contact the vendor or a certified technician if the system still won’t boot.
Tip: Warranty policies may affect what steps are allowed.
Diagnosis: System won't boot after BIOS update attempt
Possible Causes
- highPower interruption during flash
- highCorrupted BIOS image
- mediumIncompatible firmware for motherboard model
- lowFaulty CMOS battery
Fixes
- easySecure power and access BIOS recovery mode
- mediumUse manufacturer USB recovery or flashback tool
- mediumReflash with the correct BIOS image after verifying checksum
- easyReset CMOS as a last resort
Frequently Asked Questions
What should I do first if my BIOS update fails?
Begin by securing a stable power source and initiating any vendor-provided recovery or flashback process. Do not force additional updates until you’ve completed a recovery flow and verified the BIOS image compatibility.
Start with a stable power setup and the vendor recovery option, then verify compatibility before retrying.
Can BIOS be recovered without professional help?
Many vendors provide official recovery tools and USB methods that lay out steps clearly. If you follow the vendor guide exactly, you can often recover without a technician.
Yes, if you follow the official vendor guide step by step, you can often recover without a technician.
Is BIOS update failure dangerous for the motherboard?
While not always dangerous, repeated failed flashes raise bricking risk. Stop after initial recovery attempts and seek support if needed to avoid permanent damage.
Repeated failed flashes can risk bricking; seek support if recovery doesn’t work.
How do I determine the correct BIOS version for my motherboard?
Check the motherboard model and revision in system information, then download the exact file from the manufacturer. Cross-check the filename and checksum before flashing.
Identify model and revision, download the exact BIOS file, and verify before flashing.
Will BIOS recovery erase data?
BIOS recovery itself does not touch user data, but recovery missteps may require re-flashing which carries some risk. Back up data beforehand as a precaution.
Recovery won’t erase files by default, but there’s always some risk if something goes wrong.
What if the system still won’t boot after recovery?
If recovery fails, contact the manufacturer’s support or a professional technician. Some hardware failures require board-level service.
If recovery fails, contact support or a professional technician.
Watch Video
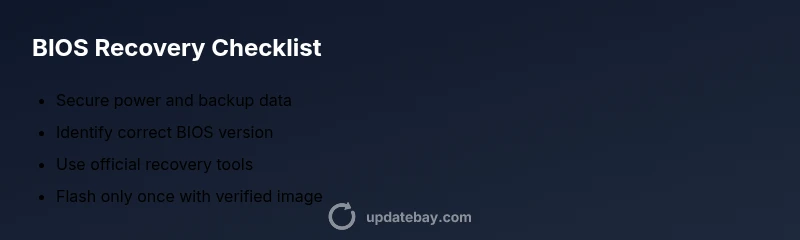
What to Remember
- Secure power before any recovery attempt.
- Use official BIOS recovery tools from the manufacturer.
- Verify BIOS image matches your exact model and revision.
- Avoid repeated risky flashes; consult support if needed.
- Back up data and document steps for warranty support.