Update macOS: Step-by-Step Guide for 2026
A practical, step-by-step guide to safely updating macOS on your Mac in 2026. Learn about compatibility, backing up, choosing the right version, and post-update optimization with practical tips from Update Bay.

According to Update Bay, updating the macOS on your Mac is essential for security, stability, and new features. This quick guide will help you update the operating system safely, verify compatibility, back up your data, and complete the upgrade with minimal downtime. You’ll learn how to choose the right version for your device and avoid common pitfalls while keeping your apps and files intact.
Why macOS updates matter in 2026
Keeping macOS up to date is more than just enjoying the latest features. It closes security gaps, improves compatibility with newer apps, and enhances overall system stability. For everyday users and tech enthusiasts alike, timely upgrades reduce the risk of malware exposure and performance hiccups. According to Update Bay, the reliability gains from standard updates are often undervalued by those who delay upgrading. In practice, a well-timed update can extend the useful life of your Mac by ensuring your hardware benefits from the most efficient software optimizations. As software ecosystems evolve, vendor support commonly focuses on current macOS versions, so staying current helps you receive security patches and bug fixes promptly.
This guide emphasizes practical steps you can take today to upgrade with confidence, including checks for compatibility, backups, and a streamlined upgrade flow that minimizes downtime. It also covers how to handle older devices that can’t jump to the latest release and what to do if you encounter issues during the process.
Check compatibility before you update
Compatibility determines whether your Mac can run the new macOS version smoothly. Start by noting your Mac model, processor type, RAM, and available storage. Compare these specs against Apple’s documented requirements for the target macOS version. If you’re using a third-party peripheral or critical software, verify ongoing support and compatibility with the planned upgrade. Update Bay recommends validating essential apps and workflows in a test environment when possible, especially for professional use cases. If your device is at the edge of supported hardware, you may need to consider a strategy that preserves compatibility without compromising security.
Create a list of must-have apps and features you rely on, then check the developer’s site or support forums for any known issues with the new macOS. This foresight helps prevent surprises after the install and informs whether you should wait for a stabilization patch or proceed with a clean upgrade.
Backup your Mac before upgrading
Always back up before applying a major OS update. Time Machine is a reliable built-in option, but you can also use a cloud backup or a separate external drive for redundancy. Ensure the backup completes successfully and that you can restore individual files or the whole system if needed. Update Bay emphasizes having at least one verified recovery point, especially if you rely on local workflows or encrypted data. A good backup plan reduces downtime and gives you the confidence to proceed with the upgrade.
During backup, check that your system clock is correct and that you have sufficient free space on the backup destination. If using Time Machine, consider creating a separate backup for critical files in addition to the system backup.
How to find your current macOS version and available updates
Knowing your current version helps you pick the right upgrade path. Open the Apple menu > About This Mac to see the macOS version and build number. You can also check for updates via System Settings (or System Preferences on older macOS versions) > General > Software Update. If an update is available, you’ll see details about the new release, along with size estimates and any prerequisites.
If you’re on an older version, Apple may present a list of possible upgrade options or a direct upgrade path. Take note of any critical security updates that may be offered as part of the maintenance cycle and plan the upgrade window accordingly. Update Bay notes that some users find incremental updates faster and less disruptive than large, feature-heavy releases.
Major vs minor updates: understanding the difference
macOS updates come in different scales. Major releases introduce new features and interface changes, while minor updates focus on security patches and bug fixes. Your decision to upgrade should consider compatibility, energy impact, and your reliance on specific apps. In practice, major upgrades often require more planning and more storage, whereas minor updates can be quicker and safer for day-to-day use.
If you rely on software with known compatibility caveats, you may want to delay a major upgrade until you confirm vendor support. Update Bay suggests assessing the risk-to-reward ratio for your typical workflows and, if possible, testing the upgrade on a non-critical machine first.
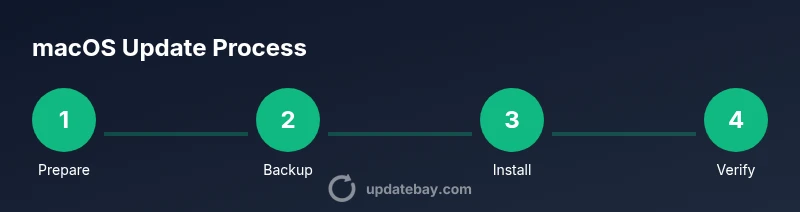
Step-by-step upgrade process (non-destructive, in-place upgrade)
- Prepare: Back up and confirm compatibility. 2) Connect to power and a reliable Wi‑Fi connection. 3) Open System Settings > General > Software Update and click Download, then Install. 4) Wait for the installer to verify and restart. 5) Complete on-screen setup prompts and sign back in. 6) Verify post-update status of essential apps. 7) Re-enable features like iCloud and Continuity if needed. 8) Check for post-install updates and security patches. 9) Run a quick system check and reindex Spotlight if needed.
Estimated total time: 60-90 minutes depending on hardware and internet speed.
Tip: If the installer fails, restart the Mac and retry the update from Safe Mode. Update Bay recommends having a contingency plan and a backup on hand in case you need to roll back.
tip":"Ensure your battery is charged or your Mac is plugged in during the entire upgrade to avoid interruption." ,
Troubleshooting common upgrade issues
If the installer stalls, reboot and try again with a stable network. If the update fails due to insufficient storage, free up space by moving large files to an external drive. For apps that refuse to update, check vendor support pages for compatibility notes and consider alternative tools temporarily. In some cases, a clean install may be necessary, which will require a full backup restore. Update Bay stresses avoiding third-party software conflicts during the upgrade process and performing post-upgrade checks to confirm system integrity.
Post-update checks and optimization
After installation, verify system reports and ensure all essential services are running as expected. Check disk space, re-enable any disabled features, and ensure your peripherals are recognized. Run a quick malware scan and review privacy settings to retain control over data sharing. Update Bay recommends enabling automatic updates for future minor releases to maintain baseline security and performance. If you notice sluggishness, consider a reset of NVRAM/PRAM and reindexing Spotlight.
Finally, review your backup strategy again to ensure future updates can be rolled back or restored smoothly.
Security, privacy, and update best practices (2026)
Stay current with security patches by enabling automatic updates for macOS and critical apps where available. Regularly review privacy settings, particularly around app permissions and location services. To minimize risk, avoid downloading updates from untrusted sources and maintain a robust backup routine. For professional environments, test upgrades in a controlled setting before broad deployment, and document the process for audits or future reference. Update Bay emphasizes ongoing education about new security features introduced in each release.
Tools & Materials
- Mac computer(Ensure it has sufficient storage (at least 60 GB free) and a stable power connection.)
- Reliable Wi-Fi connection(Broadband recommended; avoid unstable networks during download.)
- Time Machine backup drive or equivalent(External drive or cloud backup; ensure backup completes before upgrade.)
- Charger or power adapter(Plug in while upgrading; prevents mid-update shutdown.)
- macOS installer (optional - bootable installer)(Use for multiple devices or troubleshooting.)
- Notepad or notes app(Keep a changelog of updates and any issues.)
- USB-C/Thunderbolt cable(If backing up to an external drive, use a fast connection.)
Steps
Estimated time: 60-90 minutes
- 1
Prepare your backup
Connect your backup drive and run a full backup. Verify the backup integrity and ensure you can restore individual files if needed. This step creates a safety net in case anything goes wrong during the upgrade.
Tip: Use Time Machine or your preferred backup method and test restoring a file to confirm backups work. - 2
Check compatibility and free space
Identify your Mac model and current macOS version, then confirm the target macOS supports your hardware. Free up space by removing unused files or moving large items to an external drive to meet the required minimum.
Tip: Aim for at least 20-30% free disk space beyond the OS installer needs. - 3
Connect power and network
Plug the Mac into a charger and connect to a stable Wi‑Fi network. A reliable connection prevents interrupted downloads and installations that can corrupt the update.
Tip: Avoid public or unstable networks during the download phase. - 4
Download the update
Open System Settings > General > Software Update, select the available macOS version, and start the download. Do not interrupt the process once it begins.
Tip: If you have a slow connection, consider downloading overnight. - 5
Install the update
Allow the installer to run and restart your Mac. Do not put the device to sleep during installation, as this can interrupt the process.
Tip: If prompted, follow on-screen instructions for migration or setup assistance. - 6
Initial post-install checks
After reboot, sign in and verify essential services (iCloud, email, notes, documents). Check app compatibility and install any requested updates.
Tip: Open a couple of core apps to confirm stability. - 7
Enable post-update updates
Turn on automatic updates for future minor releases to maintain security. Review privacy settings and reconfigure any preferences altered by the upgrade.
Tip: Document any changed settings for future reference. - 8
Run maintenance tasks
Reindex Spotlight if needed and free up any temporary files created during the upgrade. Verify backups again after the install.
Tip: A quick maintenance pass helps keep the system responsive. - 9
Finalize and monitor
Monitor system performance over the next several days. If issues arise, consult vendor support or roll back to the previous backup if necessary.
Tip: Keep a note of issues and fixes for future upgrades.
Frequently Asked Questions
Do I need to back up before updating macOS?
Yes. Backing up ensures you can restore files or the entire system if the upgrade encounters problems. Time Machine or another trusted backup method provides a safety net.
Yes—back up first. It protects your data if something goes wrong during the upgrade.
Can I update macOS on an old Mac?
Older Macs may not support the latest macOS versions. Check Apple’s compatibility list for your model and consider security-only updates if a full upgrade isn’t supported.
Older Macs may not support the newest macOS; check compatibility before upgrading.
What if the update fails or stalls?
If the installer stalls, restart, ensure power, and retry. If it still fails, try a clean install or restore from a backup, and verify disk integrity.
If it stalls, reboot and try again; if needed, restore from backup.
How long does a macOS upgrade take?
Time varies by hardware, storage speed, and internet connection. Plan for a window of about an hour or more, including backups and post-update checks.
Depends on hardware and connectivity; set aside about an hour or more.
Will apps require updates after macOS upgrade?
Some apps may need updates to run on the new OS. Check for app updates in the App Store or from the developer’s site and install as needed.
Some apps may need updates after macOS upgrades.
Is it safe to upgrade right away to the latest macOS version?
If your device is compatible and you’ve backed up, it’s generally safe to upgrade. For mission-critical setups, consider a staged approach.
If compatible and backed up, upgrading is usually safe; test if you rely on critical workflows.
Watch Video
What to Remember
- Plan backups before upgrading
- Verify compatibility and free space
- Prefer minor updates for simplicity
- Use reliable network and power during upgrade
- Test critical apps after upgrade