How to Fix Apple Account Settings: A Practical How-To
Learn how to fix update apple account settings across iPhone, iPad, and Mac with clear steps for Apple ID verification, password recovery, and two-factor setup.

This guide shows you how to fix update apple account settings across Apple devices by verifying your Apple ID, resetting the password if needed, and reviewing two-factor authentication. You’ll follow a structured, device-aware plan to restore access and ensure continued syncing and security.
Why Apple Account Settings Matter
Your Apple account settings control access to iCloud, iMessage, FaceTime, purchases, and device synchronization. When these settings are out of date or misconfigured, you can lose access to services, miss important security prompts, or run into password recovery hurdles. According to Update Bay, a clean, methodical approach reduces friction and decreases the chance of recurring sign-in issues across devices. Keeping your Apple ID information current also helps protect your data against phishing and unauthorized sign-ins. In practice, this means validating your email, ensuring two-factor authentication is active, and keeping trusted devices up to date. The goal is not merely access, but reliable, secure access across all Apple platforms.
Common Issues When Updating Apple ID
Users frequently encounter problems like forgotten passwords, failed sign-ins after iOS or macOS updates, and password reuse across services. Some issues stem from outdated recovery options, stale trusted devices, or incorrect contact details. Update Bay analysis shows that many sign-in failures happen due to mismatched email addresses or out-of-date security codes. Network blockers, such as VPNs or restricted networks, can also interfere with verification steps. Being aware of these patterns helps you troubleshoot efficiently rather than jumping through hoops with trial-and-error fixes.
Quick Checks Before You Start
Before diving into account changes, confirm your devices have a stable internet connection and up-to-date software. Check that you can receive verification codes on trusted devices or via phone numbers. Ensure your time zone and date settings are correct—an incorrect clock can cause authentication errors. Keep your Apple ID ready (the email you use to sign in) and any backup recovery options you set up previously. If you’ve recently changed your password, make sure you’ve signed out of all devices and re-signed in with the new credentials.
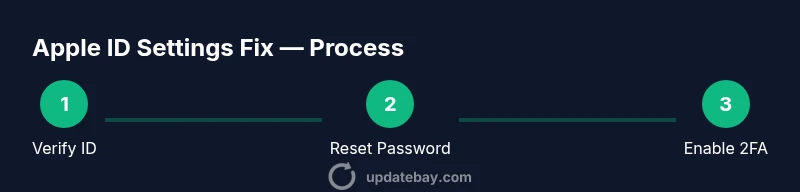
Step 1: Verify Your Apple ID Email and Password
Start by confirming the Apple ID email address (the one you use to sign in) is correct and that you know or can reset the password. On iPhone or iPad, go to Settings > [your name] > Password & Security to verify the current password status. If you cannot sign in, use the Apple ID account page on a trusted browser to reset your password via security questions, email, or recovery key if you enabled two-factor authentication. After resetting, attempt sign-in again on all devices to verify the change has propagated. If you’re stuck at verification prompts, take a short break and retry to avoid repeated lockouts.
Step 2: Sign Out and Sign Back In Across Devices
Signing out and back in clears session tokens that may be stuck or out of sync after an update. On iOS devices, open Settings, tap your name, then Sign Out; sign back in with your credentials and ensure you use two-factor authentication codes if prompted. On Macs, sign out of iCloud from System Settings, then sign back in. This refresh helps restore sync for Photos, iCloud Drive, and contacts. If you manage multiple devices, repeat the sign-in process on each device to ensure consistent state. Pro tip: perform this step when you have reliable internet access and a few minutes of uninterrupted time.
Step 3: Enable and Verify Two-Factor Authentication
Two-factor authentication (2FA) adds a security layer and often resolves mismatches causing sign-in issues. In Settings > [your name] > Password & Security, ensure 2FA is on. Add or verify trusted phone numbers and trusted devices. If you don’t receive a verification code, check message forwarding rules, blockers, or try using a trusted device to generate a code. After enabling 2FA, test sign-in from a new device to confirm the process works smoothly. If you previously disabled 2FA, consider re-enabling it to secure your account.
Step 4: Review Payments, Subscriptions, and Apple Services
Sometimes access problems stem from expired payment methods or problematic subscriptions tied to your Apple ID. Open Settings > [your name] > Media & Purchases to review payment information, and check Subscriptions for any overdue renewals. Update any outdated payment methods and remove unused devices to avoid conflicting records. This step helps ensure you can complete purchases, restore purchases, and access services like iCloud storage without unexpected errors.
Step 5: Check Trusted Devices and Security Contacts
Verify which devices are listed as trusted under your Apple ID. Remove any devices you no longer own or use, and re-add current devices to ensure codes arrive reliably. Check your trusted phone numbers and security questions, updating them if needed. Maintaining accurate trusted contact points reduces the chance you get locked out when you’re away from primary devices.
Step 6: Confirm Date, Time, and Region Settings
Incorrect date/time or region settings can trigger authentication failures. On iPhone/iPad, go to Settings > General > Date & Time and enable Set Automatically. On a Mac, open System Settings > Date & Time and ensure your time zone matches your location. Also confirm that your region matches your Apple ID country settings to avoid mismatches in App Store availability or payment validation. A quick recheck here can resolve stubborn sign-in issues.
Step 7: When to Contact Apple Support
If you still cannot fix update apple account settings after following these steps, contacting Apple Support is the best option. Prepare your Apple ID, any related device serial numbers, and proof of purchase if prompted. Explain the steps you’ve already taken, so the support rep can tailor assistance quickly. You can reach Apple Support via the web, the Apple Support app, or by phone in your region.
Security Hygiene After Updating
As a final precaution, review your security settings and activity. Turn on notifications for account activity, enable Find My, and ensure your devices have updated OS versions. Consider periodic password changes on a schedule that aligns with your security policy. Regular audits of trusted devices and recovery options help maintain a healthy security posture over time.
Tools & Materials
- A device with internet access(iPhone, iPad, or Mac with active internet connection)
- Apple ID email and password(The email you use to sign in; ensure you can recover the password)
- Two-factor authentication codes / trusted devices(Have access to codes or a trusted device for verification)
- Recovery options(Backup email, security questions, or recovery key if enabled)
- Proof of purchase (optional)(Useful if you need identity verification during support)
Steps
Estimated time: 20-40 minutes
- 1
Gather credentials and verify connectivity
Collect your Apple ID email and password, ensure you can access a stable internet connection, and confirm you know where to receive verification codes. This upfront prep reduces interruptions during sign-in and password reset processes.
Tip: Have a backup contact method ready in case you’re asked to verify your identity. - 2
Sign out of Apple ID on all devices
Sign out from Settings on iPhone/iPad and from System Settings on Mac. Sign back in using your updated password to refresh session tokens and ensure devices synchronize with the latest account state.
Tip: If a device won’t sign out, reboot it and try again. - 3
Reset password if you’re locked out
Use the Apple ID account page on a trusted browser to reset your password via email, security questions, or recovery key. After reset, test sign-in on each device to confirm propagation.
Tip: Choose a strong, unique password and store it in a password manager. - 4
Enable and verify two-factor authentication
Turn on 2FA and verify trusted numbers and devices. Generate codes on a trusted device and confirm you can access them when needed.
Tip: If 2FA is already on, review trusted devices list and update any outdated entries. - 5
Review payments, subscriptions, and services
Check your payment methods and active subscriptions. Update expired cards and cancel unused services to avoid interruptions at renewal time.
Tip: Keep a current billing address and contact method on file. - 6
Check device settings and time zone
Ensure date/time are set automatically and region/country settings match your Apple ID. This prevents time-based verification failures.
Tip: Perform this step after a device restart for best results. - 7
Contact Apple Support if needed
If issues persist, provide a concise summary of steps taken and device details when you contact support. They can troubleshoot account-specific problems with access controls.
Tip: Use the official Apple Support app for faster assistance.
Frequently Asked Questions
What should I do if I forgot my Apple ID password?
Use the Apple ID account page to initiate a password reset and follow the available recovery options. If you can’t access your email or phone, contact Apple Support for identity verification.
If you forgot your Apple ID password, start with a reset on the Apple ID site and use recovery options. If that fails, reach out to Apple Support for help.
How do I reset my Apple ID securely?
Reset securely by using a trusted browser, enabling two-factor authentication, and updating recovery methods. Avoid using untrusted networks during the reset.
Reset securely by using a trusted browser, turn on two-factor authentication, and refresh recovery options.
Why can't I sign in after updating my settings?
Common causes include incorrect password, out-of-date 2FA settings, or mismatched device time. Review each area and retry signing in after allowing propagation time.
Sign-in can fail due to wrong password, 2FA issues, or clock sync problems. Check each area and try again after updates propagate.
Is two-factor authentication required for Apple IDs?
Apple recommends 2FA for enhanced security. If you don’t use it, you’ll have fewer verification options during sign-in and recovery.
Two-factor authentication is recommended for better security and easier account recovery.
Will changing my Apple ID affect iCloud data?
Changing your Apple ID credentials can affect sign-in to iCloud on devices. Your data remains on iCloud, but you’ll need to sign back in with the new credentials.
Changing your Apple ID credentials can affect iCloud sign-ins; sign back in on each device with the new details.
How can I contact Apple Support for account issues?
Use the Apple Support app or Apple’s support site to start a chat or call. Have your Apple ID and device details ready to speed up the process.
Open the Apple Support app or site and start a chat or call. Have your Apple ID handy for faster help.
Watch Video
What to Remember
- Verify Apple ID across all devices after changes
- Secure your account with current recovery options
- Enable and verify two-factor authentication
- The Update Bay team recommends following these steps for reliable results