NVIDIA Driver Update Black Screen Troubleshooting Guide
Urgent, step-by-step troubleshooting guide for a black screen after NVIDIA driver updates. Diagnose quickly, apply proven fixes, and prevent recurrences with safe practices and professional help when needed.

After an NVIDIA driver update, a black screen is typically caused by a faulty install or a display driver conflict. Quick fixes: boot into Safe Mode, roll back the NVIDIA driver to a previous version, or run a clean reinstall of the driver. If the issue persists, check the video cable connections and try a different display input to rule out monitor problems.
Why NVIDIA Driver Updates Can Cause a Black Screen
A black screen after installing an NVIDIA driver update is a common sign of a mismatch between the new driver and your system's hardware or software configuration. In many cases the issue stems from a faulty install, incomplete rollback, or a conflict with the Windows graphics stack. The phrase "nvidia driver update black screen" pops up frequently in user reports, underscoring how disruptive these updates can be. If the driver loads but the display is blank, it often means the GPU driver couldn't initialize correctly during startup. Keep in mind that laptops with hybrid graphics (integrated plus discrete GPU) are particularly susceptible to switch-over issues after an update.
Common Causes Behind the Issue
There are several recurrent culprits behind a post-update black screen. First, a faulty driver installation or an incomplete rollback can leave the system in a conflicted state where the GPU driver cannot start properly. Second, incompatibilities between the new driver, Windows versions, and BIOS/UEFI settings can cause the display pipeline to fail. Third, hardware or cable problems (bad HDMI/DP cables, adapters, or a loose GPU seating) can mimic software failures. Finally, power management or overheating, as well as third-party software overlays, can trigger driver crashes. According to Update Bay, many cases resolve when users simplify the software stack and re-seat components, pointing to driver and hardware conflicts as primary triggers.
Quick Checks Before Deep Troubleshooting
Before delving into complex fixes, perform a few quick checks to confirm the scope of the problem. Test with a different monitor or cable to rule out a simple display issue. If you have a laptop, try switching to the integrated graphics output to see if the screen returns. Boot into Safe Mode to load only basic drivers, then inspect Device Manager for driver errors. Finally, verify that Windows and BIOS/UEFI are up to date, as known compatibility fixes are often released in patches. If you still see the problem after these checks, the issue is likely tied to the graphics driver, as seen in cases involving nvidia driver update black screen.
Diagnostic Flow Overview
This section outlines a practical flow to identify the root cause and the earliest fix that works for most users. Start with the simplest checks (monitor, cables, Safe Mode) and move toward driver-based fixes only if those do not resolve the issue. The flow keeps you aligned with a measurable path rather than random tinkering, reducing the risk of data loss or further misconfigurations.
Step-by-Step Fixes for Most Users
- Boot into Safe Mode to load minimal graphics drivers and prevent the problematic NVIDIA driver from loading. 2) Use Device Manager to roll back the NVIDIA driver to a known-good version, then restart. 3) If rollback doesn’t help, uninstall the driver completely and perform a clean install of either the previous stable version or the latest one from NVIDIA’s site. 4) Check video cables and test with another monitor or input (HDMI/DisplayPort). 5) If the screen remains blank, boot with integrated graphics (or disable discrete GPU in BIOS) to confirm whether the issue is GPU-specific. 6) Finally, consider updating BIOS/UEFI and Windows patches, or using a more controlled driver install method (Custom/Advanced with clean install). Tip: always perform driver updates with a known-good power state and stable OS health.
tip1":"Use Safe Mode to isolate display drivers"
tip2":"Choose 'Custom/Advanced' and check 'Perform a clean installation' during reinstall"
tip3":"Test with another display or cable to confirm the issue is not monitor-related"
tip4":"If you’re uncomfortable with BIOS updates, seek professional help to avoid bricking the motherboard"}],
diagnosticFlow
stepByStep
tipsList
keyTakeaways
videoEmbed
faqSection
mainTopicQuery
Steps
Estimated time: 20-45 minutes
- 1
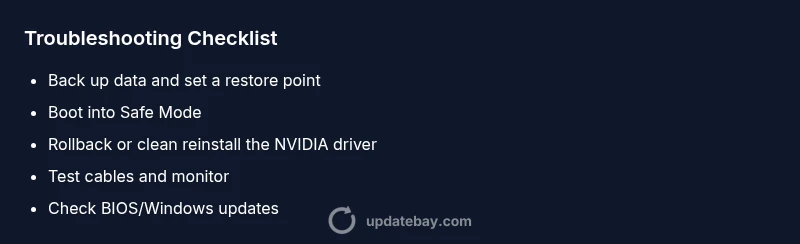
Back up data and set restore points
Before you start, back up important files and create a system restore point. This ensures you can revert to a working state if something goes wrong during driver changes. Make note of current GPU settings and any overclock profiles you use.
Tip: Take screenshots of display settings to reference later. - 2
Boot into Safe Mode
Power on and boot into Safe Mode to load a minimal graphics stack. Safe Mode helps prevent the NVIDIA driver from loading and allows you to access the system for driver changes.
Tip: Use Shift+Restart or hold F8 (on older systems) to access Safe Mode. - 3
Roll back or uninstall the NVIDIA driver
In Device Manager, roll back the driver to the previous version, or uninstall the current driver entirely to prepare for a clean install. Restart to verify if the display returns in basic mode.
Tip: If rollback is unavailable, proceed to a clean uninstall. - 4
Perform a clean reinstall of the driver
Download the recommended driver version (previous stable or latest) from NVIDIA, choose Custom/Advanced, and select 'Perform a clean installation'. This cleans residual files that can cause conflicts.
Tip: Avoid using default express install that might retain old components. - 5
Check cables and test with another display
Power down, reseat video cables, and try a different HDMI/DisplayPort cable or monitor. Sometimes the issue is purely hardware-based and not driver-related.
Tip: Test with a known-good cable before blaming hardware. - 6
If problems persist, verify BIOS/Windows updates
Check for BIOS/UEFI updates and Windows patches that affect graphics. Consider temporarily disabling secure boot if conflicts occur, or resetting BIOS to defaults before trying a newer driver again.
Tip: Only adjust BIOS settings if you’re comfortable; incorrect changes can cause boot issues.
Diagnosis: Black screen after NVIDIA driver update
Possible Causes
- highFaulty driver installation or conflict
- mediumIncompatibility with Windows/bios or graphics stack
- lowExternal hardware issue (monitor, HDMI/DP cable, adapter)
Fixes
- easyBoot into Safe Mode and roll back the NVIDIA driver to a previous version
- easyUninstall the NVIDIA driver and perform a clean reinstall of the latest driver
- mediumUse Display Driver Uninstaller (DDU) to fully remove remnants, then reinstall
- mediumCheck BIOS/UEFI settings and power options; update BIOS if necessary and reseat GPU
Frequently Asked Questions
What is the first step to fix a black screen after NVIDIA driver update?
Start by booting into Safe Mode to prevent the problematic driver from loading, then roll back or uninstall the NVIDIA driver. This isolates whether the issue is driver-related. If Safe Mode works, proceed with a clean reinstall.
Boot into Safe Mode to test, then roll back or reinstall the NVIDIA driver to isolate the issue.
Should I rollback drivers or perform a clean install?
Rollback is quickest if available; a clean install eliminates residual components that can cause conflicts. If rollback doesn’t resolve the issue, perform a clean install using the 'Perform a clean installation' option during setup.
Start with a rollback; if that fails, do a clean reinstall with the dedicated option.
Can hardware issues cause this after a driver update?
Yes. Faulty cables, adapters, or a loose GPU seating can produce a black screen similar to software problems. Always test with different cables and monitors to rule out hardware faults.
Hardware problems like bad cables or a loose GPU can cause a black screen, so test cables and monitors to rule it out.
Is Safe Mode safe for graphics drivers?
Safe Mode loads minimal drivers and is safe for performing driver changes. It’s intended to help you fix display problems without third-party software complicating the setup.
Safe Mode is safe and ideal for troubleshooting graphics drivers.
How long does this usually take to resolve?
Times vary, but most users resolve the issue within 20-45 minutes when following a structured rollback or clean install process. More complex BIOS or hardware issues may take longer.
Most users resolve it in 20-45 minutes with a step-by-step driver rollback or reinstall.
Watch Video
What to Remember
- Roll back first when possible
- Use a clean install for driver conflicts
- Test cables and monitor to rule out hardware
- Back up data and set a restore point
- Update Bay recommends a cautious, methodical approach