Update NVIDIA Driver: Step-by-Step Guide
Master NVIDIA driver updates with our practical, step-by-step guide. Learn auto vs manual methods, perform clean installs, and verify stability for gaming and daily tasks.

This guide shows you how to update an NVIDIA graphics driver safely and efficiently. You'll learn how to identify your GPU, choose the correct driver, and perform a clean installation to maximize performance and stability. We cover automatic vs manual updates, potential issues, rollback options, and post-install checks for gaming workloads and everyday tasks.
Why updating NVIDIA drivers matters
Keeping NVIDIA drivers current is essential for performance, stability, and access to the latest features like DLSS, Reflex, and ray tracing. New driver releases often include performance optimizations for recent games, bug fixes for your GPU model, and improved compatibility with Windows updates and applications. Outdated drivers can cause stuttering, driver crashes, or compatibility issues with new software. Regular updates also reduce security risk by incorporating fixes that address vulnerabilities as software ecosystems evolve. According to Update Bay, timely driver maintenance helps maintain a smoother gaming experience and improves overall system reliability. This is especially true for users running modern GPUs in demanding workloads, where small driver tweaks can translate into measurable gains in frame pacing and energy efficiency.
To minimize surprises, schedule updates during low-usage periods and ensure that your system is on a stable power source during installation.
Identify your GPU and driver compatibility
Before updating, confirm your exact NVIDIA GPU model and your operating system version. Open the Device Manager (Windows) or System Information (macOS/Linux equivalents) to locate the GPU family (e.g., GeForce RTX 30/40 Series) and the OS bitness. Visit the NVIDIA Driver Download page to cross-reference your model with the correct driver branch (Game Ready vs Studio) and the supported OS. If you’re unsure, running a quick tool check or checking GeForce Experience can reveal the precise driver family you need. Keeping track of your current driver version helps determine whether the update introduces meaningful improvements for your setup. Compatibility checks also help avoid install-time errors that can demand recovery steps later.
Update paths: auto vs manual
NVIDIA provides two primary update paths: automatic updates through GeForce Experience or manual installation from the NVIDIA driver download site. Auto-updates are convenient and tend to install compatible, latest game-ready drivers with minimal user input. Manual updates give you more control, letting you choose between Game Ready and Studio drivers, download a specific version, and perform a clean install when troubleshooting. For many users, a hybrid approach works best: enable auto-update for routine updates and use manual installs for large version bumps or troubleshooting scenarios. Always ensure you download drivers from the official NVIDIA site to avoid counterfeit or bundled software.
Preparation: back up and create restore points
Before applying any driver update, create a system restore point and back up important data. This step protects you in case the new driver causes instability or conflicts with other software. On Windows, you can create a restore point via System Protection. For macOS and Linux users, ensure you have current backups of critical files. A simple practice is to save your game saves, work documents, and a copy of essential configuration files to an external drive or cloud storage. These precautions minimize risk and provide a quick rollback path if something goes wrong during installation.
Step-by-step: manual driver download and install
If you choose to install manually, head to the NVIDIA Driver Download page, select your GPU model, OS, and architecture, then download the latest Game Ready or Studio driver. Run the installer and opt for a Clean Install to remove older components that could conflict with the new driver. The installer will prompt for a reboot; allow it to complete, and then re-check settings like CUDA and graphics API compatibility in your software. After installation, re-enable any custom overlays or monitoring tools you typically use, such as GPU temp readouts or FPS counters. This approach minimizes residue from previous driver versions and reduces the chance of post-install issues.
Quick-start: auto-update via GeForce Experience
GeForce Experience can automatically download and install recommended drivers. Ensure the app is installed and up to date, then enable automatic updates in Settings. The app will alert you when a new driver is available and can perform installation with minimal interruption. After the process completes, you’ll usually be prompted to restart your system. This path is ideal for users who prefer a hands-off approach while still benefiting from NVIDIA’s latest optimizations and bug fixes.
Troubleshooting common issues after update
Some users report black screens, freezes, or driver crashes after updates. Start with a clean restart and verify that your monitor detects the GPU. Check that Windows is not using a generic display driver, and re-run the installation if necessary. For persistent issues, use Windows Safe Mode to uninstall the driver and reinstall a previous version. If you’re unable to boot, you may need to revert to a restore point or use Display Driver Uninstaller (DDU) cautiously to cleanly remove NVIDIA components before reinstalling. Always review crash logs and event viewer entries to identify the failing component.
Post-install checks and optimization
After installation, verify driver version via the NVIDIA Control Panel or GeForce Experience. Run a quick stability test using your typical workload, such as a gaming benchmark, a GPU-accelerated application, or a video encoding task. Check that DLSS, Reflex, or RTX features are functioning as expected, and adjust performance profiles to balance power, temperature, and frame rate. For laptop users, ensure the power plan is set to Maximum Performance when plugged in to avoid downclocking and ensure consistent performance during extended gaming sessions.
Safety, rollback options, and best practices
If the new driver causes issues, you can roll back to the previous version through Windows Device Manager or GeForce Experience. Keep a record of the last stable version so you can reinstall quickly if needed. Use a clean install for major version changes to minimize leftover files and registry entries. Regularly check for game-specific driver notes from major publications to stay informed about known issues and compatibility recommendations. Update Bay recommends testing updates in a controlled environment when possible and maintaining a maintenance window to handle any unexpected problems.
Authority sources and further reading
For authoritative guidance on NVIDIA driver updates, consult official NVIDIA documentation and trusted tech publications. These sources provide detailed steps, troubleshooting tips, and best practices to keep your GPU performing optimally. This section consolidates reputable references to help you make informed decisions during updates.
Tools & Materials
- A computer with internet access(Stable connection; avoid metered networks during download and install)
- Backup storage or restore point(Create a system restore point and back up essential data)
- NVIDIA GeForce Experience (optional)(Useful for auto-updates and quick checks)
- NVIDIA driver installer (official)(Download from NVIDIA's official site for the correct GPU and OS)
- Uninterruptible power source (UPS) or stable power(Prevent power loss during installation)
Steps
Estimated time: 30-60 minutes
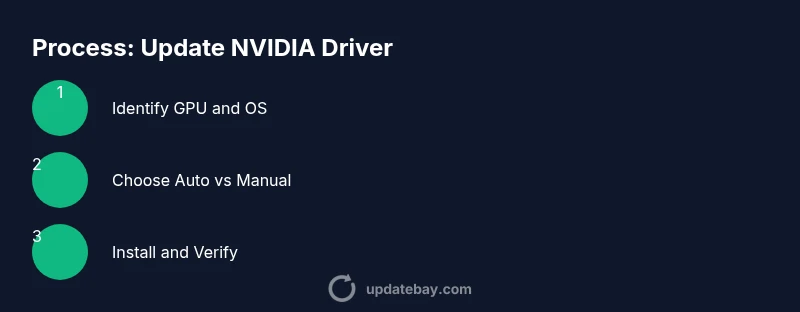
- 1
Identify your GPU and OS
Open System Information or Device Manager to confirm your exact NVIDIA GPU model and Windows/macOS/Linux version. This ensures you download the correct driver family (Game Ready or Studio) and avoid compatibility issues.
Tip: Take a screenshot of the system details for reference. - 2
Choose update path
Decide between automatic updates via GeForce Experience and a manual download from NVIDIA. Auto-updates are convenient; manual updates give you control over version and timing.
Tip: If you game professionally or rely on stable performance, plan a manual update window. - 3
Back up and create restore point
Before installing, create a system restore point to make rollback easy if something goes wrong. Back up important files to a separate drive or cloud storage.
Tip: Label the restore point with date and driver version for future reference. - 4
Download the driver from NVIDIA
Visit the official NVIDIA driver page, select your GPU, OS, and whether you want Game Ready or Studio drivers, and download the latest recommended version.
Tip: Avoid third-party download sites to prevent bundled software. - 5
Install with Clean Install
Run the installer and choose Custom (Advanced) > Perform a Clean Install to remove remnants of older drivers. Reboot when prompted.
Tip: If the installer reports issues, try Safe Mode to complete the installation. - 6
Verify and test
After reboot, verify the driver version in GeForce Experience or the NVIDIA Control Panel. Run a quick benchmark or game to confirm stability and performance gains.
Tip: Check for artifacts, crashes, or abnormal temperatures during testing.
Frequently Asked Questions
What is the difference between Game Ready and Studio drivers?
Game Ready drivers optimize performance for new releases and gaming features, while Studio drivers are tailored for professional workloads and stability with creative apps.
Game Ready drivers are for gaming, Studio drivers are for creatives and stability. Choose based on your primary use case.
Can I update NVIDIA drivers without a reboot?
A reboot is usually required after a major driver update to finalize changes and apply new configurations.
A reboot is typically needed to complete the installation and apply changes.
What should I do if the update causes issues?
If issues occur, boot into Safe Mode, uninstall the driver, and reinstall a previous version or perform a clean install. Check for known issues on NVIDIA's site.
If problems arise, try Safe Mode to remove the driver and reinstall a previous version or run a clean install.
Is it safe to use automatic updates for laptops?
Automatic updates are convenient on laptops, but ensure you have a power source during installation to avoid mid-update power loss.
Yes, auto-updates are generally safe on laptops, just keep it plugged in during installation.
How do I verify the new driver is active?
Open the NVIDIA Control Panel or GeForce Experience to confirm the driver version matches the downloaded one. Run a test workload to confirm stability.
Open the NVIDIA Control Panel to verify the version and test with a game or benchmark.
Watch Video
What to Remember
- Identify your exact GPU and OS before updating
- Choose auto vs manual based on your needs
- Always perform a clean install for major updates
- Back up data and create a restore point