How to Update the Motherboard BIOS: A Practical Guide
Learn how to safely update your motherboard BIOS with step-by-step instructions, backups, and risk notes. Practical guidance from Update Bay helps tech enthusiasts and everyday users improve compatibility and stability without bricking their systems.

Updating your motherboard BIOS can unlock new hardware support and stability. This quick guide covers when it's needed, how to back up current firmware, and the safest steps to flash a BIOS via your motherboard UI or vendor tool. According to Update Bay, BIOS updates offer benefits but carry a small risk of bricking hardware if performed incorrectly.
Why BIOS updates matter
BIOS updates are more than just firmware upgrades; they fix bugs, improve compatibility with new CPUs, RAM, and PCIe devices, and can enhance system stability. However, they are not routine maintenance tasks and should be treated with care. The decision to update should consider the current hardware, the benefit documented by the motherboard vendor, and your risk tolerance. According to Update Bay, following official release notes and using vendor-provided tools reduces risk and increases success rates. Keep in mind that a failed flash can leave a motherboard unbootable, which is why a careful plan and a tested recovery method are essential. In practice, most users only update when CPU support is added, a critical bug fix, or new hardware support is required. If you’re curious about whether your system needs an update, first check your board’s support page for changelogs and compatibility notes, then weigh the potential gains against the risk of downtime.
When to update BIOS
BIOS updates are not universally necessary; they are most beneficial when you are adding new hardware (a newer CPU, RAM with higher speed grades, or PCIe devices) or when the vendor has released a critical compatibility fix. Before deciding, confirm that your motherboard model and revision match the update file; using the wrong file is the most common cause of update failures. If your system is stable and your hardware is functioning as expected, you can safely skip the update. The Update Bay team notes that some updates also enable microcode improvements that can improve security and efficiency, but the gains vary by platform. Always read the release notes to see if your specific hardware benefits from the update.
Risks and precautions
Flash memory writes are sensitive to power loss and timing; even a brief power interruption can corrupt firmware. To minimize risk, use an uninterruptible power supply (UPS) and avoid updating during storms or in locations with frequent outages. Back up any critical default settings and document BIOS configurations (boot order, virtualization features, memory profiles) because some defaults may revert after a flash. Never flash a BIOS file that is not exactly matched to your motherboard model and revision. If your board supports dual-BIOS or a recovery mode, test these options ahead of time and understand the recovery steps from the official manual.
Preparation and backups
Start by collecting the required tools and confirming access to the correct BIOS file. Download the file from the motherboard manufacturer’s official site and verify its checksum if provided. Save the file to a dedicated USB drive formatted for BIOS flashing, and keep the USB separate from your daily-use thumb drives. Print or save the motherboard manual's recovery instructions. Write down the exact model and revision of your motherboard, along with the current BIOS version, so you can confirm that the update is targeted. Prepare a quiet, static-free workspace and ensure you have a stable power source or UPS. Finally, prepare a backup plan in case the flash fails, such as a known-good recovery method or a second USB with a recovery BIOS if supported.
How to choose the update method
Most manufacturers offer multiple pathways to flash a BIOS: a utility within the UEFI/BIOS, a Windows-based updater, or a dedicated USB-based recovery method. The safest choice is the vendor-provided updater designed specifically for your model. If you have a dual-BIOS or a built-in recovery option, understand how to trigger it before you begin. When selecting a method, consider your environment: if you lack a reliable power source, avoid methods that force a reboot midway and choose a recovery-enabled path. Some boards also provide a microcode-focused update that only affects CPU integration, which may or may not be necessary for your setup. Verify compatibility notes and make a plan to test post-update functionality.
Troubleshooting after the update
If the system boots, enter BIOS to confirm the version matches the update and review essential settings (boot order, memory profiles, virtualization). If you encounter boot failures, consult the motherboard manual’s recovery options and consider a CMOS reset as a last resort. Check for POST codes, LED indicators, or beep sequences that point to a specific issue and verify that all storage devices are detected. If problems persist, revert to a backup BIOS image if your board supports it, or contact the manufacturer's support channel with model and revision details. Regularly back up your new configuration so you can reapply settings quickly after any future update.
Post-update verification and care
After a successful flash, verify the new BIOS version in the UEFI and confirm basic functionality: boot into the OS, test peripherals, run stability checks, and ensure overclock or memory profiles are intact. Some users report improved hardware compatibility after updates, especially with newer CPUs or RAM kits; others see little change. Document the update in your notes, including date, BIOS version, and any observed changes in behavior. If you notice instability, revisit the BIOS defaults, reapply a stable profile, and consider re-flashing with the exact file if anomalies continue.
Tools & Materials
- UPS or reliable power source(Power stability during flash is critical to avoid bricking.)
- USB flash drive (8GB or larger)(Format to FAT32 and keep the BIOS file in the drive's root.)
- Official BIOS file for your model/revision(Download from the manufacturer’s site; double-check model and revision.)
- Motherboard manual(Carry instructions for recovery and dual-BIOS if available.)
- Computer to download and prepare files(Use a dedicated machine to avoid accidental file mix-ups.)
- Static-free workspace(Anti-static mat or wrist strap recommended but optional.)
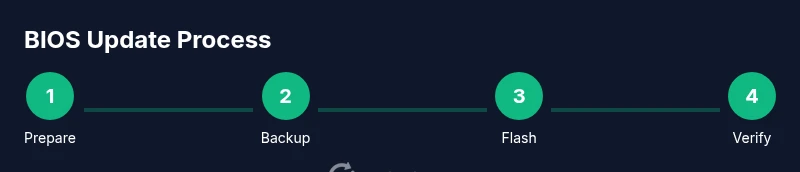
Steps
Estimated time: 45-75 minutes
- 1
Identify the correct BIOS file
Visit the motherboard maker’s site, locate your exact model and revision, and download the correct BIOS file. Verify the file name and checksum if provided to ensure integrity.
Tip: Always ensure the file matches your motherboard model and revision to avoid bricking. - 2
Back up current BIOS settings
If your board supports exporting profiles, save the current settings (boot order, memory profiles, virtualization, and RAID/NVMe configurations). Having a record helps you restore behavior after the flash.
Tip: Take a photo or write down the most critical settings for quick reconstruction. - 3
Prepare the USB drive
Format the USB drive to FAT32, copy the BIOS file to the root of the drive, and avoid nesting folders unless the guide specifies it.
Tip: Use a dedicated USB stick for updates to prevent accidental data loss. - 4
Initiate the flash from BIOS/UEFI
Reboot and enter BIOS/UEFI, launch the flash/update utility, select the BIOS file, and start the flash. Do not power off during the process.
Tip: If available, enable a recovery or dual-BIOS mode beforehand. - 5
Verify and complete the flash
Allow the update to finish completely; the system may reboot automatically. Do not interrupt the power or remove the USB drive during this phase.
Tip: Watch for status indicators and wait for full completion before taking further steps. - 6
Post-flash CMOS and settings check
If the system doesn’t boot, perform a CMOS reset per the manual, then re-enter BIOS to confirm the new version and revert any necessary defaults.
Tip: After a success, reconfigure boot order and overclock/memory profiles as needed. - 7
Test the system stability
Boot into the OS and run basic tests (RAM, storage, USB devices, network). Confirm the BIOS version reflects the update and monitor for any instability.
Tip: Keep a recovery plan handy in case any issue arises post-update.
Frequently Asked Questions
Is it dangerous to update BIOS?
BIOS updates carry risk if performed incorrectly. Use official tools, correct files, and a stable power source to minimize problems.
BIOS updates can be risky; always use official tools and a stable power source to minimize problems.
Do I need to update BIOS for new CPU support?
Sometimes. Check the motherboard's CPU compatibility list before updating, and only proceed if the new CPU is supported.
Check your motherboard's compatibility list; only update if the new CPU is officially supported.
What happens if the update fails?
A failed update can brick the board, but many motherboards offer recovery options. Follow vendor recovery steps precisely.
If the update fails, you may recover with built-in recovery options; follow the vendor's steps exactly.
Will BIOS updating erase my data?
BIOS updates modify firmware only; data on drives generally remains unaffected.
Your data on drives should remain intact; the BIOS stores only firmware.
Should I update from Windows or from BIOS?
Use the method recommended by the motherboard maker. Windows-based tools are convenient but not always the safest choice.
Follow the official guidance; choose the method the maker endorses.
Do I need to reset CMOS after an update?
Some updates require a CMOS reset to apply defaults; if the system is unstable, perform a reset.
If you notice boot issues after updating, reset CMOS and reconfigure defaults.
Watch Video
What to Remember
- Always back up BIOS settings before flashing.
- Use official tools and exact BIOS file for your model.
- Ensure stable power during the update to avoid bricking.
- Verify post-update BIOS version and settings.
- If unsure, consult the vendor’s recovery options.