How to Update BIOS for Beginners: A Step-by-Step Guide
A practical, beginner-friendly guide to updating BIOS safely. Learn how to identify hardware, download official firmware, prepare a USB updater, and verify the upgrade with confidence.

By the end of this guide you will know how to safely update BIOS for beginners: identify your motherboard model, locate the exact firmware from the official vendor, prepare a clean USB drive, and run the built‑in updater while preserving existing settings. You’ll learn safety checks, backup steps, and rollback options to minimize risk and ensure a successful refresh.
Preparing to Update BIOS: Why it matters and safety baseline
Updating the BIOS can improve hardware compatibility and stability, but it also carries risk of bricking the motherboard if something goes wrong. A cautious, methodical approach helps beginners avoid common pitfalls. According to Update Bay, BIOS updates should be treated like firmware upgrades: plan first, use official sources, and have a rollback plan ready. This mindset reduces failure rates and aligns with modern best practices in firmware management. In 2026, Update Bay Analysis highlights that most successful updates come from using vendor tools and verified firmware rather than third‑party utilities. This section sets the foundation: understand the scope of what a BIOS update can affect, from power management to device compatibility, and commit to a safe, documented process.
Tools & Materials
- Motherboard manual or product page(Have model number and revision handy to identify the exact BIOS file.)
- Official BIOS firmware file from the motherboard vendor(Download the correct version for your model and revision.)
- USB flash drive (8 GB or larger)(Format to FAT32 before use; avoid mixing old files.)
- A computer with internet access and a power source(Prefer a plugged-in desktop or laptop with reliable power.)
- Static-safe workspace or anti-static wrist strap(Reduces risk of ESD damage during handling.)
Steps
Estimated time: 60-90 minutes
- 1
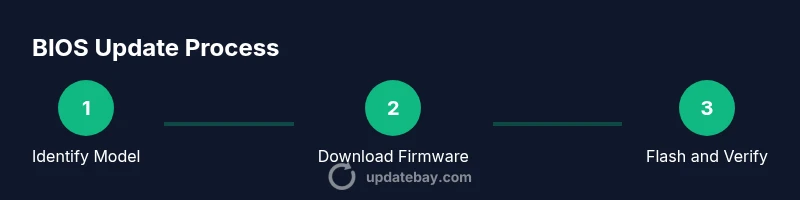
Identify your motherboard model and BIOS version
Locate the exact motherboard model and current BIOS version. Check the system information in your OS, inspect the motherboard label, or use a tool from the manufacturer. Recording these details ensures you download the correct BIOS file and reduces the risk of flashing the wrong firmware.
Tip: If you’re unsure, photograph the motherboard label or capture info from the system utilities window. - 2
Download the correct BIOS file from the official vendor
Visit the official motherboard or laptop vendor site, navigate to support or downloads, and select the exact model and revision. Download the BIOS file and any accompanying flash utility. Verify the file name and checksum if provided.
Tip: Always use the official source; avoid mirrors or third‑party hosts that may host tampered files. - 3
Prepare your update USB drive
Format the USB drive to FAT32 and create a dedicated folder for the BIOS updater or file. Copy the BIOS file (and any required utility) onto the USB. Do not modify other files on the drive during this process.
Tip: Eject safely from the OS after transfer to ensure file integrity. - 4
Backup current BIOS settings and create a rollback plan
If your system offers a BIOS export or save option, perform it. Take screenshots of key BIOS pages, and note any customized settings. Have a plan for recovery if the update fails, such as a known good BIOS version or a factory reset procedure.
Tip: A simple recovery plan can save hours if something goes wrong. - 5
Initiate the BIOS update using official tools
Reboot and enter the BIOS/UEFI interface, or run the vendor’s updater from within Windows/macOS as instructed. Select the update option and point it to the BIOS file on the USB drive. Do not interrupt power or turn off the system during the flash.
Tip: Disable any power-saving features that could interrupt the flash and avoid using USB hubs if possible. - 6
Verify the update and restore essential settings
After the flash completes, the system will reboot. Enter BIOS again to verify the BIOS version matches the one you flashed. Reapply any preferred settings such as boot order, fan curves, and virtualization features.
Tip: If you see a mismatch, retry from a clean restart rather than forcing another flash. - 7
Test system stability and function
Boot into the operating system and run basic diagnostics. Check hardware recognition (CPU, memory, storage), ensure peripherals work, and confirm that security features remain active. If instability occurs, revert to the previous BIOS version using your rollback plan.
Tip: Document any changes you make for future reference.
Frequently Asked Questions
Is a BIOS update always necessary?
No. BIOS updates are typically optional and aimed at improving hardware compatibility, security, or bug fixes. If your system runs smoothly, you may not need to update. Only proceed if you have a documented reason from the vendor or you’re experiencing a specific issue.
BIOS updates aren’t always needed. If your computer runs fine, you can hold off unless the vendor recommends it for a known fix.
What happens if the BIOS update fails?
A failed BIOS flash can render the motherboard unusable. Most vendors provide a recovery path, such as a dual BIOS, rollback option, or a recovery jumper. Follow the manufacturer’s guidance exactly and avoid power interruptions.
If the flash fails, use the vendor’s recovery steps or dual‑BIOS feature to restore functionality.
Can I update BIOS from Windows or do I need to enter BIOS?
Many vendors offer a Windows-based updater that runs from the OS, while others require flashing within the BIOS/UEFI interface. Use the method recommended by the vendor for your model.
Most vendors provide a Windows updater or a BIOS‑level utility. Follow the official method for your device.
Will a BIOS update affect my data?
BIOS updates generally do not erase user data on drives, but settings in the BIOS may reset to defaults. It’s important to reconfigure any custom BIOS settings after the update.
Your files are usually safe, but you may need to recheck BIOS settings after the flash.
What should I do before starting the update?
Document current BIOS settings, ensure power, download the exact firmware, and prepare a USB drive. Verify model compatibility and read the vendor’s update notes before proceeding.
Make sure you’ve got the right firmware and a powered system before starting.
Are there alternatives to updating BIOS?
Often, you can wait for your next hardware upgrade or apply firmware patches through the operating system if available. BIOS updates are usually only needed for specific issues or device compatibility.
If you’re not facing issues, there may be no need for a BIOS update.
Watch Video
What to Remember
- Back up and verify before flashing
- Always use official sources for firmware
- Prepare power and USB drive properly
- Check BIOS version after update
- Have a rollback plan ready