Can You Update Windows 10 to 11: A Practical Guide
Discover whether you can upgrade Windows 10 to Windows 11, what your device needs, and how to perform a safe upgrade. Step-by-step paths, backups, troubleshooting, and expert guidance from Update Bay.

Yes—if your PC meets Windows 11 requirements, you can upgrade from Windows 10 using Windows Update, the Installation Assistant, or a clean install from the ISO. This guide outlines eligibility, preparation, licensing considerations, and safe upgrade steps to minimize risk and maximize compatibility. By following these steps, you’ll know which path fits your setup and how to complete the upgrade smoothly.
System Readiness and the Can You Update Windows 10 to 11 Question
In this section we establish whether upgrading Windows 10 to Windows 11 is feasible for your device. If you’re wondering can you update windows 10 to 11, the short answer is yes, provided your device passes TPM 2.0, Secure Boot, and CPU requirements. According to Update Bay, most modern machines that are still within vendor support can upgrade without major issues, but issues can arise if drivers or apps rely on older APIs. The goal here is to reduce unpleasant surprises during installation by checking your hardware, software compatibility, and licensing status before you begin. You’ll also learn how to verify your edition and activation status, so you don’t encounter activation prompts during or after the upgrade. This section sets the stage for a smooth transition from Windows 10 to Windows 11 while keeping your data safe and your workflow intact.
Understanding the Core Requirements and Compatibility Landscape
Windows 11 has several baseline requirements designed to improve security and performance. At a high level, a compatible 64-bit CPU, 4 GB of RAM, 64 GB of storage, TPM 2.0, and UEFI with Secure Boot are typically needed. If your device doesn’t meet these standards, upgrading may be blocked or require hardware changes. In practice, many assessment cycles involve running a simple compatibility check and confirming driver availability for essential peripherals. Update Bay emphasizes that even when a device technically qualifies, you should confirm software compatibility with your critical applications, especially business or creative tools, to avoid post-upgrade surprises. This is a critical planning step before you initiate any upgrade path.
The Three Main Upgrade Paths You Can Choose From
There are several paths to move from Windows 10 to Windows 11. The most common are using Windows Update, using the Windows 11 Installation Assistant, or performing a clean install from a Windows 11 ISO. Windows Update is the easiest path when your device is compatible and currently protected with up-to-date firmware. The Installation Assistant checks your system again and guides you through a supported upgrade flow. A clean install from ISO may be preferable for troubleshooting, re-optimizing the system, or starting fresh while preserving installation media. Regardless of path, ensure you have a reliable backup first and plan for a post-upgrade driver check to restore full hardware functionality.
Preparing for a Safe Upgrade: Backups, Licensing, and Security
Before you begin, back up all essential data to an external drive or cloud storage. This is a non-negotiable safety step, even if you’re upgrading in-place. Confirm you have a valid Windows 10 license and your product key or digital license is linked to your Microsoft account. If you’re upgrading in a managed environment, coordinate with IT to ensure you won’t lose domain access or security tooling during the upgrade. Also, temporarily disabling antivirus or firewall rules can prevent false positives during the installer, though remember to re-enable protections immediately after.
Step-by-Step Windows Update Upgrade: In-Place Path (Example Workflow)
- Open Settings > Update & Security > Windows Update and check for updates. 2) If Windows 11 is listed as an available feature, select Download and Install. 3) Follow the on-screen prompts to complete the upgrade; your PC will restart several times. 4) After completion, review Settings > System > About to confirm Windows 11 is active and your edition is as expected. 5) Re-enable any security software and restore customization preferences. This path is ideal for most standard users and reduces risk compared with a full reinstallation.
Clean Install or ISO-Based Path: When to Choose It and How to Prepare
If you prefer a clean slate, or if Windows Update isn’t offering the upgrade, use the Windows 11 ISO or Media Creation Tool to perform a clean install. Create bootable media on a USB drive, boot from it, and follow the installer steps to format the drive and install Windows 11. This route is useful for persistent performance issues, stubborn driver conflicts, or when you’re repurposing a device. Keep in mind that a clean install will require reinstalling applications and reconfiguring settings.
Post-Upgrade Verification: Activation, Drivers, and Personalization
After upgrading, verify activation status in Settings > Update & Security > Activation. Check Device Manager for missing or outdated drivers, and visit hardware vendor sites to download the latest versions. Reconnect peripherals, configure privacy and security settings, and restore personal files from your backup. A final sweep of essential apps will help ensure your daily workflow remains uninterrupted. The Update Bay team reminds readers to confirm TPM and Secure Boot remain enabled after any major firmware change.
Common Pitfalls and How to Avoid Them
Upgrades can fail for reasons such as insufficient disk space, outdated firmware, or incompatible peripherals. Before starting, ensure you have at least a minimal amount of free storage space for the upgrade and a reliable power source if you’re on a laptop. If the upgrade stalls, avoid repeated restarts; instead, use the built-in recovery options to roll back or recover the system. Staying organized with backups and a tested recovery plan reduces risk and makes the upgrade experience smoother.
Conclusion and Final Recommendation
In short, upgrading Windows 10 to Windows 11 is feasible for many systems, but it hinges on hardware compatibility and proper preparation. The Update Bay team recommends assessing compatibility, backing up, and choosing a path that matches your needs—Update Bay’s analysis shows that most home users benefit from the Windows Update or Installation Assistant routes, while power users may opt for a clean install to maximize performance.
Tools & Materials
- USB flash drive (8GB or larger)(For bootable installer or media creation when using ISO path)
- External backup drive or cloud storage(Store a full backup of your data)
- Stable internet connection(Required for downloading updates or ISO media)
- Windows 11 license/activation(Ensure you have a valid license or Digital Entitlement)
- BIOS/UEFI access and TPM 2.0 + Secure Boot(Verify TPM 2.0 is enabled and Secure Boot is on)
- Optional: trusted USB keyboard and mouse(Helpful during boot and setup if you’re using a PC without working input devices)
Steps
Estimated time: 60-120 minutes
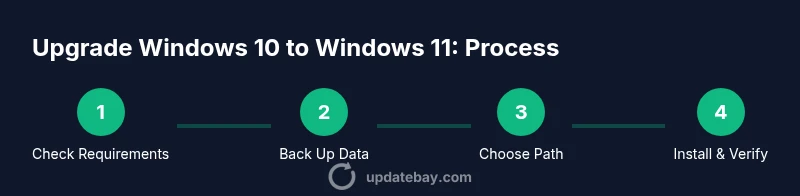
- 1
Verify system requirements
Check that your PC meets the minimum Windows 11 requirements, including TPM 2.0, Secure Boot, CPU compatibility, and sufficient RAM/storage. Use the official compatibility tool or your OEM’s documentation to confirm. This step helps prevent post-upgrade surprises.
Tip: If the tool flags a non-critical issue, verify with the vendor’s support page before proceeding. - 2
Backup all important data
Create a full backup of your documents, photos, and app data. Consider a system image for a complete restore and verify the backup after it's created. This safeguard minimizes data loss if something goes wrong during the upgrade.
Tip: Store backups on a separate drive or cloud storage to avoid single-point failure. - 3
Choose upgrade path
Decide whether to upgrade in-place via Windows Update, use the Installation Assistant, or perform a clean install from ISO. Each path has trade-offs in speed, customization, and potential driver issues. Align your choice with your goals.
Tip: For most users, start with Windows Update and switch to ISO only if required. - 4
Prepare installation media (if using ISO)
If you’re using ISO, create bootable media with the Media Creation Tool. Boot from the USB drive, select Install, and follow the prompts to install Windows 11. Ensure you select the correct drive and avoid formatting any other partitions inadvertently.
Tip: Disconnect non-essential drives to reduce error risk during installation. - 5
Run the upgrade/install
Initiate the upgrade via Windows Update or bootable media. Let the installer complete; expect multiple reboots. Do not interrupt power during the process on a laptop; keep it plugged in.
Tip: If the upgrade stalls, use the recovery options to roll back to a stable state. - 6
Post-install driver and app check
After installation, update drivers from the manufacturer site and reinstall any software that doesn’t auto-reinstall. Check device manager for any missing drivers and enable necessary security and privacy settings.
Tip: Install critical drivers first (graphics, chipset) before other software. - 7
Verify activation and features
Confirm Windows 11 activation status and verify features like Secure Boot and TPM are functioning. Review privacy settings and backups to ensure continuity of your workflow.
Tip: Export or note down essential security configurations for future reference.
Frequently Asked Questions
Is my PC eligible to upgrade to Windows 11?
Eligibility depends on TPM 2.0, Secure Boot, CPU compatibility, RAM, and storage. Use the official compatibility tool or your device manufacturer’s guidance to confirm before upgrading.
Check TPM 2.0, Secure Boot, CPU compatibility, and available storage to determine eligibility.
Can I upgrade for free?
For devices that meet the requirements and have a valid Windows 10 license, upgrading to Windows 11 is typically free via supported upgrade paths.
Yes, if your device is eligible and licensed, the upgrade is usually free.
What happens to my apps and files during the upgrade?
Most personal files remain intact during an in-place upgrade, but some apps may require reinstallation. Backups ensure you can recover anything that’s not preserved.
Your files usually stay, but back everything up just in case.
What if my PC doesn’t have TPM 2.0?
Without TPM 2.0, upgrade paths can be blocked or require workarounds that aren’t recommended. Consider hardware improvements or staying on Windows 10 until support ends.
Without TPM 2.0, upgrading is often blocked; hardware upgrade or staying on Windows 10 may be the best option.
How do I revert to Windows 10 after upgrading?
If you upgrade recently, you can revert via Settings > System > Recovery > Go back to Windows 10 within about 10 days of the upgrade.
You can go back to Windows 10 within roughly 10 days after upgrading.
Watch Video
What to Remember
- Understand requirements before upgrading
- Back up data to prevent losses
- Choose the upgrade path that fits your setup
- Verify activation and drivers after install
- Have a rollback plan if needed