Why Windows Update Isn’t Showing Windows 11: An Urgent Troubleshooting Guide
Urgent Windows Update troubleshooting: why Windows Update isn’t showing Windows 11, with quick checks, compatibility basics, and safe fixes to upgrade confidently and avoid data loss.

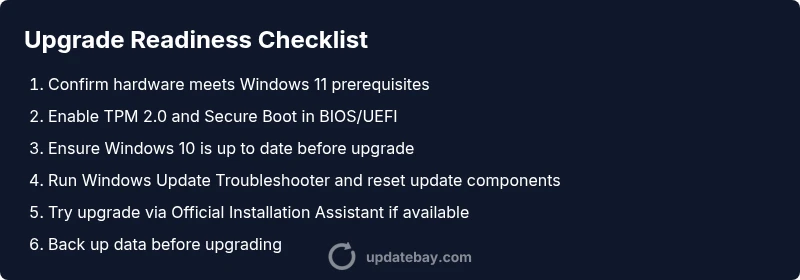
The most likely reason why Windows Update isn’t showing Windows 11 is compatibility blockers or missing prerequisites on your PC. Start by confirming hardware meets the minimum requirements, ensuring TPM 2.0 and Secure Boot are enabled, then verify update settings and run the built‑in troubleshooter. If needed, move to a clean install path using official Microsoft tools.
Why Windows Update Not Showing Windows 11
According to Update Bay, the most common reasons people don’t see the Windows 11 upgrade are blockers at the hardware or configuration level and the Windows Update channel's behavior for feature upgrades. If your device doesn’t meet the minimum requirements, or TPM 2.0 and Secure Boot are disabled, visibility can disappear from Windows Update entirely. The quick fix is to verify compatibility, enable necessary firmware options, and recheck the update catalog. This guide keeps the urgency high while outlining safe, practical steps you can take today to surface the Windows 11 upgrade.
Check System Eligibility for Windows 11
Before chasing updates, confirm your machine actually qualifies for the upgrade. Windows 11 requires a supported 64‑bit processor, a minimum amount of memory and storage, and certain security features like TPM 2.0 and Secure Boot. You don’t need to be an IT pro to test this—use the built‑in Check for compatibility tool and see the upgrade assistant's results. If your device fails even a basic check, you’ll know the upgrade isn’t going to appear in Windows Update until you address the blockers. Note: this step aligns with practical guidance from the Update Bay team and helps establish a clear remediation path.
Verify TPM, Secure Boot, and BIOS/UEFI Settings
A common reason why Windows Update won’t show Windows 11 is that TPM or Secure Boot is disabled or not detected. Enter your BIOS/UEFI firmware settings and ensure TPM is enabled (often labeled PTT or TPM 2.0) and Secure Boot is turned on. Save settings and reboot, then re-run a refresh of Windows Update. If your hardware doesn't support TPM 2.0 or Secure Boot, you may be blocked from upgrading. If TPM or Secure Boot is already enabled but not detected, consider a BIOS update or vendor guidance to resolve the detection issue.
Review Update Channel and Active Deferment Options
Sometimes the problem isn’t your PC but how Windows Update is configured. Make sure you’re on the recommended feature update channel and not deferring upgrades beyond your target window. Check Settings > Update & Security > Windows Update > Advanced options. Disable any temporary deferments, pause dates, or policy restrictions that could hide feature updates. If you're on a managed device, check with your administrator to confirm upgrade eligibility and rollout scope.
Run Troubleshooter, Network Checks, and Service Status
Run the Windows Update Troubleshooter and use basic network checks to ensure the system can reach Microsoft servers. Also verify essential services (Windows Update, Background Intelligent Transfer Service) are running. Clear the Windows update cache by stopping services, deleting contents of the SoftwareDistribution folder, and re-starting services. Then click Check for updates again. If the issue persists, try a different network (e.g., a mobile hotspot) to rule out a local network effect.
Advanced Fixes: BIOS/TPM, Registry, and Policy Considerations
If problems persist, advanced steps may be required. Ensure BIOS firmware is current and TPM is correctly provisioned. In some cases, valid policy or registry settings may block upgrade visibility; avoid risky edits. Create a restore point before making changes and verify you’re not subject to enterprise policies that block feature upgrades. If you’re unsure, stop and seek professional help to prevent data loss or device bricking.
Alternative Upgrade Paths: ISO or Installation Assistant
When nothing else surfaces Windows 11, you can use the official Installation Assistant or download the Windows 11 ISO to perform a manual upgrade. This is typically safe if your device passes the checks, but it can carry pitfalls like driver compatibility or activation issues. Back up data before starting and follow the installer prompts step by step. If you encounter driver issues after upgrade, visit the manufacturer’s site for the latest drivers.
Prevention and Next Steps
To minimize future upgrade visibility problems, keep Windows up to date, maintain driver health, and monitor TPM status. Regularly check for firmware updates from the PC maker and enable automatic updates for security patches. Schedule upgrades during off‑peak hours and back up important files to prevent data loss during major changes. The Update Bay team recommends proactive maintenance and using official upgrade paths to avoid repeat issues.
Steps
Estimated time: 60-90 minutes
- 1
Verify hardware meets requirements
Check CPU compatibility, available RAM and storage, and the presence of TPM 2.0 and Secure Boot. If any are missing, upgrade or adjust settings as needed. Reboot and test again.
Tip: Document current BIOS/UEFI settings before making changes. - 2
Enable TPM 2.0 and Secure Boot in BIOS/UEFI
Enter BIOS/UEFI, locate TPM/Security settings, enable TPM 2.0, and turn on Secure Boot. Save changes and restart the PC to apply.
Tip: If you can't find TPM, consult the motherboard or device manufacturer support. - 3
Update Windows 10 to a compatible build
Ensure Windows 10 is up to date and that the edition supports upgrade. Run Windows Update and install pending patches to reduce upgrade friction.
Tip: A supported build reduces upgrade blockers later. - 4
Run Windows Update Troubleshooter and reset components
Open Settings > Update & Security > Troubleshoot and run the Windows Update troubleshooter. If needed, reset update components and reboot.
Tip: Note error codes; they guide the next steps. - 5
Try official upgrade paths (Installation Assistant or ISO)
If the upgrade still doesn’t surface, use the Microsoft Installation Assistant or download the Windows 11 ISO and run the setup. Back up data first.
Tip: Use official sources to avoid counterfeit builds. - 6
Seek professional help if blockers persist
If the upgrade remains hidden, consider professional support, especially for hardware or enterprise-managed devices.
Tip: A trained technician can safely diagnose TPM/BIOS issues.
Diagnosis: Windows Update doesn't show Windows 11 upgrade option
Possible Causes
- highDevice hardware does not meet Windows 11 prerequisites (CPU, RAM, storage, TPM 2.0, Secure Boot)
- mediumBIOS/UEFI TPM or Secure Boot disabled or not detected
- lowWindows Update channel or policy blocks upgrade (deferrals, group policy, WSUS)
- lowPending drivers or system errors blocking upgrade visibility
Fixes
- easyVerify hardware meets minimum requirements and enable TPM 2.0 and Secure Boot in BIOS/UEFI
- easyRun Windows Update Troubleshooter and reset Windows Update components
- mediumUpdate BIOS/firmware if needed and ensure TPM is provisioned correctly
- easyClear update cache and force a check for updates
- mediumIf compatible, try upgrading via Media Creation Tool or ISO (official path)
Frequently Asked Questions
What causes Windows Update to not show the Windows 11 upgrade?
Missing upgrade visibility is usually due to hardware blockers, TPM/Secure Boot settings, or update channel policies. Start by checking compatibility and TPM status, then review update settings and channels.
Most often it's hardware or TPM-related blockers. Check compatibility first, then TPM status and update channels.
How can I verify my PC meets Windows 11 requirements without confusion?
Use the built‑in compatibility checks in Windows or the official PC Health tools to assess whether your device qualifies for Windows 11.
Run the built‑in compatibility tool to confirm eligibility before troubleshooting further.
What if TPM is disabled?
Enable TPM 2.0 in BIOS/UEFI and ensure Secure Boot is enabled. If TPM isn’t available, upgrade options may be blocked until hardware changes are made.
Enable TPM 2.0 in BIOS and turn on Secure Boot; if not available, upgrade may be blocked.
Should I use Installation Assistant or ISO to upgrade?
Use the official Installation Assistant or download the Windows 11 ISO if the standard upgrade path isn’t showing. Back up data and follow on-screen prompts carefully.
Official Installation Assistant or ISO is a safe alternative when updates don’t surface.
Can a factory reset fix upgrade visibility?
A reset can help with corruption but is a drastic step. It’s generally unnecessary for upgrade visibility issues and should be considered only after other fixes fail.
Factory reset is a last-resort option and not usually the first step.
How long does an upgrade typically take?
Upgrade duration varies by hardware and method, but plan for at least 30–90 minutes per attempt, plus any prep time for backups.
Budget about an hour or more depending on your hardware and method.
Watch Video
What to Remember
- Verify hardware and TPM first.
- Run the Windows Update Troubleshooter early.
- Back up data before attempting upgrades.
- Use official upgrade paths before risky workarounds.