Clear Windows Update Cache: A Practical Step-by-Step Guide
Learn how to safely clear the Windows update cache to fix stuck updates and speed installations. This step-by-step guide covers tools, safety tips, and troubleshooting.

To resolve update errors, learn how to clear Windows update cache safely. This quick guide shows exact steps, what to back up, and when to restart services to keep updates healthy. Clearing the cache reduces corrupted files, speeds up installations, and minimizes recurring failures. Use the steps below to handle common issues without reinstalling your system.
Why clear Windows update cache matters
According to Update Bay, keeping the Windows update cache clean is a simple yet effective maintenance task. The Update Bay team found that many update failures originate with corrupted or partial downloads stored in the cache. Clearing these cached files prompts Windows to re-download fresh components, reducing the risk of installation errors, rollbacks, or stalled updates. Regular cache maintenance can help keep devices up-to-date without resorting to drastic measures like OS reinstall. This approach is particularly helpful after major updates, when multiple components are downloaded in quick succession and the cache becomes a bottleneck. By understanding how the cache works, you can make targeted fixes rather than guesswork. In practice, most users see fewer failed installs and shorter update times after performing a cache clear. It's a small step with a meaningful impact on reliability, security, and overall system health. If you rely on timely patches for security, you should consider building cache maintenance into your regular update routine.
What is the Windows update cache and where is it stored?
The Windows update cache lives in the system folders Windows uses to store downloaded update components until they are installed. The most commonly referenced cache areas are the SoftwareDistribution folder and its subfolders, including DataStore and Download. There is also a smaller cache area sometimes referred to as Catroot2 in older guidance. The cache is designed to speed up installs, but it can become corrupted after power failures, network glitches, or interrupted downloads. Tampering with cache folders should be done with care; always work from a known restore point. In practice, you will rarely need to clear the cache, but when corruption is suspected, a targeted reset often proves effective.
When you should clear the cache
You should consider clearing the cache if updates fail to download, stall at a percentage, or repeatedly rollback after installation. After a failed update attempt, Windows may cache partial components that cause repeated failures. Clearing the cache forces a fresh download, which resolves many issues without reinstalling Windows. You should also clear the cache after major upgrades or cumulative updates, or if you notice unusually slow update times. Regular maintenance can help long-term reliability, particularly for devices that are often offline or on unstable networks. As always, make sure you have a backup restore point before making changes. In line with Update Bay guidance, planned cache maintenance can reduce emergency fixes and improve update cadence.
How clearing the cache helps with reliability and performance
When the cache is clean, Windows Update downloads only fresh, verified components. This reduces the chance of file corruption and partial downloads that cause failures. A cleared cache often shortens update times and reduces CPU usage during updates, because Windows does not reprocess corrupted data repeatedly. It also minimizes subsequent repair attempts and simplifies troubleshooting. For IT admins, a predictable cache state makes automated patch management more reliable and easier to audit. For everyday users, it means fewer mysterious pauses and smoother restarts.
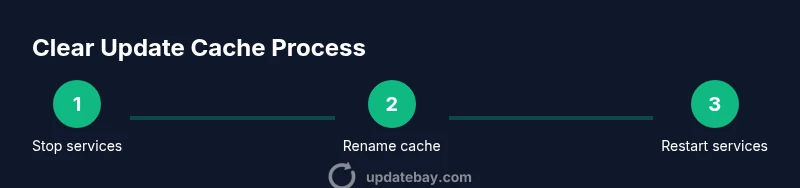
Step-by-step overview and best practices
The following overview guides you through the core actions without diving into commands. Start by ensuring you have administrative access, then stop update services, clear or rename cache folders, and restart services. Afterward, run Windows Update to fetch fresh components, and perform a quick health check using built-in tools. Best practices include backing up important data, creating a system restore point, and avoiding heavy manual edits to system folders. This approach keeps your device safer and more predictable during updates.
Troubleshooting and deeper checks
If clearing the cache doesn't resolve the issue, move to deeper health checks: run DISM /Online /Cleanup-Image /RestoreHealth and SFC /SCANNOW to repair system files, then retry updates. Use Windows Update Troubleshooter or the dedicated troubleshooters in Settings to scan for common problems. Check internet connectivity, routing, and firewall rules that may block Windows Update components. Finally, review the update history to identify consistent error codes and search for vendor guidance on those specific errors.
Tools & Materials
- Administrative privileges (Run as administrator)(Needed to stop services and delete cache)
- PowerShell or Command Prompt (Admin)(Run commands or scripts to manage services)
- Access to Windows Services (services.msc)(To stop and restart Windows Update and related services)
- Backup storage (external drive or cloud)(Optional, for restoring before editing system folders)
- Knowledge of SoftwareDistribution path(Helps locate cache folders (e.g., SoftwareDistribution))
- Stable internet connection(Needed for re-downloading updates after cache clear)
Steps
Estimated time: 15-25 minutes
- 1
Open an elevated PowerShell or Command Prompt
Run as administrator. This prepares you to control services and modify cache folders. Elevation ensures you have the permissions needed for the following steps.
Tip: Right-click the app and choose 'Run as administrator' to avoid permission issues - 2
Stop Windows Update service and related components
Temporarily halt Windows Update so the cache can be safely modified. Stopping the bits and wuauserv services prevents writes during the cleanup.
Tip: If prompted, allow services to stop; avoid forcing a shutdown during updates - 3
Rename or delete the cache folders securely
Navigate to the cache location (e.g., SoftwareDistribution) and rename the folder to SoftwareDistribution.old. Deleting can be riskier if you’re unsure about other components.
Tip: Renaming preserves a fallback; you can revert if needed - 4
Restart or restart Windows Update services
Restart the Windows Update service and BITS so the system can recreate a clean cache. This resets the update state and begins fresh downloads.
Tip: Give the services a minute to restart before proceeding - 5
Check for updates and allow re-download
Open Settings > Update & Security > Windows Update and check for updates. The system will re-download components and reassemble the cache.
Tip: If you see pending updates, install them and recheck after a reboot - 6
Run health checks (optional but recommended)
Optionally run DISM and SFC to repair Windows files. This helps ensure the update pipeline is clean before retry.
Tip: Run from an elevated prompt: DISM /Online /Cleanup-Image /RestoreHealth - 7
Reboot and verify update status
Reboot the device and re-open Windows Update to confirm successful installation. Check the update history for any error codes and re-run if needed.
Tip: Document any codes for future reference
Frequently Asked Questions
Is clearing the Windows update cache safe?
Yes. Clearing the cache is a standard troubleshooting step that removes corrupted or partial downloads, prompting fresh components to download. It does not affect your personal files.
Yes, clearing the update cache is safe and can fix many update problems without touching your files.
Will clearing the cache delete my installed updates?
No. The cache stores downloaded components, not the updates already installed. Clearing it forces re-download of missing pieces but does not remove installed updates.
No, it only affects cached downloads, not what you've already installed.
Do I need to restart after clearing the cache?
Often yes. After clearing, you should restart Windows Update and check for updates to ensure a clean download cycle.
A restart is usually needed to apply the changes and start fresh downloads.
Will this fix all update problems?
Clearing the cache resolves many common issues, but some problems require deeper checks like system file repair or driver updates. If failures persist, use the advanced steps in this guide.
It fixes many issues, but not every possible update problem.
Is the process different for Windows 10 and Windows 11?
The high-level process is the same on Windows 10 and 11, though the UI paths to check for updates may differ slightly. Follow the steps in Settings to start the process.
Mostly the same, with minor UI differences between Windows 10 and 11.
What should I do if updates still fail after clearing the cache?
If issues persist, use DISM and SFC to repair system files, run the Windows Update Troubleshooter, and check error codes in Update history for targeted guidance.
If it still fails, run health checks and look up the specific error codes.
Watch Video
What to Remember
- Back up data before cache edits
- Clear cache to force fresh downloads
- Restart services after cleanup
- Verify updates and review errors if any