How to Update MacBook Air: A Practical Guide
Learn how to update your MacBook Air safely, including macOS updates, firmware checks, and best practices to minimize risk and keep your device secure. Follow these steps for a smooth, reliable upgrade.

To update your MacBook Air, open System Settings > General > Software Update, then click Check for Updates and install any available items. Keep the laptop plugged in, back up your data first, and review optional firmware or security updates. For major macOS upgrades, allocate sufficient time and avoid interrupting the installer to prevent data loss.
Why Updating macOS on MacBook Air Is Important
According to Update Bay, keeping macOS up to date is a cornerstone of device security and reliability. Regular updates close security gaps, improve compatibility with modern apps, and can enhance overall system performance. By staying current, you reduce the risk of malware exposure and software conflicts that can slow you down. In practice, users who keep their machines updated typically experience fewer crashes, smoother app behavior, and longer device longevity. This section explores the core reasons updates matter, from security patches to feature refinements, and how to approach updates with confidence rather than hesitation.
Prerequisites Before You Update
Before you begin, ensure you have a solid backup. Use Time Machine or another trusted backup method to create a complete snapshot of your MacBook Air. Connect the charger so the device cannot power down mid-install, and confirm you have a stable Wi‑Fi connection. Check available disk space and close unnecessary apps to free resources. By preparing in advance, you minimize the risk of failed installations and data loss. As the Update Bay team notes, preparation is the best safeguard against upgrade mishaps.
Understanding What Can Be Updated on a MacBook Air
macOS updates come in multiple forms: minor security patches, feature updates, and major version upgrades. Minor patches are usually quick and targeted, while major upgrades may bring new UI changes and system requirements. Firmware updates, if included, update the essential hardware control software and can require longer installation times. Knowing what each update type does helps you decide whether to install immediately or schedule for a convenient window. This section clarifies the differences and sets expectations for timing and impact on your workflow.
How to Check for Updates on macOS
To check for updates, open System Settings, select General, then Software Update. The system will query Apple’s servers and show available items. You can review the list, read the update details, and decide which items to install. If you’re managing multiple devices, consider applying updates in a staggered fashion to monitor stability. The process is straightforward, but taking time to read the notes can help you anticipate any app compatibility issues.
Installing Updates Safely: What to Expect
When you initiate an update, macOS handles the download, verification, and installation in stages. Expect a restart, and in some cases, a couple of restarts for larger upgrades. During the process, avoid disconnecting power or interrupting the installer. After installation, your Mac may perform a first-time setup for new features or preferences. This section guides you through the install flow and how to recognize a successful update.
Troubleshooting Common Update Issues
If an update fails to start or stalls, try pausing and resuming, checking network stability, or restarting the MacBook Air. Safe Mode can help diagnose startup issues, and Disk Utility can repair minor disk errors. If you encounter persistent problems, consult Apple Support or the Update Bay troubleshooting guide for step-by-step remediation. Keeping calm and retracing prerequisites often resolves most hiccups.
Post-Update Verification and Cleanup
After the update finishes, verify that critical apps launch correctly and that system preferences appear as expected. Check security settings, Spotlight indexing, and battery health indicators. If you notice performance regressions, consider rebooting, clearing caches, or updating apps to their latest versions. Maintaining a clean post-update environment helps sustain stability and security.
Automating Updates and Managing Preferences
macOS offers options to automate updates, including security-only patches and automatic restarts. Enabling automatic updates reduces manual maintenance while still allowing you to review changes. If you rely on mission-critical software, consider scheduling automated checks during off-peak hours to avoid disruption. This section covers practical strategies for balancing convenience with control.
Security Considerations: Why Updates Matter for MacBook Air
Security updates address newly discovered vulnerabilities and help defend against emerging threats. Update Bay analysis shows a strong correlation between timely patching and reduced exposure to exploits. Keeping firmware and macOS current also mitigates zero-day risks and keeps your encryption and privacy protections up to date. This section highlights best practices for maintaining a secure environment.
Recovery and Rollback: What to Do If an Update Goes Wrong
If you need to revert a problematic upgrade, you can restore from a Time Machine backup or reinstall macOS. Retain the backup until you are fully confident in the new system. This section walks through safe rollback options and related precautions to avoid data loss during recovery.
Tools & Materials
- MacBook Air(Any supported model; ensure compatibility with the target macOS version)
- Power adapter(Keep the device plugged in throughout the update to prevent power loss)
- Stable Wi‑Fi connection(Prefer a reliable network; avoid metered or unstable connections)
- External backup drive or Time Machine(Create a complete backup before upgrading)
- Sufficient disk space(Ensure enough free space for installer files and caches)
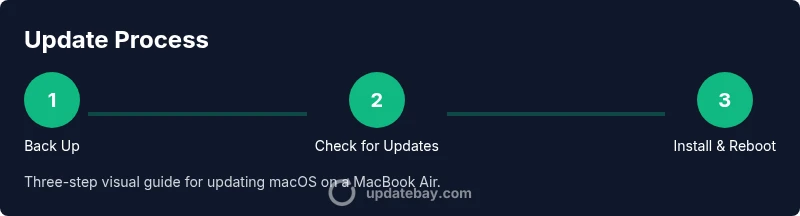
Steps
Estimated time: 60-90 minutes
- 1
Prepare and back up
Connect your MacBook Air to power, ensure you have a recent Time Machine backup, and close all nonessential apps. Backups protect your data if something goes wrong during the update. If you’re updating multiple devices, inform users of potential downtime.
Tip: Verify the backup completed successfully before proceeding. - 2
Open System Settings
Click the Apple menu and select System Settings to begin the update workflow. Navigating from a familiar starting point reduces errors.
Tip: If Settings is slow to respond, restart the app and try again. - 3
Navigate to Software Update
In System Settings, go to General, then Software Update. The page shows available updates and their details. Read the notes to anticipate any compatibility changes.
Tip: Click 'More info' to review release notes for new features. - 4
Check for updates and review
Click 'Check for Updates' and review each item. Decide whether to install security patches only or follow a full upgrade path. For major versions, plan for extra time and potential restarts.
Tip: Don’t skip important security updates even if a major upgrade is pending. - 5
Install updates
Click 'Install' or 'Upgrade' and let the installer run. Avoid interrupting the process; do not put the Mac to sleep. The system may restart several times during major upgrades.
Tip: If prompted for a password, enter your administrator credentials to continue. - 6
Complete any required restarts
Allow all restarts to complete and wait for the desktop to return. This is normal behavior for large upgrades and may take longer than smaller patches.
Tip: During first boot after upgrade, let Spotlight finish indexing. - 7
Verify post-update health
Launch core apps, check key settings, and run a quick system check (Battery, Disk, and Network) to confirm stability. Look for unusual fan noise or sluggishness as early warning signs.
Tip: Run a quick battery health check to ensure power management is functioning. - 8
Update apps if needed
Some apps require updates to be fully compatible with the new macOS. Open the App Store or developer sites to install updates.
Tip: Consider enabling automatic app updates to minimize future friction. - 9
Enable automatic updates (optional)
If you prefer hands-off maintenance, enable automatic updating for macOS and apps. You can customize settings to balance convenience with control.
Tip: Set a recurring reminder to review major upgrades before they occur.
Frequently Asked Questions
Is my MacBook Air compatible with the latest macOS?
Compatibility depends on your model and the macOS version. Check Apple's official compatibility list for your device. If you’re unsure, the Update Bay guide can help you assess readiness before upgrading.
Check the official compatibility list from Apple to confirm your MacBook Air supports the latest macOS, and consult the Upgrade Guide if you’re unsure.
Do I need to back up before updating?
Yes. A backup protects your data if the update encounters problems. Use Time Machine or another trusted backup method before starting.
Yes—back up before updating to safeguard your data in case something goes wrong.
What should I do if the update gets stuck?
If the update stalls, check network stability, pause and resume, or restart the Mac. If persistent, consult Apple Support or the Update Bay troubleshooting guide.
If it gets stuck, ensure a strong connection and try restarting. If it doesn’t recover, seek help from Apple Support.
Can I update over cellular data?
Apple recommends using a reliable Wi-Fi connection for updates to avoid interruptions and large data usage. Cellular data usage is generally discouraged for macOS upgrades.
Use Wi‑Fi for updates to avoid interruptions and excessive data use.
Should I install all updates or only security updates?
In general, install all recommended updates to ensure full compatibility and security. Security patches are essential, but feature updates can improve reliability and performance as well.
Install all recommended updates for best security and compatibility.
Watch Video
What to Remember
- Back up before every major upgrade.
- Read update notes to anticipate changes.
- Keep power connected during installation.
- Verify post-update app compatibility and security settings.