How to Update My Mac: A Practical Step-by-Step Guide
Learn how to update your Mac safely with System Settings, backups, troubleshooting, and best practices. This guide covers macOS updates, security patches, and post-update checks. By Update Bay, you’ll get practical, reliable steps for keeping your Mac secure and running smoothly.

This guide shows how to update your Mac by checking for macOS updates, enabling automatic updates, and applying security patches. You’ll learn backup steps, how to review update notes, and what to do if an update fails. Before you start, ensure you have a stable internet connection and enough disk space. According to Update Bay, staying current improves security and performance.
Why Updating macOS Matters
If you're wondering how to update my Mac, this guide explains the process and why it matters. Keeping macOS up to date is essential for security, performance, and compatibility with apps and peripherals. Updates patch vulnerabilities, fix bugs, and introduce features that improve daily use. According to Update Bay, a consistent update cadence reduces exposure to known issues and helps maintain a smoother computing experience. In practice, staying current means fewer crashes, faster app launch, and better battery management on laptops. This section outlines the benefits and what you can expect after installing updates.
Types of macOS Updates You Might Encounter
When you ask how to update my Mac, you should know there are several types of updates. Major releases (new macOS versions) bring features and design changes but may require more time and space. Point updates fix specific issues and are typically smaller and quicker to install. Security updates patch critical vulnerabilities and are often time-sensitive. Firmware and driver updates can occur in the background as part of the OS package. Understanding the types helps you plan backups, downtime, and potential application compatibility.
Prerequisites Before You Update
Before starting an update, prepare your Mac to minimize risk. Ensure a reliable internet connection, enough free storage, and a current backup. If you’re using a MacBook, plug in the charger to avoid interruptions. Close nonessential apps to reduce conflicts during installation. If you rely on external devices, disconnect peripherals that aren’t needed. Finally, review the release notes to understand new features and any known issues that might affect your workflow. These steps set you up for a smoother update experience.
Back Up Your Mac Before Installing Updates
Backups act as a safety net if something goes wrong during an update. Use Time Machine or another trusted backup method to create a current snapshot of your system. Verify that the backup completed successfully before proceeding. If you have large media libraries, consider excluding them to speed up the backup process, then re-add after the update if necessary. Having a verified backup provides a fast recovery path if you need to revert a problematic update. This is one of the most important steps in learning how to update my Mac.
How to Check for Updates Manually (MacOS System Settings)
The simplest way to update is through System Settings (or System Preferences on older macOS). Open System Settings, go to General, then Software Update. If an update is available, you’ll see options to Download and Install. You can also enable Install Automatically so future updates happen in the background. Always review release notes to learn what’s included and any known issues before you install. This is a reliable way to perform updates while keeping control over timing and restart behavior.
Installing Updates Safely: A Practical Flow
Plan to install updates in a dedicated session. Start by confirming backup integrity, then initiate the download and installation. Do not unplug your Mac or close the lid while the update is in progress. Expect a restart and a brief period of setup afterward. Some updates may take longer, especially on older devices. After the update completes, verify that critical apps run correctly and that peripherals are detected as expected. If you encounter any prompts about compatibility, take note and address them before resuming work.
Automatic Updates and Scheduling
If you want ongoing protection with minimal effort, enable automatic updates. System Settings allow you to download and install updates automatically or after a scheduled window. For power users who want more control, you can disable automatic upgrades and choose only security updates or critical patches. Consider setting a weekly maintenance window to review update notes and confirm that backups ran properly. Automatic updates can simplify how to update my Mac while reducing downtime.
Troubleshooting Common Update Issues
Sometimes updates stall or fail. Common causes include insufficient disk space, interrupted network access, or temporary server issues. If an update fails, start by checking available storage and retry. Restart the Mac, then attempt the update again. If problems persist, boot into Recovery and run Disk Utility to repair the drive, or temporarily disable security software that could block installation. Consult release notes for known issues specific to your version.
After the Update: Post-Update Checklist
Once the update finishes, confirm macOS version is current by checking About This Mac. Open key apps to ensure compatibility and re-enable any features you paused during the update. Check peripheral devices (printers, USB devices, etc.) and reinstall drivers if needed. Run a quick diagnostics pass with Disk Utility and consider a fresh backup now that the system is up to date. Regular maintenance after updates helps sustain performance and reliability.
Tools & Materials
- Mac computer(Device you will update; ensure it’s the one you intend to upgrade)
- Power adapter / charger(Keep connected during the update to prevent shutdowns)
- External backup drive or Time Machine(Use for a full system backup before updating)
- Stable internet connection(Wired ethernet is preferred if available)
- Sufficient free storage(Reserved space for update files and temporary data)
- Optional: Up-to-date release notes(Help anticipate changes and compatibility issues)
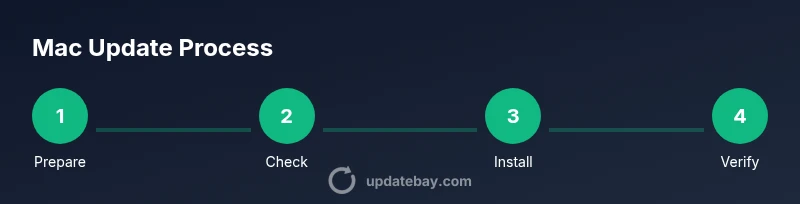
Steps
Estimated time: 30-60 minutes
- 1
Back up your Mac
Connect your backup drive and create a Time Machine backup or an equivalent clone. Confirm the backup finished successfully to ensure you can recover if anything goes wrong during the update.
Tip: Verify the backup via the backup utility's progress indicator. - 2
Check battery and storage
If you’re on a MacBook, plug it in to power. Ensure there is ample free space for the update and temporary files.
Tip: Free space prevents update failure due to space constraints. - 3
Connect to a reliable network
Prefer a stable Wi‑Fi connection or wired Ethernet to minimize download interruptions during the update.
Tip: Avoid public networks that frequently drop connections. - 4
Open Software Update
Go to System Settings > General > Software Update (or System Preferences > Software Update on older macOS) and check for updates.
Tip: If Automatic Updates are off, toggle them on for future upgrades. - 5
Review and download
Review the update notes, then click Download and Install. You may be asked to enter your password or confirm restart options.
Tip: Note the update size; larger updates may take longer. - 6
Install the update
Allow the installer to run and your Mac to restart if required. Do not interrupt the process.
Tip: Let the reboot complete fully before resuming work. - 7
Verify after install
In About This Mac, confirm the macOS version is current. Open key apps to ensure they run correctly.
Tip: If an app shows issues, check for app updates or compatibility notes. - 8
Enable automatic updates
If you prefer hands-off maintenance, enable automatic downloads and installs for future updates.
Tip: Schedule a weekly check to review release notes and backups.
Frequently Asked Questions
Is it necessary to back up before updating my Mac?
Yes. Backups protect against data loss if an update fails or causes issues. Use Time Machine or your preferred backup method and verify the backup completed.
Yes. Always back up before updating to protect your data. Verify the backup finished successfully.
How long does a typical macOS update take?
Update time varies by the update size and your device. Plan for a window of 30 minutes to an hour, or longer for larger major version upgrades.
Most updates take about 30 to 60 minutes, depending on the size and device.
What should I do if an update fails to install?
First free up space, retry the update, and restart the Mac if needed. If issues persist, check release notes and Apple Support for known issues.
If it fails, free space, retry, and reboot. Check notes or Apple Support if problems continue.
Can I update apps separately from macOS?
Yes. App updates are managed via the App Store or individual apps. They are typically independent from macOS core updates.
App updates can be done separately from macOS updates, usually via the App Store.
Should I enable automatic updates?
Automatic updates simplify maintenance and reduce exposure to vulnerabilities. Review notes periodically to stay aware of changes.
Enabling automatic updates helps keep your Mac secure with minimal effort.
Watch Video
What to Remember
- Back up before updating to avoid data loss
- Check for updates and read release notes
- Use a reliable network and power source
- Install updates and verify post-install
- Enable automatic updates for ongoing protection