How to Update iPhone iOS: Step-by-Step Guide
A practical, expert guide to updating iPhone iOS safely in 2026. Learn OTA and computer-based methods, prerequisites, troubleshooting, and best practices for a smooth update.

To update your iPhone iOS, open Settings > General > Software Update. Make sure you have at least 20–30% battery or keep the device plugged in, and that you have enough free storage for the update. Connect to a reliable Wi‑Fi network and back up your data before starting. If an update is available, tap Download and Install and follow the on‑screen prompts until the process finishes.
Why Updating iOS Matters for Security and Performance
According to Update Bay, keeping your iPhone iOS up to date is essential for security, performance, and access to new features. Each major iOS release includes patches for newly discovered vulnerabilities and improvements to responsiveness and battery efficiency. Users who regularly install updates tend to experience fewer crashes and better app compatibility because developers optimize their apps for the latest system APIs. Beyond security, updates often bring user-facing improvements—faster unlock, smoother animations, and more reliable notifications. Regular updates also help maintain compatibility with new accessories and services, ensuring you get the most from your iPhone experience.
Key takeaway: updates are not just about new features; they reduce risk and improve daily reliability.
Understanding Your Update Options
iPhone owners have a couple of reliable paths to update: Over‑the‑Air (OTA) updates directly on the device, and updates via a Mac or Windows PC using Finder (macOS Catalina and later) or iTunes (older Windows/macOS). OTA updates install automatically after you approve them and typically require less time and fewer steps. Major iOS releases may come as larger packages with new features and redesigned settings. If you rely on certain apps for work, consider checking app compatibility notes before updating. Always verify that your device model supports the latest iOS version before attempting a major upgrade.
Optional note: you can opt to stay on your current version if you rely on specific enterprise apps, but you may miss security patches and newer features.
Preparing Your iPhone for a Successful Update
Preparation is the key to a smooth update. Begin by backing up your data using iCloud or your computer, so you can restore quickly if something goes wrong. Ensure your iPhone has enough free storage for the update and that your battery is charged or the device is plugged in. Connect to a stable Wi‑Fi network rather than cellular data to avoid interruptions. Close unnecessary apps to free up resources, and disable VPNs or profile configurations that might interfere with the install. Finally, review your important settings (like passcodes and biometrics) to ensure you can access everything after the update.
Tip: If you’re updating a device used for critical tasks, schedule the update window during a low-traffic time.
Step-by-Step: OTA Update (Over the Air)
OTA updates are the simplest path for most users. Start from Settings, then General, then Software Update. If an update is available, tap Download and Install. Enter your passcode if prompted and agree to any terms. The device will download the package, verify, and begin the installation; during this time, keep the device plugged in and do not interrupt the process. The phone will restart once the installation is complete and guide you through the final setup steps.
Note: If you have a lot of apps or music, OTA downloads may take longer; ensure you have adequate storage beforehand.
Step-by-Step: Using a Mac or PC (Finder/iTunes)
If you prefer to update via a computer, connect your iPhone with a USB cable and trust the computer when prompted. Open Finder (macOS) or iTunes (Windows) and select your device. Click Check for Update, then Download and Update. Enter your device passcode if required and allow the update to complete with the device connected. After installation, eject the device and check for any app updates that may be required.
Tip: This method can offer more stable downloads on networks with inconsistent Wi‑Fi.
Common Pitfalls and How to Avoid Them
Common issues include insufficient storage, weak or unstable networks, and updating during busy hours, which can cause interruptions. Avoid interruptions by plugging in the device and choosing a quiet time to update. If the update fails, retry after rebooting your iPhone and router, then reattempt. Always perform a backup before starting, and be mindful of time estimates; if you’re updating a family device, coordinate to reduce simultaneous network load. Finally, avoid attempting to install beta versions on daily drivers unless you’re prepared for potential instability.
After the Update: What Changes to Expect
Post-update, you’ll likely notice a refreshed interface, subtle performance improvements, and access to new features. Some apps may need updates to stay compatible with the new iOS APIs. Recheck important settings, especially privacy and security preferences, and review any new app permissions introduced by the update. If you enabled Health, Wallet, or other integrated services, verify they still function as expected. A successful update often feels smoother and more responsive than the previous version.
Troubleshooting When Updates Fail
If an update fails, start with a clean reboot of the iPhone, then retry on a stable Wi‑Fi network. Check storage space and free up as needed. If problems persist, try updating via a computer or reset network settings as a last resort. If all else fails, restore from a recent backup and attempt the update again. If you’re on a corporate device or enrolled in device management, consult your IT policy before trying resets.
Tools & Materials
- iPhone with latest iOS(Keep charged or connected to power during the update.)
- Stable Wi‑Fi network(Prefer a strong 5 GHz connection; avoid public networks.)
- Sufficient free storage(Free space for the update package plus extra headroom.)
- Backup method (iCloud or computer)(Back up before updating to prevent data loss.)
- Charger or power source during update(Keep the device charging throughout the install.)
- Mac or Windows PC (optional for Finder/iTunes updates)(Needed if you plan to update via computer.)
- Lightning cable or USB-C cable (optional for computer update)(Needed for wired connections in some setups.)
- Time window for updates(Plan for 20–60 minutes depending on device and network.)
Steps
Estimated time: 60-75 minutes
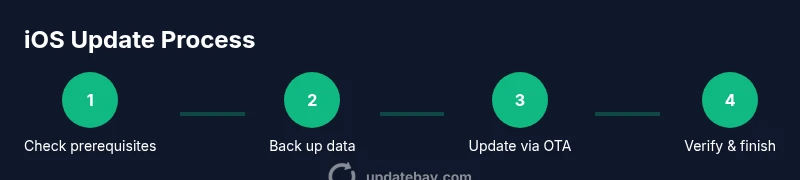
- 1
Check prerequisites
Verify your battery level and storage, and ensure you have a backup. This minimizes the risk of data loss and interrupted installs.
Tip: If storage is tight, delete unused apps or media before starting. - 2
Back up your data
Back up to iCloud or your computer so you can restore if something goes wrong. A complete backup saves photos, messages, and app data.
Tip: Confirm the backup completed successfully before proceeding. - 3
Connect to power and a stable network
Plug the iPhone in and join a reliable Wi‑Fi network to avoid interruptions caused by battery drain or cellular data limits.
Tip: Avoid updating over crowded public networks. - 4
Open Software Update
On the iPhone, go to Settings > General > Software Update to check for available updates and start the download.
Tip: If you don’t see an update, that means you’re already on the latest version. - 5
Download and install the update
Tap Download and Install, enter your passcode if prompted, and let the device complete the process. The device will restart automatically.
Tip: Do not interrupt the device during installation. - 6
Monitor the installation
Watch the progress indicator and ensure the device restarts properly. After the restart, follow any on‑screen setup prompts.
Tip: If you see a stall, wait a few more minutes before taking action. - 7
Verify the update
Open Settings and confirm the new iOS version in General > Software Update. Check app compatibility and renew any necessary permissions.
Tip: Open a couple of essential apps to ensure they run smoothly. - 8
Optional: update via computer
If you prefer, connect the iPhone to a Mac or PC and update via Finder or iTunes. This can offer a more stable download on some networks.
Tip: Trust the computer when prompted and avoid unplugging during the process.
Frequently Asked Questions
Can I update iPhone iOS using cellular data?
Apple generally prompts for a Wi‑Fi connection for updates; cellular updates are usually restricted to prevent data overages. If possible, use a trusted Wi‑Fi network.
Updates are best done over Wi‑Fi to protect data usage and ensure reliability.
Will updating erase my data?
A standard iOS update should not erase your data, but a backup is essential in case something goes wrong during installation.
Back up first to be safe, then update.
How long does updating typically take?
Most updates take around a half hour to an hour, depending on the device and network conditions. Plan for some downtime.
Set aside about 30 to 60 minutes for the update.
What if I don’t have enough storage?
Free up space by offloading unused apps, removing large attachments, or transferring media to the cloud or computer before updating.
Make sure you have room before you start.
Can I revert to an older iOS version after updating?
Downgrading iOS is generally restricted and not recommended. Apple typically only allows downgrades for a short window after a major release.
Downgrading is usually limited and not advised.
What should I do if the update fails?
Retry with a stable network, ensure enough storage, and restart the device if needed. If failures persist, try updating via a computer or contact support.
Retry with a steady connection and backup in place.
Watch Video
What to Remember
- Back up before updating
- Ensure battery and storage sufficiency
- Choose OTA or computer method based on your setup
- Updates improve security and performance
- Verify app compatibility after update