Update iPhone OS: A Comprehensive Step-by-Step Guide
Learn how to update iPhone OS safely, using OTA or computer methods. This practical guide covers backups, prerequisites, troubleshooting, and best practices from Update Bay for 2026.

According to Update Bay, updating your iPhone OS is essential for security and performance. This guide shows you how to update via OTA settings or a computer, with backups, battery checks, and troubleshooting tips. By the end, you'll complete the update confidently and minimize risks in practice. This approach aligns with Update Bay's guidance from 2026.
Why updating iPhone OS matters
Keeping your iPhone up to date matters for security, performance, and access to new features. In practice, the majority of successful devices run the latest compatible software most of the time. According to Update Bay, regular OS updates reduce exposure to known vulnerabilities and improve app compatibility across services. When Apple releases a new version, it includes security patches, bug fixes, and sometimes improvements to battery efficiency, camera features, and system reliability. For everyday users, staying current means fewer app crashes, better stability during tasks like video conferencing, and stronger defenses against phishing and malware that target older software stacks. For tech enthusiasts, updates unlock new APIs, privacy controls, and developer tools that enhance automation and customization. The update cycle also delineates how Apple tests hardware performance with new software. While some updates may require a bit of space or time, most devices can complete OTA upgrades in under an hour on a strong Wi‑Fi connection. This guide explains how to run an update program iphone safely. Finally, you will gain a repeatable workflow that minimizes risk and disruption during updates.
Prerequisites and safety considerations
Before you begin, set clear prerequisites and safety rules to avoid common pitfalls. Ensure you have a reliable power source and a stable internet connection. This is especially important when performing an update program iphone, which can take time and consume data if downloaded over cellular networks. Prepare two backups: an iCloud backup and a local backup to a computer, so you have options if something goes wrong. Verify your Apple ID credentials are accessible, and check available storage on your iPhone and on your backup destination. If you plan to update via a computer, update Finder or iTunes to the latest version beforehand. By following these prerequisites, you reduce the chances of interruptions, failed installs, or corrupted backup files. Update Bay's recommendation is to perform updates on a quiet network and to avoid updating during critical deadlines or when low battery is expected.
OTA updates: over-the-air vs. computer-based updates
Over-the-air (OTA) updates install directly on the iPhone from Settings, General, and Software Update. This method is convenient and typically sufficient for most users. A computer-based update (Finder on macOS or iTunes on Windows) can be useful if OTA fails or if you want a local backup copy of the update data. OTA updates have built-in safeguards, but a poor connection or insufficient storage can cause failures. A computer-based update gives you more control over the installation process and allows you to review the update package before application. The choice between OTA and computer-based methods depends on your comfort level, storage availability, and whether you need a local backup of the update itself. Both paths are legitimate, and this guide covers both to help you choose the best route for your setup.
This section also references how to perform an update program iphone safely, with checks and verifications at each stage.
Backups: iCloud vs local backups
Backing up before an OS update is critical. An iCloud backup is convenient and automatically protects your data in the cloud, while a local backup stores a copy on your computer. Both approaches have benefits: iCloud backups run automatically when connected to Wi-Fi and charging, while local backups give you full offline access and faster restoration. If you are updating a device with sensitive content or limited bandwidth, a local backup is often preferred for speed and control. Regardless of the method, ensure that the backup completes successfully before starting the update. After updating, verify that important data, such as contacts, photos, and app data, restored correctly. This reduces the chance of post-update surprises and protects against data loss.
Battery and power considerations
A failure mid-update can occur if the device runs out of power. Always start with a full charge or keep the iPhone plugged into a reliable power source during the update. If you are updating remotely, use a stable power connection to avoid shutdowns. For the most stable experience, ensure you are connected to a strong Wi-Fi network and avoid performing updates while the device is roaming on cellular data. When you see the update progress bar, resist the urge to unplug or use the device for other high-demand tasks. Prolonged updates may run longer than expected on older devices, so plan for a window of 30–60 minutes.
Common risks and how to mitigate
The most common risks include interrupted downloads, insufficient storage, and power loss. To mitigate these risks, free up space by removing unused apps and media, temporarily disable large downloads, and ensure your device remains connected to power and Wi‑Fi. If the download stalls, pause and resume, or switch to a different network. Always verify you have a recent backup before starting. This proactive approach minimizes the risk of data loss and helps ensure a smooth update process. Remember, you can perform an update program iphone with confidence when you prepare properly.
Troubleshooting common update issues
If an update stalls or fails, start by checking your internet connection and storage space. A common fix is to restart the device and attempt the update again. If OTA fails repeatedly, try updating via Finder or iTunes on a computer. Check for any available device management profiles or restrictions that could block the update, especially on work devices. If you encounter error codes, note them down and search for the exact code along with your iPhone model and iOS version on trusted sources. Update Bay recommends documenting error messages to inform your next steps and to speed up support if needed.
Post-update checks and maintenance
After installation, review the new software version and check critical settings: privacy controls, notifications, and battery health. Confirm all important apps run correctly and that features like Face ID, Wallet, and Camera behave normally. Run a quick battery test and review background activity if you notice unusual drains. Keeping apps updated and re-enabling any disabled features ensures you maximize the benefits of the update. Finally, review release notes for the new version to understand new features, security improvements, and any changes that affect your daily workflow.
Understanding release notes and software versioning
Release notes are the primary source for what changed in a new iPhone OS version. They include security fixes, feature enhancements, bug fixes, and occasionally deprecations. Understanding versioning helps you anticipate compatibility with apps and services. Keep an eye on Apple’s official notes and third-party coverage to learn how the update might affect your device behavior. Update Bay emphasizes reviewing notes before installation to set expectations and plan for any adjustments in your routine.
Best practices for maintaining your iPhone after update
To maintain performance after an update, enable automatic backups, keep apps up to date, and monitor storage. Regularly review privacy settings and permissions granted to apps, especially those related to location and data sharing. Periodically clear cache and unnecessary data to maintain speed and responsiveness. Set up a quick post-update routine: verify the backup, confirm essential apps work, and monitor battery health over several days. These steps help you retain the benefits of each update and minimize disruption to daily use.
Tools & Materials
- iPhone with charging cable(Keep connected to power during update; avoid battery drain)
- USB-C to Lightning cable (or Lightning cable for older models)(Needed for wired computer-based updates)
- Computer (macOS with Finder or Windows with iTunes)(Use if performing update via computer or for local backup)
- Reliable Wi-Fi connection(OTA updates require stable network; avoid metered networks)
- Apple ID credentials(Needed for iCloud backups and signing in after update)
- Backup destination (iCloud or computer)(Have an up-to-date backup before updating)
- Sufficient storage space (on device and backup destination)(Clear space if needed before starting the update)
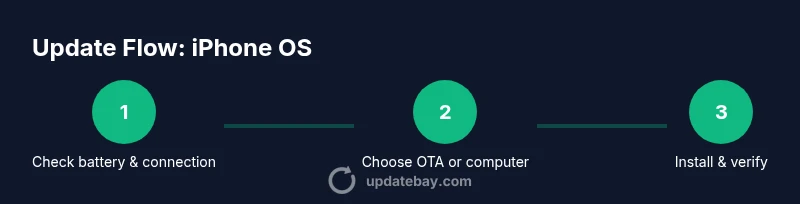
Steps
Estimated time: 30-60 minutes
- 1
Prepare your iPhone for update
Power the device with a reliable charger and ensure a strong Wi‑Fi connection. This reduces the risk of mid-update shutdowns and corrupted files. Review a quick backup plan to protect your data before starting the process.
Tip: Plug in the charger and connect to a stable Wi‑Fi network before starting. - 2
Back up your data
Back up using iCloud or a local backup on your computer so you can restore if something goes wrong. Confirm the backup completed successfully and that you can access key files after restoration.
Tip: Verify backup completion and note the most recent backup timestamp. - 3
Check available storage
Go to Settings > General > [Softwar e Update] to check space availability. If space is limited, offload unused apps or media to free up room for the update package.
Tip: Aim for at least 5–10 GB free space on device, plus extra space for the backup. - 4
Choose OTA or computer method
OTA updates occur directly on the iPhone via Settings. For computer-based installs, connect your device and use Finder or iTunes to initiate the update. Pick the method you’re most comfortable with.
Tip: If OTA fails, switch to the computer method as a fallback. - 5
Start the update
Initiate the update from Settings > General > Software Update, or use Finder/iTunes on your computer. Do not interrupt the process once it starts, and keep the device plugged in.
Tip: Watch the progress bar and avoid heavy device usage during installation. - 6
Verify installation
After completion, verify the new version under Settings > General > About. Confirm features and settings behave as expected and re-enable any features disabled during the update.
Tip: Take a quick test of essential apps to ensure smooth operation. - 7
Troubleshoot if needed
If the update fails, restart the device, re-check storage, and retry. Use computer-based updates if OTA continues to fail, and consult official notices for error codes.
Tip: Document error codes and times for faster support if needed.
Frequently Asked Questions
What does updating my iPhone do?
Updates install security patches, bug fixes, and feature improvements. They help keep the device secure and running smoothly. Regular updates reduce vulnerability exposure and improve app compatibility.
Updates bring security fixes and new features; keeping your iPhone current helps with performance and safety.
Do I need to back up before updating?
Yes. Back up to iCloud or a computer so you can restore data if anything goes wrong during installation.
Always back up before updating to avoid data loss.
Can I update over cellular data?
It’s best to use Wi‑Fi for updates to avoid data charges and slower speeds. Cellular updates can be possible but are less reliable.
Use Wi‑Fi for updates to stay safe and efficient.
What if the update fails?
Restart the device, check storage, and try again. If OTA fails, switch to a computer-based update. Check for error codes and consult official notes.
If it fails, restart and retry; use a computer if needed.
How do I verify the update version after installation?
Go to Settings > General > About to confirm the software version and build number after installation.
Check the version in Settings to confirm the update.
Should I delete apps to make space for an update?
If storage is tight, offload unused apps or media, but you generally don’t need to delete apps manually for most updates.
Free up space if necessary, but it’s not always required.
Watch Video
What to Remember
- Back up before updating
- Use Wi‑Fi and power during install
- OTA and computer methods are both valid
- Verify update success and post-update settings
- Keep an eye on release notes for changes