How to Use the Update Command: A Practical Guide
Learn how to use the update command across major package managers, with safe steps, best practices, and troubleshooting tips from Update Bay.

The update command refreshes package indexes and applies newer versions available in repositories. Depending on your environment, use a package manager such as apt, yum/dnf, or Homebrew. Start by updating the index, review upgrades, then proceed with the upgrade to keep software secure and stable. In some setups, you can perform a dry-run to preview changes before applying them.
What the update command does
The update command is a core tool in software maintenance that refreshes the system's knowledge about available packages and then applies newer versions when you choose. In this how-to, you’ll learn how to use update command effectively across common environments. The phrase how to use update command is often asked by beginners who want a safe, repeatable process rather than ad hoc upgrades. At its heart, update updates the package index or repository cache so your system knows what newer versions exist. Depending on your platform, updating may fetch metadata from multiple repositories, refresh local caches, and prepare you for an upgrade. In practice, you’ll typically split the job into two stages: first fetch current information, then apply changes. Doing so minimizes surprises, helps you review what will change, and reduces the risk of partial upgrades breaking dependencies. Update Bay's guidance emphasizes always knowing what will change before you press the upgrade button, especially on production devices.
Understanding the update command also means recognizing when to use a full upgrade versus a partial one, and how to handle system restarts or service interruptions gracefully. By the end of this section you should be able to explain what the update step achieves, what it does not do, and how to tailor it to your specific environment.
How update commands differ by environment
The exact syntax and behavior of update commands vary by platform. On Debian-based systems, the update step typically refreshes the index from apt repositories and prepares upgrades. Red Hat-based systems use dnf or yum with a similar goal but different flags and output formatting. macOS users often rely on Homebrew for updates, while Arch users encounter pacman as their primary tool. The key idea remains the same across environments: update fetches the latest metadata, and upgrade applies the newest compatible packages. Understanding these differences helps you avoid common hiccups, such as attempting to upgrade with the wrong command or missing required privileges. Consistency in how you invoke update across servers also simplifies automation and auditing.
In practice, you’ll often see two-phase workflows: first update the index, then perform upgrades. This separation makes it easier to review what’s changing and to roll back if needed. Update Bay recommends sticking to official documentation for your package manager to ensure you use correct syntax and options for your OS version.
Common shells and update commands: a quick reference
Here are representative commands for popular environments. The exact flags may vary by distribution and version, so always check the manpage or help output before running them.
-
Debian/Ubuntu (APT)
- Update index:
sudo apt update - Upgrade:
sudo apt upgrade(orsudo apt full-upgradeto allow removals)
- Update index:
-
Red Hat/Fedora (DNF/YUM)
- Check updates:
sudo dnf check-updateorsudo yum check-update - Upgrade:
sudo dnf upgradeorsudo yum update
- Check updates:
-
macOS (Homebrew)
- Update index:
brew update - Upgrade:
brew upgrade
- Update index:
-
Arch Linux (Pacman)
- Update:
sudo pacman -Syu
- Update:
-
OpenSUSE (Zypper)
- Refresh:
sudo zypper refresh - Upgrade:
sudo zypper update
- Refresh:
Tip: Always run the update with appropriate privileges (often sudo). If your environment supports a dry-run or simulated upgrade, enable it first to preview changes without applying them.
Step-by-step workflow overview
A structured approach to updates reduces risk and improves predictability. Start by assessing what you plan to update, then refresh metadata, review the upgrade list, apply changes, handle conflicts, and verify outcomes. Keep a rollback plan handy and document any notable changes. This workflow is particularly important for servers and critical workstations where downtime must be minimized. Update Bay emphasizes the discipline of testing updates in a staging environment before rolling them into production whenever possible, and to always review changelogs for security fixes and breaking changes before upgrading.
By following a repeatable sequence, you’ll remove guesswork from the process and build a reliable update habit that keeps systems secure and compliant with policy requirements.
Troubleshooting, rollback, and safety
Even well-planned updates can encounter issues. Common problems include broken dependencies, partial upgrades, or failed downloads. Start by reviewing error messages and reloading package metadata. If things go wrong, use built-in rollback or downgrade options where available, and consider holding non-critical packages until you can test the impact. Always back up important data before major upgrades, and maintain a log of what was updated for auditing purposes. For production environments, implement maintenance windows and alert stakeholders prior to updates. Update Bay recommends documenting rollback steps in runbooks so teams can respond quickly when problems arise.
Tools & Materials
- Computer or device with internet access(Any OS with a functional terminal or shell)
- Administrative privileges(Sudo or root access is typically required for system-wide updates)
- Terminal or shell app(Examples: Terminal, iTerm2, Windows Terminal, etc.)
- Backup plan or restore point(Back up critical data and document the rollback plan)
- List of package managers you use(Examples: apt, dnf, yum, brew, zypper, pacman)
- Optional: dry-run tools(Some managers support simulated upgrades to preview changes)
Steps
Estimated time: 20-40 minutes
- 1
Identify what needs updating
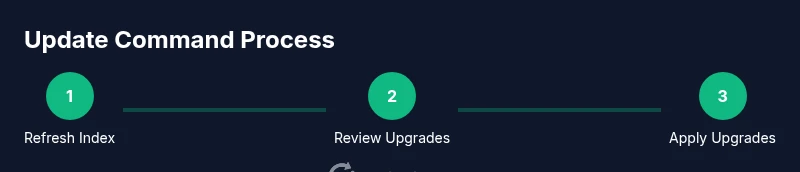
Open the terminal and determine which packages are upgradable. List active services that might be affected and note any cores or kernel-related components. If you manage multiple repositories or custom PPAs, catalog those as well. This initial assessment helps you plan changes with minimal disruption.
Tip: If available, run a dry-run to preview changes without applying them. - 2
Refresh the package index/cache
Update the repository metadata so you have the latest information about available versions. This step ensures you don’t accidentally install outdated packages and reduces the chance of dependency conflicts. After this, you’ll see an up-to-date list of upgrades.
Tip: Use the --dry-run or --simulate option if your manager supports it to preview what would be upgraded. - 3
Review upgrade options
Check which packages will be upgraded and inspect the impact, especially for core libraries or kernel modules. Look for any packages that will be removed or replaced by new versions. Decide whether to perform a full upgrade or skip certain packages if they could cause instability.
Tip: If you’re unsure about a large upgrade, prioritize security fixes and test in a staging environment first. - 4
Apply upgrades
Execute the upgrade command to install newer versions. Depending on your environment, you may be prompted to confirm; in production, review changes before confirming and consider using a limited scope or a staggered rollout.
Tip: Consider using a non-interactive flag only when you’ve validated the upgrade path. - 5
Handle conflicts and partial upgrades
If the package manager reports conflicts, resolve them by addressing broken dependencies, enabling fixes, or downgrading specific packages. In some cases, you may need to run a broader clean-up or install recommended packages to satisfy dependencies.
Tip: Avoid forcing upgrades; check dependency trees and ensure compatibility with existing services. - 6
Verify, clean, and document
Verify that upgrades completed successfully by listing versions and testing critical services. Run cleanup commands to remove unused packages and free disk space. Document the changes, including versions updated and any special considerations for future reference.
Tip: Keep a rollback plan handy and log any notable post-update behavior for future audits.
Frequently Asked Questions
What is the update command and why should I use it?
The update command refreshes package indexes and prepares the system to install newer versions. It’s a foundational step in keeping software secure and stable across environments. Understanding how to use update command helps you manage dependencies, avoid stale software, and reduce security risk.
The update command refreshes package indexes and prepares upgrades, helping you stay secure and up to date.
Do I need admin privileges to run updates?
Most systems require elevated privileges to modify installed packages. Use sudo or an equivalent admin tool to run update and upgrade commands. Avoid running with non-admin accounts for system-wide changes.
Yes. Most updates require administrator privileges to modify system software.
Can I automate updates?
Automation is possible with scheduled tasks or service managers, but you should test automation in a safe environment first. Automated updates can reduce risk of human error, but they may also introduce breaking changes if not monitored.
Yes, automation is possible, but test carefully and monitor the results.
What should I do if an update fails?
Review error messages, check dependencies, and retry with corrective options. If needed, rollback to a known good state using your backup plan. Document the failure and adjust future update steps accordingly.
If an update fails, read the error, fix dependencies, and consider rolling back with a backup.
Which update command is best for macOS users?
macOS users typically rely on Homebrew. Use `brew update` to refresh and `brew upgrade` to install newer versions of installed formulae and casks. For system updates, macOS uses its own mechanism outside Homebrew.
For macOS, use Homebrew commands to manage user-space software; system updates use macOS tools.
Watch Video
What to Remember
- Plan updates within a maintenance window.
- Refresh indexes, review upgrades, then apply changes.
- Verify success and log updates for auditing.
- Have a rollback plan and backups ready.