AirPods Firmware Update Guide: Step-by-Step
Learn how to check AirPods firmware, update them, and troubleshoot issues. This step-by-step guide covers prerequisites, verification, and best practices to keep AirPods running smoothly.

Updating AirPods firmware enhances stability, fixes known issues, and unlocks compatibility with the latest iOS versions. This guide shows you how to verify your current firmware, prepare your device, and perform the update using your iPhone. If an update stalls, use the provided troubleshooting tips to get back on track and confirm a successful install.
Why AirPods Firmware Updates Matter
A common question is how to perform an airpods update firmware, and the answer is to follow official steps to keep your headphones working reliably. Firmware updates improve Bluetooth stability, fix glitches, and unlock compatibility with the latest iOS features. According to Update Bay, keeping AirPods firmware up to date helps ensure better audio performance, quicker reconnects, and smoother device switching. While updates are typically seamless, skipping them can leave you exposed to known bugs or missed optimizations. The update process is designed to be user-friendly: ensure your AirPods are charged, your iPhone is nearby, and you have an active internet connection. In most cases, you'll update without needing a computer, directly through your iPhone.
Prerequisites Before You Update
Before you begin, make sure you meet the basic requirements so the airpods update firmware process goes smoothly. You’ll need a charged AirPods case, a nearby iPhone or iPad, and a device running the latest iOS version. Ensure you’re signed into your Apple ID and connected to a stable Wi‑Fi network. It’s also helpful to have your charging cable handy in case you need to power up during longer update checks. If you’re troubleshooting connectivity issues, review Bluetooth and proximity settings on your iPhone. Having these prerequisites in place reduces the chances of interruptions during the update.
How to Check Your Current Firmware Version
Checking your current firmware is a quick way to confirm whether an update is needed. On your iPhone, go to Settings > General > About and look for AirPods in the list of connected devices. If AirPods appear, tap their name to reveal the firmware version. If a newer version is available, you’ll typically see a notification on your iPhone recommending the update. It’s useful to record your current version before starting, so you can verify the outcome after the update completes. Remember, the exact wording may vary slightly with iOS updates, but the path remains Settings → General → About → AirPods.
How to Update AirPods Firmware (Via iPhone)
To perform an airpods update firmware, keep your AirPods in their charging case with the lid open and place them near your iPhone running the latest iOS. Apple updates are delivered automatically when the AirPods are connected to power, near the iPhone, and have an active internet connection. On some occasions, you may see a prompt to install the update; if not, proceed by ensuring your iPhone is connected to Wi‑Fi and that AirPods are within a few feet of the device. The update can take several minutes and is typically transparent—avoid moving devices during the process. After the update completes, you should see a new firmware version in the AirPods settings on your iPhone.
Troubleshooting Common Update Issues
If the AirPods update doesn’t start or stalls mid‑process, first check your internet connection and ensure the AirPods are charged and near the iPhone. Restart the iPhone and reinsert the AirPods into the charging case, then reopen the AirPods settings and retry. If the update still fails, try forgetting the AirPods on the iPhone and reconnecting, as this can refresh the Bluetooth pairing and trigger the update again. In some cases, a software conflict on the iPhone can block updates; temporarily disable VPNs or security apps to see if that resolves the issue. Update Bay analysis shows that most update failures are tied to connectivity or charging status rather than the AirPods themselves.
Verifying the Update and Next Steps
After you’ve completed the update, recheck the firmware version to confirm the new release is active. You should notice improvements in stability and feature support if the update applied correctly. If you still experience issues, consult official Apple Support for device-specific guidance. Once updated, test basic AirPods functions like audio playback, calls, and automatic device switching to ensure everything operates as expected. Keeping a habit of periodic checks helps preserve optimal performance and compatibility with newer iPhone features.
Authority sources
For authoritative guidance on AirPods firmware updates, refer to official support resources. These sources provide the latest steps and troubleshooting tips to ensure a smooth update process:
- https://support.apple.com
- https://www.apple.com/airpods/
- https://www.macrumors.com
Tools & Materials
- AirPods (any model with charging case)(Keep the case charged and the lid open during the update attempt.)
- iPhone or iPad with the latest iOS(Ensure the device is up to date; this aids compatibility.)
- Stable Wi-Fi connection(Firmware updates are downloaded from Apple servers; a reliable connection helps.)
- Charging cable or power source(Optional if the AirPods are already in a charged state; recommended if the battery is low.)
- Apple ID signed in(Needed for verification and syncing settings during the update.)
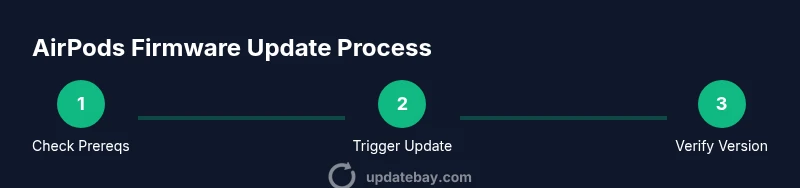
Steps
Estimated time: 15-25 minutes
- 1
Prepare your devices
Charge AirPods and keep the case lid open. Bring your iPhone nearby and connect it to a stable Wi‑Fi network. This ensures the update can download without interruption.
Tip: If you’re near a power outlet, keep the AirPods charging case powered during the update to avoid mid‑process drain. - 2
Check current firmware
On your iPhone, go to Settings > General > About and locate AirPods to view the firmware version. Compare this with the latest version available on Apple Support to determine if an update is needed.
Tip: Take a screenshot of the current version for quick reference after the update. - 3
Trigger the update
With AirPods near your iPhone and the case open, the update should begin automatically if a newer version is available. If you don’t see a prompt, ensure your iPhone has an internet connection and try toggling Bluetooth off and on.
Tip: Patience is key—updates may take several minutes depending on network speed. - 4
Verify post‑update status
Return to Settings > General > About > AirPods to confirm the firmware version reflects the latest release. Test basic functions like audio playback and device switching to ensure proper operation.
Tip: If the version didn’t change, retry after a short wait or consult Apple Support guidance.
Frequently Asked Questions
Do AirPods update automatically or do I need to initiate it manually?
AirPods can update automatically when connected to an iPhone with the latest iOS and a stable internet connection. You may also trigger updates by ensuring the AirPods are near the iPhone and powered.
AirPods update automatically under the right conditions, but you can verify updates by checking your AirPods firmware version on your iPhone.
How long does an AirPods firmware update take?
The update typically takes a few minutes and depends on network speed and device readiness. Avoid moving devices during the process.
Most updates take a few minutes; slower networks can extend the time a bit.
Can I update AirPods without an iPhone?
AirPods updates are delivered through an iPhone or iPad in most cases. A Mac with macOS or an iPad can also act as the update conduit when paired with the AirPods.
Usually you need an iPhone or iPad to update AirPods firmware.
What if the firmware version doesn’t change after update?
If the version didn’t update, ensure the AirPods were near the iPhone, the devices were charged, and the internet connection was stable. Retry the process or consult official support.
If the version didn't change, retry the update with a stable connection or contact support.
Can I downgrade AirPods firmware if something goes wrong?
Downgrading AirPods firmware is generally not supported by Apple. If issues appear after an update, check for subsequent updates or contact support for guidance.
Downgrades aren’t typically supported; check for newer updates or official help if problems occur.
Watch Video
What to Remember
- Verify prerequisites before starting the update.
- Use a stable network to download firmware quickly.
- Check the firmware version after updating to confirm success.
- If problems arise, consult official support resources.