bios asus update: Safe Step-by-Step BIOS Guide
Learn how to perform a bios asus update safely, using official ASUS BIOS files, a power-protected USB drive, and verification steps from Update Bay.

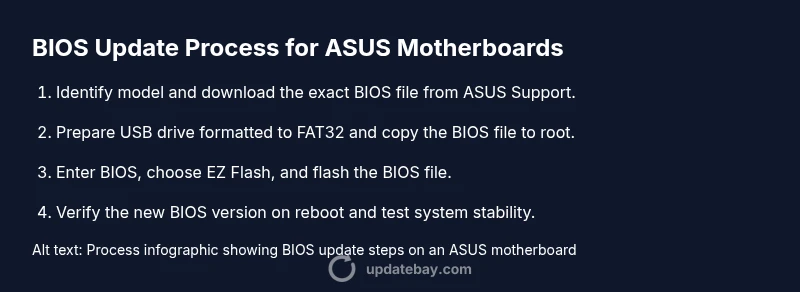
By the end of this guide you will confidently update the BIOS on ASUS systems, understand when it's necessary, and verify the update succeeds. Gather your ASUS model number, download the exact BIOS file from ASUS Support, use a bootable USB drive or Windows tool, and back up crucial data before proceeding. Follow the steps carefully to minimize risk today.
Why BIOS updates matter for ASUS systems
BIOS updates address routine stability improvements, compatibility with newer hardware, and security patches. For ASUS motherboards, these updates can enhance boot times, fan control, and overall system reliability. According to Update Bay, keeping the BIOS current is a core part of maintaining a healthy PC ecosystem. When you perform a bios asus update, you’re not just chasing features—you’re closing security gaps and aligning firmware with the latest drivers and operating systems. If you skip updates, you may encounter erratic POST behavior, hardware incompatibilities, or missed performance optimizations. This section explains why timely BIOS updates are a prudent maintenance step for ASUS platforms and how to assess whether an update is truly necessary for your setup.
How to determine if you need a BIOS update
Determining whether a BIOS update is needed starts with your hardware goals and symptoms. Check ASUS support pages for your exact motherboard model to see current BIOS versions and release notes. Look for critical bug fixes, security advisories, or improved hardware compatibility that match your system usage. If you’ve recently added a new CPU, RAM kit, M.2 drive, or PCIe card, a BIOS update may unlock stability or feature support. Always compare your installed BIOS version against the latest listed on ASUS support to decide if an update is warranted. This decision process helps you avoid unnecessary risk when the system is already stable.
Risks and safety considerations
BIOS updates carry inherent risk: a failed flash can render a motherboard unbootable. To minimize risk, never interrupt a BIOS update, use a reliable power source, and only flash the exact BIOS file intended for your motherboard model. Back up essential data and create a recovery plan before proceeding. If you’re uncomfortable with the process, consider using ASUS Live Update or EZ Flash in a controlled environment where you can reapply power if needed. Understanding these risks upfront helps you plan a safer bios asus update.
Preparing: prerequisites and planning
Preparation is the most important part of a safe BIOS update. Start by identifying your motherboard model and current BIOS version. Download the correct BIOS file from the official ASUS Support site for that exact model. Prepare a USB flash drive (at least 8GB, formatted appropriately) and ensure your system is connected to a reliable power source or UPS. Create a backup of important data and note any installed peripherals that could influence firmware compatibility. Finally, set aside a dedicated update window when you won’t be interrupted, ideally with a second machine available for verification if needed. This planning stage reduces surprises during the flash.
Choosing the right BIOS file from ASUS
Always obtain the BIOS file from the official ASUS support page for your specific motherboard model. Double-check the model number, revision, and LAN/win-10 compatibility notes in the release description. Verify the file name and checksum if provided, and download the full ROM rather than incremental updates unless explicitly stated. After download, move the file to your USB drive and prepare any required auxiliary tools mentioned by ASUS, such as EZ Flash utilities. Using the official file minimizes the risk of corrupted firmware or incompatible variants during the bios asus update.
Two common update methods for ASUS boards
There are two mainstream paths for updating ASUS BIOS: EZ Flash inside the UEFI BIOS, and Windows-based tools or utilities like ASUS Live Update. EZ Flash runs entirely from the motherboard firmware, which minimizes the risk by not relying on the host OS to perform the flash. The Windows method uses the BIOS update executable within Windows before rebooting to apply the flash. Choose EZ Flash for maximum stability and minimal OS interaction, especially on systems without a stable Windows environment. This section helps you decide which approach aligns with your hardware and comfort level.
Verifying a successful BIOS update
After the flash completes, you should enter BIOS on boot and verify that the BIOS version matches the expected update. Record the new version string, check system behavior in POST, and note any changes to hardware initialization. If your motherboard exposes a BIOS version banner on startup, use that to confirm the update. It’s also wise to re-enter the OS and test key workflows, such as boot time, USB detection, and storage drive recognition. Verification ensures the bios asus update was applied correctly and that you’re benefiting from the intended improvements.
Troubleshooting common issues and recovery
If a BIOS flash fails or the system won’t boot after an update, don't panic. Prepare a backup plan: a known-good BIOS recovery procedure, a USB flash drive with a supported BIOS recovery image, and a spare BIOS backup if your motherboard provides dual-BIOS or recovery jumpers. Consult ASUS support resources and documentation for your model to access recovery tools and instructions. In many cases a failed update can be recovered by a secondary BIOS, a reflash from USB, or a vendor-recommended recovery procedure. This section empowers you to recover gracefully if things don’t go as planned.
Final considerations and Update Bay's verdict
The Update Bay team underscores that BIOS updates should be conducted with caution and preparation. If your system is stable and you have a specific need—security patches, new hardware compatibility, or performance fixes—proceed with the bios asus update using official files. For most users, scheduling updates during a maintenance window and ensuring power safety yields the best outcomes. The Update Bay verdict is that careful planning, official sources, and a reliable power supply make BIOS updates a valuable maintenance task rather than a risky gamble.
Tools & Materials
- Exact motherboard model and current BIOS version(Identify from BIOS splash screen or motherboard packaging.)
- Official ASUS BIOS file for your model(Download from ASUS Support; ensure correct revision.)
- USB flash drive (8GB minimum)(Format to FAT32 or as specified by the method chosen.)
- Reliable power source or UPS(Prevents interruption during flash; desktops typically need a UPS.)
- Data backup(Back up important files before flashing.)
- Screwdriver (optional)(If you need to reseat components or access BIOS jumper settings.)
Steps
Estimated time: 60-90 minutes
- 1
Identify model and download BIOS
Locate your exact ASUS motherboard model and download the corresponding BIOS file from the official ASUS Support site. Verify the revision and read release notes to understand what the update fixes or improves. This step ensures you flash the correct firmware and avoids module mismatches.
Tip: Double-check the model number and file name before download to avoid incorrect firmware. - 2
Prepare USB drive and environment
Format the USB drive to the correct filesystem (usually FAT32), and copy the BIOS ROM file to the root directory. If using EZ Flash, some boards require a specific folder structure or helper utilities. Ensure you are not carrying other files that could confuse the flash process.
Tip: Use a dedicated USB stick and safely eject after copying the BIOS file. - 3
Back up data and ensure power
Back up essential data and connect the system to a stable power source or a UPS. Jumper-safe liquids should be away from the system; ensure the power won’t cut during the update, as an outage can brick the motherboard.
Tip: Have a second power outlet on a surge protector for added stability. - 4
Enter BIOS and start EZ Flash or update tool
Boot into your BIOS/UEFI and locate the EZ Flash (or equivalent) utility. Select the BIOS file from your USB drive and initiate the flash process. Do not interrupt the flash; monitor on-screen prompts and confirm any warnings.
Tip: If you see a warning about power loss, switch to a fully charged source or UPS before continuing. - 5
Complete the flash and restart
Allow the update to complete and the system to reboot automatically. Do not power off during reboot, as this can leave the motherboard non-functional. Once back in BIOS, confirm the new version is active.
Tip: Take a clear note of the BIOS version shown after reboot for verification. - 6
Verify version and test basics
Re-enter the operating system and test essential functions: boot time, USB devices, storage drives, and any hardware you updated for compatibility. If the version doesn’t match, re-check the file and retry the flash according to ASUS recovery guidance.
Tip: Perform basic tests first; avoid heavy tasks until stability is confirmed.
Frequently Asked Questions
What is the safest method to update BIOS on ASUS boards?
The EZ Flash method within the BIOS is widely regarded as the safest approach since it avoids reliance on the OS. Use the official BIOS file for your model and ensure a uninterrupted power supply during the flash.
The safest method uses EZ Flash inside the BIOS with the official file and a stable power supply.
Can I update BIOS if my system is currently stable?
If you are not relying on new features or security fixes, you can skip the update. However, if the release notes address critical issues or compatibility with new hardware, upgrading may be beneficial.
Only upgrade if the notes show benefits or security fixes; otherwise you can skip it.
What should I do if the flash fails?
Power down safely and use the motherboard's recovery options or a secondary BIOS if available. Consult ASUS support for model-specific recovery steps and avoid repeated flashes without guidance.
If flash fails, use recovery options or contact ASUS for model-specific steps.
Is a Windows-based BIOS updater safe to use?
Windows-based updater tools can work well, but they introduce OS-related risk. Ensure the tool is official, and run on a stable system with adequate power.
Windows tools can work but carry more OS-related risk; prefer official tools and a stable environment.
How do I verify the update after reboot?
Check the BIOS version first in the BIOS splash screen, then confirm it within the BIOS setup. Boot into Windows and verify peripheral and hardware changes reflect compatibility updates.
Check BIOS version on boot, then verify in BIOS setup and OS.
Do I need to back up data before updating?
Yes. Back up important files as a precaution against unforeseen issues during flashing. A simple file backup reduces stress if recovery steps are needed.
Always back up important files before updating.
Watch Video
What to Remember
- Prepare with exact model and official BIOS file
- Choose a stable power source and backup data
- Follow ASUS EZ Flash or Windows-based tools carefully
- Verify BIOS version after reboot
- Have a recovery plan ready in case of failure