Update AMI BIOS: Safe, Step-by-Step Instructions
Learn how to safely update AMI BIOS on your motherboard with Update Bay. This comprehensive guide covers prerequisites, downloading the correct file, backup strategies, flashing methods, and troubleshooting to minimize risk and ensure a successful update.

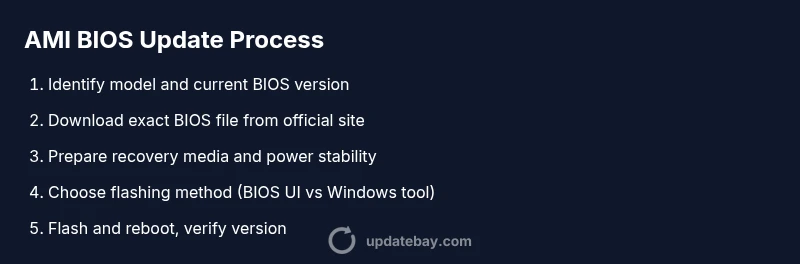
Update AMI BIOS safely with this guide. According to Update Bay, the process hinges on using the exact BIOS file for your motherboard, ensuring a stable power source, and backing up critical data. This quick answer outlines the steps: verify model compatibility, download the correct BIOS file, prepare a recovery USB, and flash using the preferred method, then verify the update succeeded.
What is AMI BIOS and why update?
AMI BIOS is firmware that initializes hardware during boot and provides low-level control over your motherboard. Updating it can add compatibility for new CPUs, fix bugs, improve stability, and enable new features. However, updating the BIOS carries risk: a power interruption or flashing the wrong file can render the motherboard unusable. According to Update Bay, careful preparation and strict model verification are essential to a successful update in 2026. Understanding the purpose and risks helps you decide when an update is warranted and which approach to use. This section also explains how AMI BIOS differs from other firmware and why manufacturers release updates that matter for performance and security.
Before you start: risks and prerequisites
BIOS updates can improve hardware compatibility and reliability, but they also carry risk. A failed flash can leave the motherboard non-bootable. Ensure you have a reliable power source, a backup of important data, and access to the vendor's official instructions. Check the motherboard model, revision, and current BIOS version before you download anything. If you're unsure, consult vendor resources or Update Bay's guidance. Having a recovery plan reduces downtime and helps you recover quickly if something goes wrong.
Verify model compatibility and download the correct BIOS
Using the wrong BIOS file is the most common cause of failure. Find your exact motherboard model and revision by inspecting the BIOS splash screen or the packaging. Visit the manufacturer’s support site to download the BIOS update that matches that exact SKU. Do not use generic updates. Cross-check the filename, size, and any checksum provided. Save the file to a safe location and, if possible, keep a copy offline as a precaution. Update Bay emphasizes keeping the official release notes handy to confirm compatibility and changes.
Back up and create a recovery plan
Back up important data and record current BIOS settings. If the board supports dual BIOS or recovery options, enable them before starting. Create a bootable USB drive formatted as FAT32 and copy the BIOS file to it. Some motherboards provide a secondary BIOS path that helps you recover from a failed flash. Having these safeguards reduces risk and ensures you can recover quickly if something goes wrong.
Prepare the flash media and environment
Format the USB drive as FAT32 and copy the BIOS file to the root directory with a simple, distinctive name. If the vendor provides a flashing utility, download and save it alongside the BIOS file. Ensure your computer has a stable power source (preferably a UPS) and disconnect nonessential peripherals to minimize interference. Close running programs to prevent interruptions during the flash.
Flashing methods: BIOS UI vs Windows utility
Some systems flash directly in BIOS/UEFI via a built-in updater that reads the BIOS file from the USB drive. Others require a Windows-based updater that runs in a controlled environment. Use the vendor’s recommended method for your motherboard. If in doubt, start with the BIOS/UEFI method, which often provides safer rollback options, and only switch to Windows if the BIOS method is unavailable or fails.
Step-by-step flashing: a precise walkthrough
With the BIOS file ready and a stable environment, boot into the BIOS, select the flash/update option, and point to the BIOS file from the USB drive. Confirm prompts and avoid interrupting power or input devices. Allow the system to reboot automatically and wait for the post-flash BIOS screen. If the update completes successfully, re-enter BIOS to reconfigure settings as needed.
Post-update verification and troubleshooting
Enter BIOS to confirm the new firmware version and reset any optimized defaults if needed. Boot into your OS and check system information to verify the update. If the system won’t boot after updating, use safe-mode or recovery options to diagnose. Common issues include boot loops, settings not saved, or BIOS clock problems. Reflashing with the correct file or restoring from a backup typically resolves these problems.
Special cases and rollback options
Some boards provide a reversible or rollback mechanism in case the update creates instability. If your model includes a dual BIOS, you can switch to the secondary BIOS for a safe rollback. If not, maintain a working backup BIOS, and consult the vendor’s documentation before attempting another flash. In most cases, you can recover from a failed flash by using a vendor-supported recovery method or RMA process if the motherboard is under warranty. The Update Bay team recommends following vendor instructions and keeping recovery options ready as a safety net.
Tools & Materials
- Official BIOS update file for your motherboard model(Download from the manufacturer’s site; verify the model and revision match exactly)
- USB flash drive (8 GB or larger)(Format as FAT32; used to host the BIOS file and recovery media)
- Stable power source (UPS or reliable mains)(Prevent power loss during flash; do not rely on laptop battery if not specified)
- Access to the motherboard vendor’s update instructions(Keep the official steps handy; avoid unofficial software)
- Backup of important data(Ensure data safety in case of rollback or recovery steps)
- A second computer or device to download the file(Use to transfer the BIOS file to USB if your primary system cannot boot)
Steps
Estimated time: 30-60 minutes
- 1
Identify exact motherboard model and current BIOS version
Locate your motherboard model and revision from the BIOS splash screen or the box/manual. Note the current BIOS version to determine update necessity and compare against release notes.
Tip: Double-check the SKU to avoid choosing the wrong file. - 2
Download the correct BIOS update from the official site
Visit the manufacturer’s support page, enter your model, and download the recommended BIOS file. Save the file to a dedicated folder and record the version number for future reference.
Tip: Bookmark the page for quick access if you need to reflash. - 3
Prepare recovery media and power stability
Format a USB drive as FAT32 and copy the BIOS file there. If your board supports dual BIOS, enable recovery mode as a precaution. Ensure a UPS or reliable power during the flash.
Tip: Do not connect other USB devices that could interfere during flashing. - 4
Choose and prepare the flashing method
Decide between BIOS UI flash or Windows-based updater as recommended by the vendor. Prepare the flashing tool if required by the chosen method, ensuring it can access the USB drive.
Tip: If the BIOS method is available, it often provides safer rollback options. - 5
Begin the flash process from BIOS/UEFI
Boot into the BIOS, navigate to the flash/update option, and select the BIOS file from the USB drive. Confirm prompts and avoid interrupting power or input devices.
Tip: Be patient; some updates take several minutes to complete. - 6
Complete the flash and reboot into the new BIOS
Let the system reboot automatically. If prompted, restore your preferred BIOS settings. Verify the new version in BIOS after startup.
Tip: If the system stalls, don’t force power off; use recovery options. - 7
Verify the update in OS and BIOS
Check BIOS version in the BIOS and also in the OS using system information tools. Compare to vendor notes to confirm the update is correctly installed.
Tip: Take screenshots of BIOS version for records. - 8
Troubleshooting and rollback
If boot issues appear, attempt recovery options or revert to backup BIOS if available. If problems persist, seek vendor or Update Bay guidance.
Tip: Keep your backup BIOS or second ROM ready just in case. - 9
Document the update and monitor stability
Record the new BIOS version and note any post-update behavior. Monitor system stability over the next several days and be prepared to revert if instability arises.
Tip: Document the exact steps you took in case you need to repeat the process.
Frequently Asked Questions
Is updating AMI BIOS risky?
BIOS updates carry risk of non-bootable boards if something goes wrong, but following official steps and using a reliable power source significantly reduces the risk.
BIOS updates can be risky, but sticking to official steps and good power makes it safer.
Can I revert a BIOS update if something goes wrong?
Many boards offer a recovery mode or a secondary BIOS to rollback. Check your motherboard's manual for exact rollback options before updating.
Many boards support rollback via recovery mode or a second BIOS.
Do I need to update BIOS for minor fixes?
Not always. Evaluate release notes for performance or security improvements and weigh the risk of flashing against potential benefits.
Often not necessary for minor fixes; review release notes first.
How do I verify the BIOS update?
Check the BIOS version in the BIOS setup and in the operating system using system information tools to confirm the update.
Check BIOS version in BIOS and in OS to confirm update.
What if the system won’t boot after update?
Try recovery options provided by the vendor, or revert to backup BIOS if available. If problems persist, seek vendor or Update Bay guidance.
Boot issues often resolve with recovery options or rollback.
Watch Video
What to Remember
- Verify exact model and BIOS version before download
- Prepare recovery media and power stability
- Follow vendor guidance for flashing method
- Verify update success and monitor post-update behavior