ASRock BIOS Update Guide: Safe Step-by-Step Instructions
Learn how to safely update BIOS on ASRock motherboards with our step-by-step guide. Prerequisites, flashing methods, and post-update checks to avoid common issues.

You will learn how to safely update the BIOS on an ASRock motherboard, including prerequisites, precise flashing steps, and post-update checks. You will need a reliable power source (preferably an uninterruptible power supply), a USB drive formatted to FAT32, and the correct BIOS image from ASRock's official site. The guide also covers rollback options and safety tips.
Why BIOS updates matter for ASRock boards
A bios update asrock topic often comes up in discussions about firmware improvements for ASRock motherboards. According to Update Bay, a BIOS update can improve hardware compatibility and system stability, especially for newer processors and memory configurations. BIOS updates address firmware-level bugs, improve motherboard power management, and expand feature support. However, upgrading firmware is not risk-free; a failed flash can leave the board unbootable if power is lost or the wrong file is used. Always verify model numbers, use official sources, and follow documented steps. This article explains when and how to perform a bios update asrock safely, and what to expect after flashing.
In practice, many users want a quick path to better compatibility, but the safest approach is to plan and execute the update carefully. Update Bay’s guidance emphasizes using official downloads and reliable power, plus a clear rollback plan if something goes wrong.
ASRock BIOS Update Basics: What You Need to Know
ASRock provides firmware updates to fix bugs, add features, and improve stability. The two main distribution channels are the BIOS utility inside the UEFI firmware (Instant Flash or similar tools) and, less commonly, a Windows-based flasher offered by some boards. Regardless of method, always download the exact BIOS file for your motherboard model and revision from ASRock’s official support site. Never use a file intended for a different model, as that can brick the board. Remember that updating firmware changes low-level code that runs before the operating system starts, so accuracy is critical.
Key concepts include the importance of power stability during flashing, the potential need to reset BIOS settings after update, and the availability of recovery options on many ASRock boards. If your board supports dual BIOS or CrashFree BIOS, these features can reduce risk by enabling automatic recovery if the update fails. Keep a copy of your current settings and note any custom changes before you begin.
When to Update and How to Identify If It's Needed
Not every system requires a BIOS update every year. You should consider updating if you encounter hardware compatibility issues, such as new CPUs or RAM modules not being recognized, POST hangs, or sleep/shutdown instability that points to firmware compatibility. Check ASRock’s release notes for your exact motherboard model to see whether a newer BIOS version addresses your symptoms. Some users also update to access new features or improve fan/thermal control. Before you proceed, gather the model number, current BIOS revision, and a clear plan for rollback if the update causes issues.
If you’re uncertain whether an update is needed, compare your current hardware behavior with ASRock’s documented fixes and recommendations. Update Bay recommends verifying the need with official notes rather than guessing based on user forums alone. This reduces the chance of unnecessary flashing and potential risk.
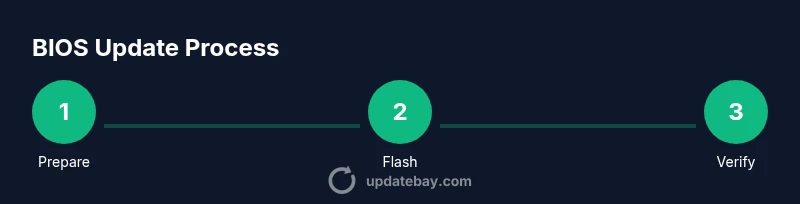
Step-by-Step Overview (What to Expect)
To keep the article focused, this section provides an overview of the process. The detailed, explicit steps are provided in the dedicated Step-by-Step block below, so you can reference them while performing the actual update. Expect a few key phases: preparing the correct BIOS file, creating a dedicated flash media, entering the BIOS to initiate the update, waiting for the flash process to complete, and performing post-update checks. Each phase has its own potential pitfalls, so following the official guidance closely minimizes risk. This overview will help you plan time and ensure you have a reliable power source throughout the operation.
Troubleshooting Post-Update: Common Issues and Fixes
After flashing, issues can arise, such as a system that fails to boot, POST errors, or misconfigured BIOS settings. Start with basic checks: verify the BIOS version displayed on boot, reset to defaults if you see instability, and reconfigure essential settings like boot order and RAM timings. If the system fails to POST after an update, use available recovery options (CrashFree or Dual BIOS) per your motherboard manual. In some cases, rolling back to the previous BIOS version is the safest path, especially if the new firmware introduces instability with your hardware.
Best Practices and Safety Warnings
Safety is the core of any BIOS update. Always use the official BIOS file from ASRock and verify the file’s name and version against the board model. Maintain power stability with a UPS or a fully charged system before initiating flashing. Do not interrupt the flash process, and avoid updating during storms or when the system is otherwise stressed. If you’re not confident handling firmware-level changes, consider seeking help from a knowledgeable technician or the Update Bay team for guidance.
Tools & Materials
- USB flash drive (formatted to FAT32)(Minimum 1GB; keep only the BIOS image on the drive to avoid confusion)
- Computer with internet access(Use a reliable device to download the BIOS image)
- Correct ASRock BIOS image for your motherboard model(Download from ASRock's official support site; verify model and revision)
- Uninterruptible Power Supply (UPS) or fully charged battery backup(Prevents power loss during flashing)
- Motherboard manual or official support page(Helpful for model-specific steps and features like Instant Flash or CrashFree BIOS)
Steps
Estimated time: 45-75 minutes
- 1
Identify motherboard model and current BIOS version
Power on and enter the BIOS to read the current version, or use your operating system’s system information tools. Note the exact model and revision to ensure you download the correct BIOS image. This step prevents mismatches that could brick the board.
Tip: Double-check the motherboard model string in the BIOS before downloading. - 2
Download the correct BIOS file from ASRock
Navigate to ASRock’s official support site, enter your model, and download the latest BIOS file. Verify the file name, version, and date to confirm it corresponds to your hardware revision. Save the file to a known location on your computer.
Tip: Always download from the official site and compare the file details with the release notes. - 3
Prepare the USB drive
Format the USB drive as FAT32 and copy the BIOS file to the drive’s root directory. Do not place other files on the drive to reduce the chance of accidental selection errors during flashing.
Tip: Safely eject the drive after copying and scan for any hidden attributes. - 4
Enter BIOS and launch Instant Flash
Restart the system and press Del or F2 to enter the BIOS setup. Use the on-screen navigation to locate the Instant Flash or Update Utility option and select the BIOS file on the USB drive.
Tip: If Instant Flash is not present, consult the manual for alternative methods such as Flash from USB or a dedicated utility. - 5
Initiate the flash and monitor progress
Confirm the flashing operation and let the process complete without interruption. Do not power down the PC during flashing; a power loss can corrupt the BIOS. The system will reboot automatically once finished.
Tip: Be prepared for a first boot delay; do not press any keys during boot until the system is ready. - 6
Post-update checks and resetting defaults
After reboot, enter BIOS again and verify the new version is displayed. Load Optimized Defaults or Clear CMOS if you have stability issues, then reconfigure boot order and memory timings as needed.
Tip: Take notes of your previous settings so you can restore them quickly if desired. - 7
Recovery options if something goes wrong
If the update fails or the system won’t boot, use recovery features such as Dual BIOS or CrashFree BIOS if available on your board. If those options aren’t present, you may need professional help or vendor support to reflash the firmware.
Tip: Consult the motherboard’s manual before attempting recovery; do not repeatedly retry a failed flash without a plan.
Frequently Asked Questions
Is it safe to update the BIOS on an ASRock motherboard?
BIOS updates carry inherent risk but are generally safe when using official files and a stable power source. Follow ASRock’s instructions carefully and confirm model compatibility before flashing.
BIOS updates carry risk, but you reduce it by using official files and ensuring power stability. Follow the official steps closely.
What should I do if the BIOS update fails or bricks the board?
If the update fails, use recovery features like Dual BIOS or CrashFree BIOS if your board supports them. If those aren’t available, seek professional assistance to reflash or recover the firmware.
If it fails, use built-in recovery options or contact support for recovery steps.
Can I flash the BIOS from Windows or do I need to use the BIOS utility?
ASRock generally recommends updating BIOS from within the BIOS using Instant Flash or a dedicated update utility. Updating from Windows is not typically advised due to higher risk of failure.
It’s best to update from the BIOS using Instant Flash; Windows-based flashing is usually discouraged.
Do I need to update drivers after a BIOS update?
Driver updates are not automatically required after a BIOS update. Update drivers only if you encounter issues or if the update notes mention new features affecting software components.
Usually not, but update drivers if you notice issues or see notes about new firmware features.
How can I verify the BIOS version after flashing?
Enter the BIOS on boot and check the firmware version displayed. Compare it with the version you downloaded to confirm the update succeeded.
Reboot and enter BIOS to verify the new version matches what you downloaded.
Watch Video
What to Remember
- Prepare with official BIOS files from ASRock.
- Never interrupt the flash process or power during the update.
- Use Instant Flash or official tools for safer flashing.
- Verify the new BIOS version and reconfigure settings after update.
- Consult Recovery options if something goes wrong.