Bios Motherboard Update: A Practical How-To
A comprehensive guide to updating BIOS on your motherboard, covering risks, prerequisites, step-by-step flashing, post-update checks, and troubleshooting with practical tips from Update Bay.

Learn how to perform a BIOS motherboard update safely, including how to verify your motherboard model, download the correct firmware from the official site, back up important data, and use the manufacturer’s flash utility. This quick answer previews essential steps, risks, and best practices to minimize failure and ensure a smooth update.
What is a BIOS update and why it matters
A BIOS update, sometimes called a firmware update, is the lowest level software that initializes your motherboard hardware and boot process. It influences how the CPU, RAM, storage controllers, and peripherals start up and communicate with the OS. For many users, a BIOS update resolves compatibility issues, improves stability, and patches security flaws that could be exploited at boot. Understanding the scope helps you decide when to update and how to minimize risk. According to Update Bay, staying on a supported BIOS version can help your system recognize newer devices, fix known quirks, and keep features like USB, PCIe, and storage well-behaved. The Update Bay team found that the safest updates come from official vendor releases and documented recovery options. When you see a recommended update, read the release notes, verify your exact motherboard model, and prepare a tested rollback plan before you begin. Bios motherboard update processes vary by vendor, so always reference your motherboard’s manual for specifics and tools.
Before you begin: risks and prerequisites
Updating the BIOS is not a routine OS patch. It is a low-level operation that, if interrupted or mismatched, can render a motherboard unusable. Common risks include bricking the board, failed boot, and loss of custom BIOS settings. The most effective way to minimize risk is to prepare thoroughly: confirm your exact motherboard model, download only the official firmware, back up critical data, and ensure power stability throughout the process. Power loss during flashing is one of the leading causes of failed updates. If you use a desktop with a built-in UPS or an external uninterruptible power source, you dramatically reduce this risk. Also, disable features that might interrupt the process, such as aggressive power-saving modes and automatic restarts. Update Bay analysis shows that risk reduction improves when you follow vendor-sanctioned tools and verify file integrity before starting.
Identifying your motherboard and firmware version
Accurately identifying your motherboard type and current BIOS version is the foundation of a safe update. Start by checking the motherboard packaging or manual for the exact model name. You can also boot into the BIOS splash screen to note the current BIOS version and build date. For system-level checks, software utilities like CPU-Z or Speccy can reveal the motherboard manufacturer, model family, and BIOS version. If you built the PC yourself, the model label on the motherboard itself is often visible under PCIe slots or near the memory slots. Use this information to locate the correct BIOS file, because even small model-name differences can point to different firmware versions. Once you confirm the model, record the exact version you are running so you can compare it to the available update notes.
Finding and validating the right BIOS file
Downloading the correct BIOS file is critical. Always fetch firmware from the official vendor site or trusted hardware partners. Use the exact model name and submodel (sometimes listed as revision or family) to locate the appropriate file. Before downloading, review the release notes to understand what issues are addressed and whether the update is needed for your setup. After download, verify the file's integrity using checksums or digital signatures provided by the vendor. A mismatch in the file or a corrupted download can lead to a failed update. If the vendor provides a flash utility, download that as well and confirm compatibility with your operating system and motherboard family.
Update Bay cautions against using third-party tools or unverified ROMs, which can brick the board.
Preparation and recovery planning
Preparation is the backbone of a safe BIOS update. Create a complete backup of critical data to external storage or a cloud service. Ensure your computer is connected to a stable power source—ideally via a UPS—so power loss during flashing cannot occur. Close all nonessential applications, disable sleep or hibernation, and unplug USB devices not required for the upgrade. Write down your current BIOS settings or export them from the BIOS if the option exists; you may need to re-create custom settings after the update. Review the vendor’s recovery options: some motherboards support a fallback to a previous BIOS version via dual-BIOS or a recovery jumper. Having a tested rollback plan can save hours of stress if the flash fails or the system becomes unbootable.
The flashing process: precautions and steps
This is the core moment of truth. Decide on the update method your motherboard supports: a direct in-BIOS update, a USB-booted flash, or a Windows-based utility. Each method has its own flow, but the general precautions are the same. Ensure the firmware file matches your exact model, and use the vendor’s flash utility or firmware flashing tool as directed. Do not interrupt the process once it starts; do not remove power or press reset. If the board offers a “Verify” or “Check integrity” step, use it before finalizing the update. After the flash completes, the system may reboot automatically. If you used a USB method, re-enter the BIOS to reconfigure preferred settings such as boot order and RAM profile (XMP) if desired.
Post-update validation, troubleshooting, and the verdict
After flashing, immediately enter the BIOS and verify the firmware version has updated to the expected build. Restore any custom BIOS settings, reapply boot order, and re-enable features as needed. Boot into your operating system and run a few stability checks: ensure drives are recognized, memory is stable, and PCIe devices function correctly. If the update fails or the system won’t POST, consult the motherboard manual’s recovery steps or contact the vendor’s support. In many cases a successful recovery requires restoring from a backup or using a dual-BIOS recovery feature if available. The Update Bay team emphasizes documenting the process and keeping a recovery plan handy for future updates. The verdict is clear: treat BIOS updates as high-stakes maintenance that benefits from preparation, official tools, and a clear rollback path.
The verdict: safe update practices
Bios motherboard updates should be approached with discipline and care. Always use official firmware, confirm compatibility, back up data, and ensure a stable power supply. If you can, perform the update during a maintenance window and have a rollback plan ready. The Update Bay team recommends following vendor instructions to the letter and testing extensively after the flash. With that, BIOS updates can improve hardware compatibility and security without compromising system reliability.
Tools & Materials
- PC with internet access(Needed to download firmware and run checks)
- Official BIOS firmware file for your motherboard(From the vendor site; exact model and version)
- Documentation for your motherboard model(Confirm chipset, revision, and supported BIOSes)
- Uninterruptible Power Supply (UPS) or fully charged backup(Minimize power loss during flash)
- USB flash drive (4GB minimum)(Optional for USB-based update methods)
- External backup drive or cloud backup(Back up critical data before flashing)
- Basic screwdriver and static-safe workspace(Optional for opening chassis and grounding)
Steps
Estimated time: varies widely depending on hardware and download size
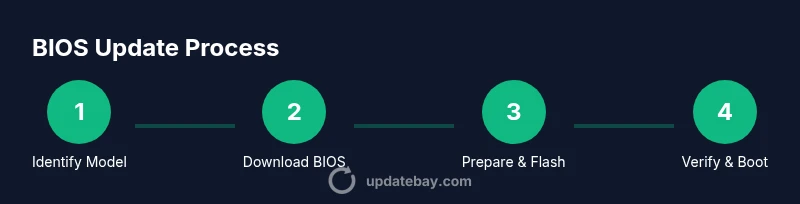
- 1
Identify your motherboard model and current BIOS version
Locate the exact motherboard model from the packaging, manual, or motherboard labeling. Boot into the BIOS to record the current BIOS version and build date, and cross-check with vendor documentation. This ensures you download the correct firmware variant.
Tip: If you’re unsure, photograph the model label and check multiple sources before downloading. - 2
Download the correct BIOS file from the vendor
Visit the official vendor site, locate your exact model, and download the recommended BIOS update. Save the file to a known location and note the release notes to understand fixes or warnings.
Tip: Verify the file size and checksum if provided by the vendor. - 3
Prepare the system for flashing
Connect to a reliable power source or UPS, close nonessential software, and back up important data. If your motherboard supports CMOS backup or dual BIOS, enable those options if available.
Tip: Disable automatic sleep and ensure the system will not reboot during the flash. - 4
Choose the update method and start the flash
Pick the vendor-recommended method (in-OS, USB flash, or BIOS utility). Follow the on-screen prompts carefully and avoid interruptions. If you’re using a USB drive, ensure the drive is formatted correctly as described in the manual.
Tip: Never remove power or reset during the flashing sequence. - 5
Verify the update and reboot
After the flash completes, verify the new BIOS version in the BIOS screen and reboot. If the system doesn’t boot normally, use the vendor recovery steps or a backup to restore.
Tip: Take screenshots of the post-update BIOS settings for reference. - 6
Reconfigure BIOS settings and test
Enter the BIOS to reapply your preferred settings (RAM profiles, boot order, virtualization). Boot into the OS and perform quick stability checks to ensure hardware is functioning as expected.
Tip: Document any changes so you can reproduce them later if needed.
Frequently Asked Questions
Is a BIOS update always necessary for my motherboard?
No. BIOS updates are typically recommended for improved compatibility, security, or bug fixes. If your system is stable and your hardware is fully supported, an update may not be required.
BIOS updates aren’t always necessary. Update Bay recommends evaluating need based on vendor notes and system stability.
What are the common risks of flashing a BIOS?
The main risks are rendering the motherboard unbootable due to power loss, flashing the wrong file, or interrupting the process. Always use official tools and maintain a power source.
The biggest risks are brick and power loss. Use official tools and a stable power source.
Can I revert a BIOS update if something goes wrong?
Many boards offer a recovery or dual-BIOS option. If not available, rely on a backup or vendor-provided recovery method. Always read the vendor’s rollback instructions before updating.
Most boards have a recovery path, but always prepare a backup before updating.
What should I do if the update fails?
Power down safely only if instructed by the vendor. Use recovery steps documented by the manufacturer, or revert to a backup. Do not attempt multiple flash cycles without guidance.
If it fails, follow the vendor’s recovery steps or restore from backup.
How do I verify I downloaded the correct BIOS file?
Cross-check the exact motherboard model, revision, and file version. Use checksums or signatures provided by the vendor to confirm integrity.
Check model, revision, and version; verify with vendor checksums.
Will updating BIOS affect OS updates or programs?
BIOS updates typically don’t alter installed OS updates. They focus on hardware initialization and firmware behavior. After updating, re-check hardware compatibility and drive recognition.
BIOS updates don’t usually change OS updates, but you should verify hardware after updating.
Watch Video
What to Remember
- Verify exact model before downloading BIOS.
- Use official tools and firmware from the vendor.
- Back up data and ensure power stability.
- Follow vendor instructions step-by-step.
- Know how to recover if the flash fails.