Intel BIOS Update: Safe Step-by-Step Guide
A practical, safety-focused guide to performing an Intel-based BIOS update. Learn prerequisites, sources, USB prep, flashing steps, verification, and post-update maintenance with clear, tested instructions.

This guide helps you perform a safe BIOS update on an Intel-based system. You’ll learn to identify your motherboard or laptop model, obtain the correct BIOS file from official sources, prepare a USB drive, flash the BIOS via BIOS/UEFI, and verify success—minimizing risk and avoiding common mistakes. Always back up data and ensure power stability before starting.
What is a BIOS update and why it matters for Intel systems
A BIOS update (basic input/output system) is a firmware upgrade that improves hardware compatibility, stability, and sometimes security for Intel-powered machines. In modern PCs and laptops, the BIOS initializes CPU cores, memory, and I/O devices at startup. While updates are not routine for every user, applying the correct BIOS update from the manufacturer can resolve firmware bugs, add compatibility with new hardware, and improve system reliability. When you see a security bulletin or a compatibility note from Intel or your motherboard maker, a BIOS update may be part of the recommended maintenance. In this guide we’ll refer specifically to the intel corporation bios update concept and explain how to perform it safely with minimal risk. Throughout, you’ll notice practical steps, safety checks, and clear decision points to help both tech enthusiasts and everyday users.
Before you start: prerequisites, backups, and safety cautions
BIOS flashing is powerful but potentially risky. Before you touch firmware, perform a full data backup and ensure you have a stable power source. If you’re on a laptop, connect to AC power and disable sleep during the process. Confirm you’re using the exact BIOS file for your system model and revision. Mismatching BIOS files can brick the motherboard. Keep a bootable USB drive with at least 4GB of free space, and download the BIOS package only from official sources. If your vendor provides a recovery jumper or dual BIOS feature, note how to trigger it in case the update goes wrong. This prep step minimizes risk and sets you up for a successful intel corporation bios update.
How Intel and motherboard vendors distribute BIOS updates
Intel and motherboard manufacturers distribute BIOS updates as firmware packages that include a BIOS image and a flashing utility. These packages are model-specific, often tied to a motherboard revision or a laptop configuration. Always source the update from the official site for your exact motherboard or OEM device. Some brands bundle the update in a Windows-based utility; others require flashing from the UEFI interface. The consistent rule is to match the update to your exact hardware ID and BIOS revision. This avoids incompatibilities and ensures you receive the intended enhancements or fixes from the intel corporation bios update workflow.
Step-by-step flow for updating an Intel BIOS safely
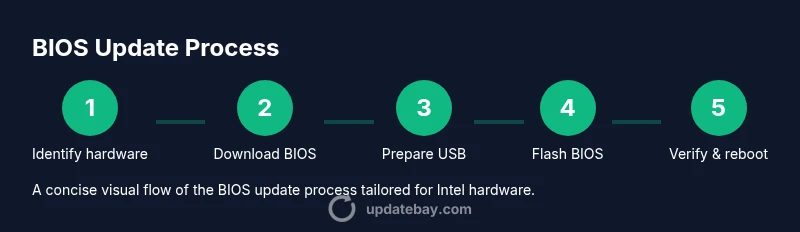
A successful intel corporation bios update follows a disciplined flow: identify hardware, download the correct BIOS, prepare a clean flash medium, perform the flash in a controlled environment, and verify the update. Keep the device plugged in, never interrupt the flash process, and confirm post-update functionality. If the device does not boot after flashing, use the recovery options documented by the manufacturer. This section expands on each phase to help you navigate potential pitfalls with confidence.
Common pitfalls and troubleshooting tips
Common issues include flashing the wrong BIOS version, power interruption during flash, and attempts to flash on unsupported hardware. Always verify model numbers, revisions, and region codes. If the update fails, don’t attempt to flash again immediately; consult the OEM recovery procedures and consider seeking help from official support channels. For troubleshooters, collect error codes, LED indicators, and BIOS beep patterns, then cross-check them with the manufacturer’s guidance. Remember, patience and adherence to the exact file are your best defense against a failed intel corporation bios update.
Post-update verification and maintenance
After flashing, enter the BIOS setup to verify version numbers, boot order, and hardware health indicators. Run a quick hardware check (memory, storage, USB devices) and ensure that Windows or your OS boots normally. Update any dependent software (chipset drivers, firmware management tools) if advised by the OEM. Keep a note of the new BIOS version, the date, and the exact model used for traceability. Regular maintenance includes monitoring for firmware advisories and scheduling future updates only when necessary to avoid unnecessary risk.
Tools & Materials
- Official BIOS file from motherboard/OEM provider(Download the exact model and revision; use a stable internet connection.)
- USB flash drive (4GB minimum)(Format to FAT32 or as required by the updater; ensure no important files on the drive.)
- AC power source connected (laptop) or a reliable desktop power supply(Avoid power loss during flash; use a surge-protected outlet.)
- Backup of important data(BIOS updates are low-risk but data protection is essential in case of failure.)
- Motherboard manual or OEM flashing guide(Helpful for model-specific steps or recovery options.)
- Static-free workspace(Ground yourself and avoid electrostatic discharge during handling.)
Steps
Estimated time: 30-60 minutes
- 1
Identify system model and current BIOS
Power on and enter the BIOS/UEFI or use system information tools to confirm the exact motherboard or laptop model and current BIOS revision. This ensures you download the correct intel corporation bios update file. Cross-check with the OEM’s site to avoid mismatches.
Tip: Take a photo of the BIOS splash screen for reference and note the precise motherboard revision. - 2
Download the correct BIOS package
From the official manufacturer or OEM support page, locate the BIOS update that matches your exact model and revision. Save the file to the USB drive or a separate folder on your PC for easy access during flashing. Do not rename the file if the updater expects a specific name.
Tip: If there are multiple firmware components, download all related files and read the release notes. - 3
Prepare the flash media
Format the USB drive as directed by the updater (usually FAT32). Copy the BIOS package and any required flashing utility to the drive. Safeguard any existing data on the drive and ensure the drive is writable.
Tip: Eject other drives to prevent accidental selection during flashing. - 4
Enter the flashing environment
Reboot and enter the BIOS/UEFI or use a vendor-provided flashing tool. Initiate the BIOS flash from the designated menu (often labeled Update, Flash, or EZ Flash). Do not interrupt power or close the laptop lid during the process.
Tip: If the system has dual BIOS, consider enabling recovery mode before flashing. - 5
Execute the update and monitor progress
Start the update and wait for the flash to complete. Some systems display a progress bar; others show a status message. Do not turn off the device or remove the USB until the process reports completion.
Tip: If the update fails, use the OEM recovery procedure rather than retrying immediately. - 6
Post-flash verification
After reboot, re-enter BIOS to verify the new version is installed. Boot into the OS and check system information and stability. Run basic hardware tests and ensure all peripherals function as expected.
Tip: Document the new BIOS version and keep the backup data until you’re confident in stability.
Frequently Asked Questions
Do I need an internet connection to update BIOS?
Most BIOS updates require a download from an official source, which needs internet access. Some OEM utilities can flash from a USB drive offline if the file has already been downloaded. Always follow the vendor’s guidance for online/offline update methods.
In most cases you’ll need internet to download the BIOS file, but some OEMs allow offline updates from a USB drive if you already downloaded the file.
What happens if the update fails?
If a flash fails, do not reboot repeatedly. Use the vendor’s recovery or dual-BIOS options if available. Refer to the OEM’s recovery guide and contact official support if needed.
If the flash fails, use the vendor’s recovery options and contact support rather than retrying blindly.
Can BIOS updates fix performance issues?
BIOS updates can address compatibility and stability, which may indirectly improve performance or reduce boot issues. They are not a substitute for OS or software updates when addressing performance problems.
BIOS updates can fix stability issues that indirectly affect performance, but they’re not a general speed boost.
How often should I update BIOS?
BIOS updates should be performed when the vendor issues a critical bug fix, security patch, or hardware compatibility improvement for your exact model. Do not update routinely without a clear reason.
Only update when there’s a documented benefit or security fix for your model.
Is it safe to use BIOS recovery if something goes wrong?
Yes, most devices have a recovery path such as a dual-BIOS or a recovery jumper. Follow the OEM’s instructions precisely to restore functionality.
Recovery paths exist for many devices; follow the manufacturer’s steps exactly to restore your system.
Should I update BIOS if my system runs fine?
If the system is stable and there are no documented issues affecting you, updating is optional. Weigh the risk against potential benefits described in release notes.
If everything works, you can skip the BIOS update unless there’s a documented need.
Watch Video
What to Remember
- Identify exact hardware model and BIOS revision before updating.
- Download BIOS only from official sources to prevent bricking.
- Maintain power stability and backup data throughout.
- Verify the new BIOS after flashing and document the update.