How to Update a Video Card: A Complete 2026 Guide
A practical, step-by-step guide from Update Bay on updating your video card—drivers first, hardware upgrades second—so you get better gaming, editing, and everyday performance in 2026.

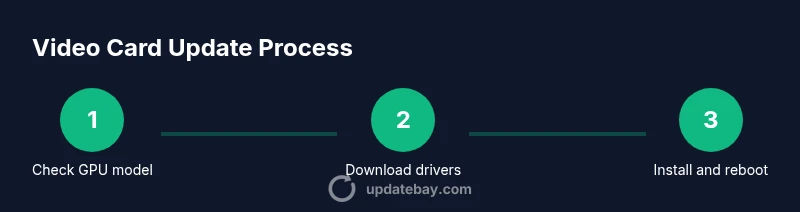
Update Bay presents a practical, step-by-step guide to updating a video card, covering both software drivers and hardware upgrades. You will confirm compatibility, install the latest drivers, and safely install a new card if you’re upgrading. This steps-based approach covers software updates first, then hardware considerations for a complete, risk-aware GPU refresh.
Why Update Your Video Card Matters
According to Update Bay, keeping your video card up to date ensures optimal performance, stability, and compatibility with new games and software. The Update Bay team found that driver updates can resolve stuttering, improve frame pacing, and fix GPU firmware vulnerabilities. Whether you're gaming, editing, or using VR, a current GPU can extend hardware life and improve power efficiency. This section explains why software drivers and hardware upgrades matter and how to approach each path with confidence.
A modern PC benefits from routine GPU maintenance for several reasons. First, drivers expose optimizations for the latest titles, enabling better frame rates and smoother visuals. Second, firmware updates can address security flaws and improve compatibility with monitor HDR features and new display standards. Third, new cards often include architectural improvements that reduce power draw and heat output, which translates into quieter fans and longer component life. Finally, software ecosystems—such as game launchers and content-creation apps—tend to rely on up-to-date drivers to ensure feature support (like ray tracing, DLSS/FSR, and Vulkan/OpenGL optimizations). Following a disciplined update cadence helps you avoid surprises when a big gaming patch lands or a productivity workload changes.
From a user perspective, there are two practical paths to consider: software driver updates and hardware upgrades. Software updates are usually the simplest and least disruptive, often delivered automatically through operating system tools or vendor software. Hardware upgrades, while more involved, can yield substantial performance gains if your current GPU bottlenecks your workflow. The key is to assess your usage, budget, and system compatibility before deciding which route to take.
Software vs Hardware: What 'update video card' Means
The phrase update video card can refer to two distinct activities: software updates to the graphics driver and a hardware upgrade by swapping the card. Software updates typically deliver performance improvements, bug fixes, and security patches without changing your PC’s hardware. Hardware upgrades, meanwhile, involve selecting a compatible card, installing it in the PCIe slot, and ensuring the power supply and case have adequate room and connectors. Understanding the distinction helps you plan a cost-effective, low-risk upgrade path and prevents wasted effort when a driver update alone suffices.
For most users, starting with software updates is the best first step. If you still encounter bottlenecks in your favorite titles or demanding workloads, then evaluating a GPU upgrade makes sense. In 2026, many mid-range cards can handle contemporary gaming at 1080p with stable frame rates, while high-refresh-rate monitors benefit most from newer architectures. A clear plan prevents overbuying and helps you optimize the upgrade for your specific needs, whether you’re chasing higher frame rates, better ray tracing, or improved compute performance for content creation.
How to Update GPU Drivers
Keeping GPU drivers current is the most common and safest way to improve performance without touching hardware. Start by identifying your GPU vendor (NVIDIA, AMD, or Intel) and the exact model. Then download the latest driver from the official vendor site or use the vendor’s companion software (GeForce Experience for NVIDIA, Radeon Software for AMD). A clean installation is often best to avoid lingering conflicts.
First, confirm your operating system and GPU model using a system information tool or the Device Manager. Next, download the driver package from the official source. During installation, choose the custom or advanced installation option and opt for a clean install if offered. After the process finishes, reboot the PC and open the vendor control panel to verify the driver version and basic GPU settings. If you encounter issues like leftover artifacts or instability, consider a deeper clean using a dedicated cleanup tool in safe mode, then reinstall the latest driver.
If you use Windows, driver updates can also come through Windows Update, but they may lag behind the manufacturer’s latest release. In those cases, installing directly from the vendor site ensures you’re getting the newest optimizations for your game library and any professional software you rely on. Always back up important data before major driver changes and keep a system restore point handy in case you need to revert.
Upgrading or Installing a New Video Card (Hardware Update)
When software updates aren’t enough, hardware upgrades become a viable path to improved gaming performance or better compute capabilities. Start by confirming your motherboard has a compatible PCIe x16 slot and that your power supply can handle the new card’s peak draw. Check the physical clearance inside your case to ensure the card will fit and that there’s adequate airflow. If you’re replacing an older card, document cable routes and remove any existing adapters carefully.
Choose a GPU that aligns with your workload and budget. For gaming at 1080p, a mid-range model often provides a smooth experience at high settings; for 1440p or 4K, you’ll want something more capable. Read reviews and verify compatibility with your system’s power connectors (6-pin, 8-pin, or newer PCIe power standards). After physically installing the card into the PCIe slot, secure it with screws, connect any required PCIe power cables, and ensure the card is seated firmly. Reassemble the case, boot the system, and install the appropriate drivers. Often, the first boot will automatically install basic drivers, but you should run the official installer to enable full features like ray tracing and upscaling.
Finally, adjust BIOS/UEFI settings if necessary (some systems require disabling integrated graphics when a discrete GPU is installed) and verify post-install performance with a few representative workloads. If you encounter issues such as no video output or system instability after installation, double-check seating, power connections, and BIOS settings, then consult the GPU vendor’s troubleshooting guide.
Compatibility, Safety, and Power Considerations
Before purchasing or installing a new card, assess compatibility and safety. Verify the motherboard supports PCIe x16 bandwidth and that your case has room for the new card’s length and width. Check your power supply unit (PSU) capacity and ensure it has the required PCIe power connectors. If your PSU is undersized, a high-performance GPU can cause boot failures or system instability. Take time to calculate total power draw for your system, including CPU, GPU, RAM, drives, and peripherals. If you’re unsure, consult a power supply calculator from a reputable source or the card’s manufacturer.
Electrostatic discharge (ESD) safety is critical when handling components. Use an anti-static wrist strap or ground yourself by touching a metal surface before touching any internal parts. Handle the card by its edges and avoid touching gold connectors or the fan blades. When in doubt, perform the upgrade on a non-working day or in a controlled environment (clean desk, minimal static sources). Finally, be mindful of warranty terms; some manufacturers require professional installation for warranty coverage to remain valid.
For modern PCs, a GPU upgrade can also influence cooling profiles and case airflow. If you add a card with a higher TGP (total graphics power) than the previous model, you may need to improve airflow with additional case fans or a better CPU cooler. Small changes in configuration can yield meaningful performance and thermal benefits.
Troubleshooting Common GPU Update Issues
GPU updates often fix problems, but they can also introduce new ones. A stable installation should yield clean boot and expected graphics features. If you see a black screen after updating drivers, try entering Safe Mode and rolling back to a previous driver version. If artifacts appear or you notice driver-timeout errors, perform a clean installation of the latest driver after removing existing ones with a cleanup tool in Safe Mode. Check for BIOS updates for the motherboard and ensure your GPU is properly seated. Power cycle the system after driver changes and verify the GPU is detected in Device Manager or the vendor’s control panel.
If performance dips after a hardware upgrade, verify that the card is not throttling due to heat. Clean dust from fans and heatsinks, reapply thermal paste only if you are experienced, and confirm that the fans ramp up under load. In some cases, enabling “prefer maximum performance” in the power settings or adjusting a game's graphics profile can resolve inconsistent frame pacing. When problems persist, consult the vendor’s troubleshooting resources and community forums for model-specific guidance.
Measuring Performance and Maintenance
A successful update or upgrade should translate into smoother gameplay and better data throughput in compute tasks. Use a mix of synthetic benchmarks and real-world tests to gauge improvement. For gaming, run representative titles at your target resolutions and sensitivity settings while noting average FPS, frame time consistency, and any stuttering. For creative workloads, monitor rendering times and timeline responsiveness. Tools such as built-in GPU dashboards, third‑party apps (where appropriate), and in-game overlays help you capture meaningful metrics without interrupting your session.
Maintenance matters too. Schedule regular driver checks, keep firmware up to date where applicable, and maintain clean, dust-free fans. Monitor temperatures under load; sustained highs may indicate cooling or case airflow issues rather than a driver problem. Document changes, including card model, driver version, and BIOS settings, so you can revert or reproduce the environment if you encounter issues later. A disciplined approach to updates and maintenance helps preserve performance over time.
Authority Sources
- NVIDIA Driver Downloads: https://www.nvidia.com/Download/index.aspx
- AMD Drivers: https://www.amd.com/en/support
- Intel Graphics Driver: https://www.intel.com/content/www/us/en/download-center/home.html
- Windows Hardware Lab Kit (WHQL): https://www.microsoft.com/en-us/download/details.aspx?id=30
How to Keep Your System Safe During GPU Updates
Maintaining system safety is essential when performing hardware changes. Always unplug the power and discharge capacitors before touching internal components. Use a grounded work surface and store screws and parts in labeled containers to avoid misplacement. If you’re uncertain about compatibility, consult product manuals and manufacturer support pages before purchasing parts. Keeping a written checklist helps prevent missed steps and reduces risk during the upgrade process.
Tools & Materials
- Anti-static wrist strap(Wear while handling components to prevent ESD.)
- Phillips head screwdriver(For removing case panels and PCIe bracket screws.)
- Torx screwdriver (if needed)(Some cases use Torx screws.)
- New GPU (upgrade or spare card)(Ensure PCIe x16 compatibility and adequate clearance.)
- Power supply with PCIe connectors(Check wattage and 6-pin/8-pin connector availability.)
- Thermal paste (optional)(Not typically required for GPU installation.)
- Cable ties or Velcro straps(Keep cables tidy for airflow.)
- Dust-cleaning brush or microfiber cloth(Clear dust from case before install.)
- Internet connection or USB drive with drivers(To download and install latest GPU drivers.)
Steps
Estimated time: 75-120 minutes
- 1
Identify GPU and system compatibility
Open Device Manager or System Information to confirm your GPU model, PCIe slot version, and available power connectors. Check motherboard BIOS compatibility and case clearance for the new card.
Tip: Take a photo of the current motherboard layout to guide cable routing after installation. - 2
Back up and prepare
Create a system restore point and back up critical data. Ensure you have static-safe workspace and all required tools at hand before touching components.
Tip: Work in a static-free area; avoid carpeted floors during the upgrade. - 3
Update or prepare drivers
If performing software updates first, install the latest driver package from the vendor. Consider a clean install to avoid conflicts with remnants from older drivers.
Tip: Download drivers before powering down to minimize downtime. - 4
Power down and unplug
Shut down the PC, unplug the power cord, and discharge any residual electricity by pressing the power button for a few seconds.
Tip: Do not touch the motherboard while the system is unplugged to avoid static discharge. - 5
Remove the old GPU (if upgrading)
Open the case panel, disconnect PCIe power cables, unscrew the bracket, and carefully pull the card from the PCIe slot.
Tip: Keep track of screws and the spacing of any backplate brackets. - 6
Install the new GPU
Insert the GPU firmly into the PCIe x16 slot until it clicks, secure the bracket with screws, and connect required PCIe power cables.
Tip: Ensure the card lays flat and is fully seated in the slot. - 7
Close the case and boot
Reconnect power, boot the system, and enter BIOS/UEFI if needed to set primary display to the new card. Install the latest drivers from the vendor.
Tip: If Windows doesn’t recognize the new card, reseat the card and check power connections. - 8
Final drivers and verification
Run the GPU installer, perform a clean install if offered, and reboot. Verify the driver version in the vendor control panel and check that performance improves with a quick game or benchmark.
Tip: Run a stress test to confirm stability under load. - 9
Benchmark and monitor
Compare pre- and post-upgrade benchmarks; monitor temperatures and fan speeds during gaming or rendering tasks.
Tip: Set up an alert if temperatures exceed safe thresholds.
Frequently Asked Questions
Do I need to uninstall old GPU drivers before updating?
Not always. A clean install from the official driver package is often sufficient to replace older components and remove conflicting files. If you encounter instability, a cleanup tool in Safe Mode can help remove stubborn leftovers.
In most cases, you can update drivers with a clean install. If problems persist, use a safe-mode cleanup tool to remove old drivers before reinstalling the latest version.
Can I install a new GPU without removing the old one?
Yes, you can install a second card in a multi-GPU setup if your motherboard and PSU support it. For most users, replacing an aging card is simpler and avoids potential driver conflicts.
Yes, you can upgrade by replacing the card, but only if your system supports it and you have enough power and space.
Will updating drivers fix gaming performance?
Driver updates often improve performance, fix bugs, and enable new features. If you still experience bottlenecks, consider a hardware upgrade matched to your target resolution and settings.
Updating drivers can boost performance, but if you’re still bottlenecked, you may need a hardware upgrade.
How long does a GPU driver update typically take?
Driver updates usually complete in 5-15 minutes, depending on the size of the package and your system speed. A restart is typically required to finalize changes.
Driver updates usually take around 5 to 15 minutes, plus a restart.
What should I do if Windows doesn't recognize the new GPU?
Check physical installation and power connections, reseat the card, and ensure BIOS is configured to use the discrete GPU. Update or reinstall drivers, and consult the motherboard and GPU vendor support if issues persist.
If Windows doesn’t see the card, reseat it and check BIOS and power connections, then reinstall drivers.
Do I need a bigger power supply when upgrading GPU?
Some GPUs require more power than older models. Verify total system draw and the PSU’s rated wattage and connector count. If in doubt, upgrade the PSU to ensure stable operation.
Bigger GPUs may need more power; check total draw and connector availability, and upgrade the PSU if needed.
Watch Video
What to Remember
- Verify GPU compatibility before purchase
- Start with driver updates, then upgrade if needed
- Perform clean driver install for best results
- Test with benchmarks and monitor temps after upgrade
- Document changes for future troubleshooting