How difficult is it to update to Windows 11: A practical guide
Learn how difficult it is to update to Windows 11, including hardware requirements, upgrade paths, common blockers, backups, and post-upgrade steps. A practical, step-by-step approach with tips to minimize disruption and ensure a smooth transition.

You can upgrade to Windows 11 if your PC meets the minimum hardware requirements and you have a genuine Windows license. The upgrade path usually runs through Windows Update or the PC Health Check tool, followed by a guided setup. Plan for 45-90 minutes, depending on disk space, driver readiness, and your internet speed; backups are essential.
What you need to know before upgrading
Upgrading to Windows 11 is a decision many users face each year. For most modern PCs, it's a feasible step; but success hinges on hardware and the upgrade method you choose. In practice, you’ll want to consider whether your device meets the official requirements, whether you have a valid Windows license, and whether you can safely back up your data before starting. According to Update Bay, clarity about requirements and preparation reduces surprises on upgrade day. The goal is to help readers plan a smooth transition with minimal disruption to work and personal tasks. This section lays out the big-picture considerations, including timing, backup strategies, and how to decide if Windows 11 is worth the move for your everyday needs.
Windows 11 hardware requirements explained
Microsoft sets clear minimums for Windows 11, and understanding them helps you avoid false optimism. A compatible 64-bit processor with at least two cores, 4 GB of RAM, and 64 GB of storage are the rough baselines. In addition, TPM 2.0, DirectX 12 compatible GPU with WDDM 2.0, UEFI firmware with Secure Boot capability, and an internet connection for updates are typically required. If you’re unsure, use the PC Health Check tool or the Windows Update eligibility page to confirm. Even when devices meet the minimums, some features may require specific hardware (like a newer GPU) to run optimally. Knowing these specifics helps you tailor expectations and plan for potential upgrades or a fallback.
Upgrade paths and what they mean for you
There are several legitimate upgrade routes to Windows 11. The easiest is through Windows Update on a compatible system with an up-to-date Windows 10 installation. Alternatively, you can use the Installation Assistant to force an upgrade on eligible devices, or download an ISO for a clean or in-place upgrade. Each method has trade-offs: Windows Update is typically the safest but can be slower; ISO installation gives more control but can require a clean install if you’re moving from a much older build. If you’re preparing a fleet of devices, you may want to test a small subset first to gauge compatibility and support needs.
Choosing the right upgrade method for your device
Your choice of upgrade path should reflect your goals and constraints. If you value minimal risk and preserved settings, Windows Update is usually best. If you need to upgrade several devices quickly or require a specific edition of Windows 11, Installation Assistant or ISO-based deployment might be preferable. Laptops with limited storage or older hardware might benefit from a staged upgrade, ensuring drivers and software are ready before broad rollout. Always verify driver availability and vendor support before choosing a path.
Common blockers and how to handle them
Many upgrade blockers stem from hardware or settings rather than the process itself. TPM 2.0 and Secure Boot must be enabled in UEFI, and some CPUs—even if technically compatible—may have limited feature support. If the upgrade won’t proceed, check for pending BIOS/UEFI updates, re-enable Secure Boot, or switch to a compatible boot mode. Disk space shortages, antivirus software conflicts, and VPN clients can also interfere with the upgrade; temporarily disabling non-essential software during the upgrade can help. If your device is not eligible, you may still benefit from staying on Windows 10 until security updates end.
Backups and data protection best practices
Backups are non-negotiable before attempting a major OS upgrade. Create at least two copies: one local backup on an external drive and one cloud-based backup for extra redundancy. Consider creating a system restore point and documenting your installed programs and licenses. Use a disk cleanup to free up space and verify that critical files—photos, documents, and business data—are covered. After you upgrade, confirm restore points exist and test a file restore from the backup to ensure your recovery plan works.
Driver and software compatibility considerations
Driver support can make or break a smooth upgrade. Before updating, download the latest drivers from your hardware vendors and verify compatibility with Windows 11. Some legacy peripherals may lack Windows 11 drivers, leading to functionality gaps. If you rely on specialized software, check with vendors about Windows 11 compatibility and planned updates. In the worst case, you may need to replace or retire outdated hardware or software to maintain a stable system.
Activation, licensing, and post-upgrade steps
If you’re upgrading from a genuine Windows 10 license, activation typically happens automatically with Windows 11. If activation fails, you may need to re-enter your product key or use the Activation Troubleshooter. After upgrade, install pending updates, run a fresh system scan, and verify your activation status in Settings • Update & Security • Activation. Turn on features you rely on (like virtualization or BitLocker) and reconfigure any enterprise policies or group policies if you manage a business environment.
Performance expectations and potential tradeoffs
Windows 11 often feels snappier on newer hardware thanks to optimized visuals and improved memory handling, but it can require more RAM and storage than Windows 10 on older machines. Expect changes in multitasking behavior, new interface elements, and updated apps. Some users notice longer initial update times, while others experience faster resume from sleep and quicker startup once the system is fully updated. If your device was already tight on resources, consider a hardware refresh or a longer-tail optimization plan before upgrading.
Alternatives and a safe fallback plan
If Windows 11 isn’t a good fit right now, staying on Windows 10 is a sensible alternative, particularly for mission-critical systems or devices with limited storage. Regularly review Microsoft’s support timelines to plan your upgrade window. For many users, a phased approach—test on a secondary device before upgrading the primary one—reduces risk. Having a rollback plan and a maintenance window can help you decide when to upgrade or stay put.
Tools & Materials
- A Windows 11-eligible PC(Ensure CPU compatibility, TPM 2.0, Secure Boot, and enough storage)
- Windows 10 license or digital entitlement(Needed for activation after upgrade)
- Stable internet connection(Required for downloads, updates, and activation)
- External backup drive or cloud storage(Back up personal and work data before upgrading)
- Administrative access on the device(Needed to install updates and run upgrade tools)
- Optional: USB flash drive for ISO or Installation Assistant(Useful for offline or bulk deployments)
Steps
Estimated time: 90-180 minutes
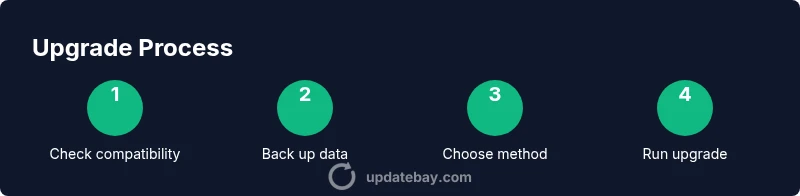
- 1
Check compatibility
Run the PC Health Check tool or Windows Update eligibility to confirm your device meets Windows 11 requirements. If not eligible, plan alternatives or a hardware upgrade path.
Tip: If you see TPM 2.0 or Secure Boot missing, you can enable them in UEFI settings and re-run the check. - 2
Back up your data
Create a full backup to an external drive and a cloud service. Verify that you can restore key files from the backup.
Tip: Document essential licenses and product keys in a secure note before upgrading. - 3
Update Windows 10
Install the latest Windows 10 updates to improve compatibility and reduce upgrade conflicts.
Tip: A fully updated Windows 10 helps smooth the transition and reduces post-upgrade fixes. - 4
Free up disk space
Ensure at least 20–40 GB free space or more if you plan to use ISO or a large backup. Run Disk Cleanup and remove temporary files.
Tip: Move large files off the system drive temporarily to speed up the upgrade. - 5
Choose an upgrade path
Decide between Windows Update, Installation Assistant, or ISO-based upgrade based on device scope and needs.
Tip: For first-timers, start with Windows Update to maximize safety and support. - 6
Run the upgrade
Launch the upgrade, monitor the progress, and avoid rebooting or interrupting power during critical phases.
Tip: Plug in the device and disable auto-restart for smoother progress tracking. - 7
Install updates and drivers
After upgrade, check for updates again, then install the latest drivers for hardware components.
Tip: If a driver is missing, check the vendor’s site for Windows 11-compatible versions. - 8
Verify activation and settings
Confirm Windows is activated, verify essential features, and reconfigure privacy and security settings.
Tip: Run a quick security scan and enable recovery features like System Restore.
Frequently Asked Questions
Is my PC eligible for Windows 11?
Eligibility depends on hardware and secure boot features. Use the PC Health Check tool or Windows Update eligibility page to confirm. Some devices may require hardware upgrades to meet minimum requirements.
Check your device with the PC Health Check tool to confirm eligibility and plan accordingly.
Do I need to reinstall apps after upgrading?
Most apps survive an in-place upgrade, but some legacy software may require reinstallation or updates. Backups help ensure you don’t lose licenses or data.
Most apps stay installed, but you may need updates or reinstallation for compatibility.
Can Windows 11 upgrades cause data loss?
A properly prepared backup minimizes risk. In rare cases, upgrade issues can affect data on a misconfigured drive, so back up first and verify restorability.
Back up first—upgrades are generally safe but not risk-free.
What if my CPU isn’t supported?
If your CPU isn’t supported, you cannot upgrade to Windows 11 through standard channels. You may stay on Windows 10 until support ends or consider hardware replacement.
If your CPU isn’t supported, upgrading isn’t an option via normal paths.
Do I still need TPM 2.0 and Secure Boot?
TPM 2.0 and Secure Boot are commonly required for Windows 11; if your system lacks these, you won’t be able to upgrade via official methods. Some devices can be updated to enable these features.
Most systems need TPM 2.0 and Secure Boot to upgrade to Windows 11.
Watch Video
What to Remember
- Verify hardware compatibility before you start.
- Back up data thoroughly and test restoration.
- Choose the upgrade path that matches your deployment scenario.
- Expect 90-180 minutes for the upgrade and post-install updates.