How to Update to Windows 11: A Step-by-Step Guide
Learn how to update to Windows 11 safely and efficiently. This comprehensive guide covers eligibility, upgrade methods, preparation, and troubleshooting with practical, step-by-step instructions and tips from Update Bay.

You can update to Windows 11 by following a clear, supported path that fits your hardware. Start with a compatibility check, then choose a method (Windows Update, Installation Assistant, or ISO) and finish with post-upgrade checks. According to Update Bay, using Windows Update is the safest, most reliable route for most eligible devices.
Why Update to Windows 11
The decision to update to Windows 11 often comes down to improved security, a refreshed and more productive interface, and ongoing feature updates. The Update Bay team found that many users experience smoother daily tasks, better security baselines, and access to newer app ecosystem features after upgrading. If your device meets the requirements, the upgrade can be a straightforward process that delivers long-term value through performance enhancements and modernized tooling. This section explains why upgrading makes sense for both tech enthusiasts and everyday users who want a current, supported Windows experience.
System requirements and eligibility
Before you start the update to Windows 11, verify your PC meets the official requirements. A compatible 64-bit processor with at least 1 GHz and 2 or more cores is needed, along with 4 GB RAM and 64 GB of storage. Your device must support UEFI, Secure Boot, and TPM 2.0, and it should have DirectX 12 compatible graphics. A display of at least 9 inches with 720p resolution and internet access are also recommended. If any criterion isn’t met, the upgrade may fail or run poorly, so plan to upgrade hardware or stay on Windows 10 until you’re ready.
Upgrade methods at a glance
There are three main routes to update to Windows 11: (1) Windows Update, (2) Windows Installation Assistant, and (3) a Windows 11 ISO for a clean or in-place upgrade. Windows Update is the simplest and most risk-averse method, especially for eligible devices. The Installation Assistant helps when Windows Update doesn’t surface the upgrade yet, while the ISO method offers full control for advanced users or business environments. Each method has its own time requirements and potential driver considerations.
Prepare your PC before the upgrade
Preparation reduces upgrade risk. Back up important files, ensure you have enough disk space, and update existing drivers. Plug in laptops to avoid power loss during installation. Pause antivirus monitoring briefly if it interferes with the upgrade, and disable nonessential startup apps to speed up the process. After backup, you’ll be ready to start the upgrade with confidence.
Authority sources and further reading
To help you verify compatibility and upgrade options, here are authoritative resources:
- Microsoft Windows 11 system requirements: https://learn.microsoft.com/en-us/windows-hardware/design/minimum/system-requirements/windows-11-supported
- Windows 11 overview and upgrade guidance: https://www.microsoft.com/en-us/windows
- The Verge Windows 11 minimum system requirements coverage: https://www.theverge.com/2021/6/24/22547185/windows-11-minimum-system-requirements-tpm-2-0
These sources provide official specifications and practical guidance to ensure you upgrade safely and with confidence.
Troubleshooting and next steps
If the upgrade stalls or reverts, don’t panic. Common issues include incompatible hardware, insufficient storage, or software conflicts. Use the rollback option within 10 days of upgrading to return to Windows 10 if needed, and recheck system requirements before attempting again. After upgrading, review device drivers and Windows updates to ensure everything runs smoothly, and customize settings for privacy and performance.
Tools & Materials
- Compatible PC meeting Windows 11 requirements(64-bit processor, 4 GB RAM, 64 GB storage, TPM 2.0, Secure Boot capable)
- Reliable internet connection(Stable bandwidth helps download updates without interruption)
- Backup storage (external drive or cloud)(Back up documents, photos, and important apps)
- Windows installation media (optional)(ISO file or Installation Assistant if not using Windows Update)
- Power source(Keep a laptop plugged in to avoid power loss during install)
- USB drive (optional)(Used if you create bootable media for ISO method)
Steps
Estimated time: 60-180 minutes
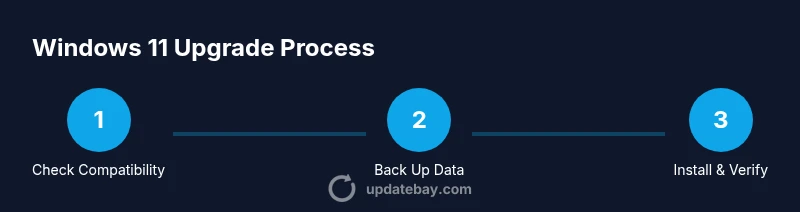
- 1
Check compatibility
Open Windows Settings and verify system compatibility for Windows 11. Use the PC Health Check tool or the official compatibility list to confirm TPM 2.0 and Secure Boot status are enabled. This step helps prevent wasted time on devices that cannot upgrade.
Tip: If your device isn’t compatible, consider hardware upgrades or staying on Windows 10 until you can upgrade. - 2
Back up your data
Create a full backup of your files and important applications. Use cloud storage or an external drive and verify the backup completes successfully. This protects your data if something goes wrong during the upgrade.
Tip: Test a few file restorations from the backup to be sure you can recover quickly. - 3
Free up disk space
Ensure you have at least 64 GB free (preferably more) to accommodate Windows 11 and updates. Run Disk Cleanup or storage sense to remove unnecessary files. A cleaner drive speeds up the upgrade process and reduces risks of installation failures.
Tip: Move large media files off the system drive if needed. - 4
Choose your upgrade path
Decide between Windows Update, Installation Assistant, or using an ISO/file-based install. Windows Update is the easiest and safest; Installation Assistant helps when Windows Update isn’t ready; ISO offers the most control for advanced users.
Tip: If you’re in a business environment, consult your IT policy before upgrading to avoid licensing or compatibility issues. - 5
Run the upgrade via Windows Update
If Windows Update shows the Windows 11 option, click Download and Install. Follow on-screen prompts, keep your device connected to power, and do not interrupt the process. The system may reboot several times during installation.
Tip: If the upgrade isn’t shown, check for updates again after some time or use the Installation Assistant as an alternative. - 6
Complete setup and verify
After installation finishes, complete the out-of-box experience, sign in with your Microsoft account, and review privacy and permissions. Open Device Manager to confirm drivers are up to date and run Windows Update once more to catch post-upgrade fixes.
Tip: Install any pending driver updates from your PC manufacturer’s site to avoid compatibility issues. - 7
If something goes wrong, revert
If the upgrade fails or you encounter instability, use the rollback option to return to Windows 10 within 10 days. Then reassess hardware compatibility, backup integrity, and driver readiness before retrying.
Tip: Document any error codes you see; they can guide troubleshooting or support conversations.
Frequently Asked Questions
Is upgrading to Windows 11 free for eligible devices?
Yes, upgrading to Windows 11 is free for devices that meet the official requirements and currently run a licensed Windows 10. If your device isn’t eligible, you may need to stay on Windows 10 until it becomes compatible.
Upgrading is free for eligible devices. If your PC isn’t compatible yet, you’ll need to stay on Windows 10 until it qualifies.
What if my PC doesn’t meet the requirements?
If your PC doesn’t meet Windows 11 requirements, you won’t be able to upgrade through official channels. You can either upgrade hardware to meet the criteria or continue using Windows 10 with security updates from Microsoft.
If your PC doesn’t meet the requirements, upgrading isn’t available officially. Consider upgrading hardware or staying on Windows 10.
How long does the upgrade take?
Upgrade duration varies by hardware and connection speed. Plan from about 30 minutes to several hours, and avoid interruptions during the process to reduce the risk of issues.
It can take from half an hour to several hours depending on hardware and internet speed. Don’t interrupt the process.
Will I lose apps or settings after upgrading?
Most user data and apps are preserved in an in-place upgrade, but some settings or apps may require reconfiguration. Backups help protect against unexpected changes.
Usually your apps and data stay, but some settings may need adjustment after the upgrade.
Can I revert to Windows 10 after upgrading?
Yes, you can revert within 10 days of upgrading by using the built-in rollback option. After that window, you’d need a clean install to revert.
You can roll back within 10 days of upgrading if you run into issues.
What should I do if Windows Update doesn’t show Windows 11?
If Windows Update doesn’t show Windows 11, try the Installation Assistant or download the ISO to perform an in-place upgrade. Ensure you meet minimum requirements and have backups ready.
If Update doesn’t show Windows 11, use the Installation Assistant or ISO as alternatives.
Watch Video
What to Remember
- Check compatibility before upgrading to avoid wasted time.
- Back up data and have a recovery plan ready.
- Choose the upgrade path that fits your needs and hardware.
- Complete post-upgrade checks to ensure drivers and apps work.