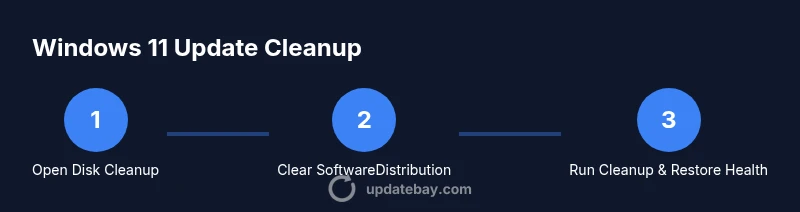
How to delete update files in Windows 11: A practical cleanup guide
Learn safe, practical steps to remove Windows Update files in Windows 11, reclaim disk space, and keep your system healthy. Start with built-in tools, then use targeted manual cleanup while avoiding essential system files.

Learn how to safely delete Windows Update files in Windows 11 to reclaim disk space and keep your system tidy. Start with built-in cleanup tools, then perform targeted manual deletions if needed. Always avoid removing active updates or essential system files during cleanup.
Why deleting update files matters
According to Update Bay, keeping Windows 11 tidy includes managing update caches. Update files accumulate in the SoftwareDistribution folder and Delivery Optimization cache, and over time they can consume a surprising amount of disk space. Regular cleanup helps prevent performance slowdowns, reduces the chance of failed updates caused by space constraints, and makes room for new apps and files. Before you start, back up important data and ensure you have an internet connection to re-download necessary updates later. Be mindful that Windows will automatically re-download updates when required.
Understanding update files and where they live in Windows 11
Windows stores update-related data in several locations. The most prominent cache is C:\Windows\SoftwareDistribution\Download, where downloaded update files sit before installation. The WinSxS folder holds component store data used by Windows updates and repairs. The Delivery Optimization cache stores parts of updates shared with other devices. Knowing these locations helps you target cleanup safely.
When it's safe to delete and what to avoid
Deleting update files is generally safe when updates are fully installed and Windows is not actively downloading or installing updates. Do not delete files while updates are in progress or while the Update service is running. Avoid touching system DLLs or important OS files outside the update caches. If you are unsure, create a System Restore point first and proceed cautiously.
Using built-in cleanup tools in Windows 11
Start with Disk Cleanup: search for cleanmgr, and run as administrator to access all cleanup options. In Disk Cleanup, select Windows Update Cleanup and Temporary files, then confirm. Enable Storage Sense under Settings > System > Storage to automate future cleanups. These built-in tools are the safest first step and align with best practices from Update Bay.
Manual cleanup: Command-line and folder-level cleanup
If you need deeper cleanup, you can perform targeted cleanup from the command line and by removing specific cache folders. Steps include stopping the Windows Update service, clearing the SoftwareDistribution\Download folder, and restarting services. After clearing, run DISM and SFC to repair any minor image issues. This approach is more aggressive and should be used with caution.
Cleaning Delivery Optimization cache safely
Delivery Optimization helps speed up updates by sharing parts with other devices. You can clear its cache by stopping the DoSvc service, deleting the Delivery Optimization cache, and restarting the service. This frees space but allows updates to redownload as needed.
Windows Update Cleanup and Disk Cleanup options
Open Disk Cleanup again and select Windows Update Cleanup if available, then also pick Temporary files and Delivery Optimization files for removal. Complement with Storage Sense settings to automate routine cleanups. This combination minimizes space waste without compromising update integrity.
Troubleshooting: updates reinstall or fail after cleanup
If Windows Update fails after cleanup, run the Windows Update Troubleshooter, check your network connection, and retry the update. Ensure that essential services are running and that you have enough free disk space for updates to download. If problems persist, consider restoring from a recent restore point and reattempting cleanup later.
Best practices for ongoing maintenance
Schedule periodic, light cleanup during low-usage hours. Keep a minimum amount of free space available to prevent future cache buildup. Use Storage Sense for automation, and periodically review cache folders to ensure you aren’t deleting beyond update caches. Regular maintenance helps prevent surprises when you need to install important updates.
Final note: safe, responsible cleanup and Update Bay verdict
In practice, a disciplined approach to clearing update caches—using built-in tools first, then precise manual steps—delivers reliable results. The Update Bay team recommends integrating these steps into your monthly maintenance routine to keep Windows 11 lean and responsive. With careful cleanup, you preserve update readiness while maximizing disk space for your apps and files.
Tools & Materials
- Disk Cleanup (Disk Cleanup tool / Cleanmgr.exe)(Run as administrator to access full cleanup options.)
- Storage Settings (Storage Sense)(Enable automatic cleanup of temporary files.)
- Command Prompt (admin)(Run manual cleanup commands.)
- PowerShell (admin)(Alternative to Command Prompt for cleanup commands.)
- File Explorer (with Administrator rights)(Navigate to update caches like SoftwareDistribution.)
- Backup drive or System Restore point(Optional safety net before deleting caches.)
Steps
Estimated time: 30-60 minutes
- 1
Review update status in Windows 11
Open Settings and check the Update status to ensure nothing is actively installing. If updates are in progress, wait until they finish before beginning cleanup. This avoids interrupting critical installations and ensures caches are in a stable state.
Tip: If unsure, pause active downloads and update checks before starting. - 2
Open Disk Cleanup as Administrator
Launch Disk Cleanup (cleanmgr) with Administrator rights to access all clean options. Select the system drive (usually C:) to ensure you can reach Windows Update Cleanup and other caches.
Tip: Running as admin unlocks the full set of cleanup choices. - 3
Choose Windows Update Cleanup and Temporary Files
In Disk Cleanup, check Windows Update Cleanup and Temporary Files. Confirm to remove these cached items. This step reduces cached update files without affecting installed updates.
Tip: Only select items you recognize as caches. - 4
Use Storage Sense for automation
If you prefer automation, enable Storage Sense under Settings > System > Storage to periodically remove temporary files and cached update data.
Tip: Schedule it to run during off-peak hours. - 5
Stop Windows Update services for manual cleanup
Open an elevated Command Prompt and run: net stop wuauserv && net stop bits to pause update activity while you clear caches.
Tip: Do not stop services if you’re in the middle of critical operations. - 6
Clear SoftwareDistribution download cache
Delete the contents of C:\Windows\SoftwareDistribution\Download (you can rename the folder as a precaution). Then restart the Windows Update service.
Tip: Deleting the folder is safe after stopping services. - 7
Clear Delivery Optimization cache
Stop the DoSvc service, remove Delivery Optimization cache under ProgramData, then restart DoSvc. This can reclaim space used for sharing update pieces.
Tip: Cache size varies; you’ll regain space after cleanup. - 8
Run DISM and SFC health checks
Run DISM /Online /Cleanup-Image /RestoreHealth followed by sfc /scannow to repair image issues that may have been exposed by cleanup.
Tip: These tools help prevent post-cleanup update errors. - 9
Restart services and check for updates
Restart wuauserv and Bits, then check for updates to ensure Windows re-downloads what is needed. Monitor for any failed updates and address as needed.
Tip: A quick reboot helps apply all cleanup changes. - 10
Create a restore point and document cleanup
Create a System Restore point before cleanup, and note what Actions you performed for future reference. This makes it easy to revert if something goes wrong.
Tip: Documentation helps you repeat safe cleanup in the future.
Frequently Asked Questions
Is it safe to delete Windows Update files in Windows 11?
Yes. Deleting update cache files removes downloaded, non-essential data. Installed updates remain intact. If you’re unsure, pause updates, back up data, and consider creating a restore point first.
Yes, it’s safe to delete Windows Update caches as long as you’re not deleting files that Windows needs for currently installing updates.
Will deleting update files affect currently installed updates?
No. Deleting cached update files only removes the installer caches. It does not remove updates already installed on your system. You may need to re-download updates later, which Windows will handle automatically.
No—the cleanup clears caches, not installed updates.
How much space can I reclaim by cleaning update files?
Space gained varies. It depends on how much cached data Windows has stored for updates. Expect a noticeable improvement on systems with several cached updates, but exact numbers differ between devices.
Space you gain depends on how much cache there is; results vary by device.
Can I automate cleanup of update files?
Yes. Use Storage Sense to automate temporary file cleanup and periodic cache clearing. You can also schedule Disk Cleanup tasks or scripts for regular maintenance.
Yes—Storage Sense can automate this cleanup so you don’t have to do it manually.
What should I avoid when cleaning update files?
Avoid deleting non-cache system files or touching active update data. Do not stop critical services during installations unless you know what you’re doing. Always back up before making changes.
Avoid touching essential system files or stopping updates mid-install.
What if updates fail after cleanup?
If updates fail, run Windows Update Troubleshooter, ensure a stable internet connection, and retry. If problems persist, restore from a prior restore point and reattempt cleanup later.
If updates fail, use the Windows Update troubleshooter and possibly restore point return.
Watch Video
What to Remember
- Start with built-in tools first for safe cleanup
- Target only update caches, not essential system files
- Stop services before manually clearing caches to avoid corruption
- Run health checks (DISM/SFC) after cleanup
- Create a restore point before major cleanup