How to Clean Update Files in Windows 11
Learn proven, safe methods to clean Windows Update files on Windows 11 using built-in tools and commands. This step-by-step guide from Update Bay helps you reclaim disk space without risking essential updates.

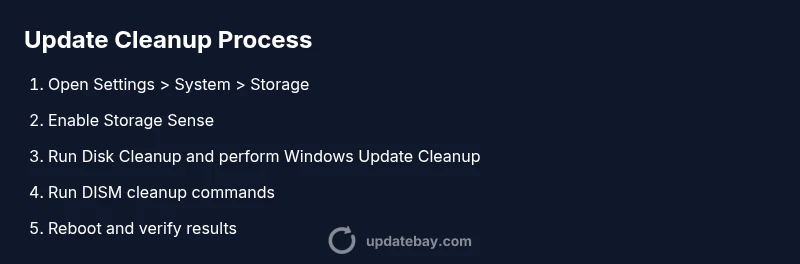
By following these steps, you will safely reclaim disk space by removing Windows Update residuals on Windows 11 without harming ongoing updates. You’ll learn built-in tools like Storage Sense and Disk Cleanup, plus command-line options with DISM. This guide focuses on practical, reversible methods suitable for most systems and is ideal for routine maintenance.
Why cleaning update files matters on Windows 11
According to Update Bay, effectively managing update leftovers helps reclaim disk space and can improve system responsiveness. If you're looking for guidance on how to clean update files Windows 11, this article walks you through safe, built-in options that minimize risk to active updates. Over time, the Windows Update cache, the SoftwareDistribution folder, and the component store (WinSxS) can consume substantial space, especially on devices with modest storage or heavy software activity. Cleaning these artifacts is not just about freeing space; it can also reduce update times, improve file search performance, and lower clutter in File Explorer. The Update Bay team found that results vary based on how aggressively updates are installed, how often you let Storage Sense run, and whether you enable automatic cleanup. The goal is to reclaim space without compromising update reliability or system stability, so this guide emphasizes reversible steps and verifiable outcomes.
To start, keep in mind that you should never delete critical system files manually. Use built-in tools or verified commands, and always back up important data before making broad changes. This approach aligns with best practices for everyday users and tech enthusiasts who want practical, safe maintenance routines. In the next sections we’ll cover what you’re cleaning, which tools to use first, and a clear, step-by-step plan that you can repeat at your own pace.
What gets cleaned and what to keep
When you explore how to clean update files Windows 11, it helps to separate what’s safe to remove from what you should leave untouched. The primary targets are update caches and temporary files that Windows creates during installations and deployments. The key items include the Windows Update cache in the SoftwareDistribution folder, the Delivery Optimization cache used for peer-to-peer downloads, and nullable log files that accumulate over time. Core system updates, installed patch data, and the component store (WinSxS) should not be deleted wholesale; removing the wrong files can cause update failures or require a repair install.
Here’s a practical rule of thumb:
- Safe to remove: temporary files, outdated logs, cached update files temporarily, deliveries from other devices if you have Delivery Optimization enabled.
- Shouldn’t remove: core components, active update packages, essential system files that Windows references during boot or update processes.
If you’re unsure about a specific file, consult documentation or run a small test cleanup on a non-critical user profile. The aim is to reclaim space while preserving update reliability.
Understanding the Windows Update cache and component store
Windows maintains several caches and stores to speed up updates and roll back components if needed. The Windows Update cache holds downloaded update packages so that Windows can install or re-install updates without re-downloading from the internet. The Delivery Optimization cache speeds downloads by sharing parts of updates with other devices on the same network. The component store (WinSxS) contains consolidated system components that Windows may need for servicing and updating future features. Over time, these caches can grow large, especially on devices that install many updates or frequently upgrade features.
Cleaning these artifacts is beneficial but must be done carefully. The cache can be rebuilt by Windows after a cleanup, and the component store may reclaim space after certain cleanup commands. Advanced steps can involve DISM (Deployment Image Servicing and Management) operations to reduce the size of the component store. In practice, you want to target nonessential caches first with built-in tools, then consider command-line cleanup if space remains insufficient. The goal is to keep the component store functional while reclaiming as much free space as possible for days or weeks of new updates.
Built-in cleanup tools and when to use them
Windows 11 ships with several built-in tools designed to reclaim space without harming system integrity. Storage Sense is a dynamic feature that can automatically delete unnecessary temporary files, including certain update leftovers, after a configurable period. Disk Cleanup provides a straightforward interface to remove Windows Update Cleanup files and other unneeded items. These tools are safe for most users and align with the recommended approach from Update Bay for routine maintenance. For many users, enabling Storage Sense and periodically running Disk Cleanup is enough to keep updates lean and disk space healthy.
When choosing between tools, start with Storage Sense to handle ongoing maintenance, then use Disk Cleanup for a manual pass when you notice space issues. Both tools respect Windows’ protections for critical files and update packages. If you still need more space after these steps, you can move to command-line cleanup with DISM and PowerShell for advanced optimization.
Step-by-step: manual cleanup using Windows settings (Path you can follow)
First, open Settings and navigate to System > Storage. This page provides a quick overview of disk usage and a direct link to Storage Sense configuration. Turn on Storage Sense, and configure it to run on a schedule that fits your usage pattern (for example, every 14 days). Then, click on Temporary files to review items that can be safely removed. Look for “Delivery Optimization Files”, “Windows Update Cleanup”, and other nonessential categories, select them, and choose Remove files. This manual pass lets you immediately reclaim space and validate what is safe to delete on your machine. If you prefer a one-off manual cleanup, Disk Cleanup remains a reliable alternative, especially on older hardware where Storage Sense might not be fully optimized for your workload.
Tip: While performing this cleanup, avoid deleting user data or personal files inadvertently. Always double-check each checkbox before confirming the cleanup action.
Command-line cleanup with DISM and PowerShell (advanced options)
For more advanced users, DISM provides powerful cleanup commands that reduce the size of the component store and fix image-health issues. Start with a safe cleanup: open an elevated Command Prompt or PowerShell window and run: DISM /Online /Cleanup-Image /StartComponentCleanup. This command removes superseded components and reduces the footprint of the component store. To inspect how much space is being reclaimed, you can run: DISM /Online /Cleanup-Image /AnalyzeComponentStore. If you need deeper cleanup and you understand the risks, you can consider DISM /Online /Cleanup-Image /StartComponentCleanup /ResetBase, but be aware this disables previous versions to reduce the base footprint and cannot be easily undone. Always ensure you have a recent backup before ResetBase.
These commands are not run daily; use them only if Disk Cleanup and Storage Sense aren’t freeing sufficient space. After completing DISM steps, reboot to ensure the changes take effect and Windows can index the cleaned stores properly.
Safety, backups, and troubleshooting best practices
Before performing any cleanup, create a restore point or full backup of important data. If you rely on enterprise deployment or have custom update scripts, coordinate with your IT team before modifying update caches or component stores. If a cleanup causes update failures, you can revert by performing a system restore to a point before the cleanup or re-running Windows Update to re-fetch necessary components. In many cases, you can recover by running DISM /Online /Cleanup-Image /RestoreHealth followed by a fresh Windows Update trial. Frequent users should consider enabling Storage Sense to automate routine cleanup while leaving room for manual checks when needed. By following these precautions, you minimize risk while maintaining the benefits of a leaner system.
How to verify cleanup results and plan for ongoing maintenance
After cleaning, verify the results by checking available disk space and re-running a few updates to ensure there are no errors. If free space increases and Windows Update completes normally, you’ve achieved a successful cleanup. Going forward, schedule periodic cleanup—ideally aligned with your update cadence (monthly or quarterly). Monitor disk usage and adjust Storage Sense rules to balance automatic cleanup with your everyday workflow. This approach helps sustain performance without manual cleanup every week, and keeps you aligned with best practices recommended by Update Bay.
Tools & Materials
- Windows 11 PC with admin rights(Administrative access recommended for system changes)
- Disk Cleanup tool(Built-in app in Windows 11)
- Storage Sense configuration(Enable and schedule cleanup intervals)
- DISM (Deployment Image Servicing and Management) tools(Accessible via Command Prompt or PowerShell (admin))
- PowerShell or Command Prompt (Admin)(Needed for advanced cleanup commands)
- Backup option (external drive or cloud storage)(Optional but recommended before major changes)
Steps
Estimated time: 60-120 minutes
- 1
Open Settings and go to System > Storage
Open the Start button, select Settings, then choose System and finally Storage. This is the central hub for cleanup actions. You’ll see a breakdown of what’s consuming space, including updates and temporary files.
Tip: If Settings is slow, use Windows+I to shortcut directly to Settings. - 2
Enable Storage Sense and schedule cleanup
Turn on Storage Sense and set a cleanup schedule (e.g., every 14 days). Storage Sense can automatically remove temporary files and previous update leftovers after a period of inactivity.
Tip: Set Storage Sense to run when the device is low on storage for best results. - 3
Review and remove temporary files manually
In Storage settings, click Temporary files and select Windows Update Cleanup and Delivery Optimization files if available. Confirm removal to reclaim space immediately.
Tip: Only select items you understand; avoid user data or documents in this view. - 4
Run Disk Cleanup for a focused cleanup
Open Disk Cleanup as Administrator, choose the system drive, and select Windows Update Cleanup and other nonessential categories. Confirm to delete.
Tip: Use the 'Clean up system files' option to get extra categories like Windows Update Cleanup. - 5
Run basic DISM cleanup to reduce component store
Open an elevated Command Prompt or PowerShell and run: DISM /Online /Cleanup-Image /StartComponentCleanup. This reduces the footprint of the component store.
Tip: Check space reclaimed with subsequent checks; do not rush this step. - 6
Analyze the component store size
In the same window, run: DISM /Online /Cleanup-Image /AnalyzeComponentStore to see current store size and potential gains.
Tip: If space remains tight, consider more aggressive options only if you understand the implications. - 7
Optional: Reset base (advanced, with caution)
For deeper size reductions, you may run: DISM /Online /Cleanup-Image /ResetBase. This cannot be undone and removes older versions of superseded components.
Tip: Only run if you are sure you won't need previous update versions. - 8
Reboot and verify results
Restart the computer to ensure changes take effect. After boot, re-check free space and perform a test Windows Update to confirm updates still install cleanly.
Tip: If updates fail after cleanup, run Update Troubleshooter and consider Restore Point rollback if needed.
Frequently Asked Questions
What happens if I delete Windows Update files?
Deleting Windows Update files is generally safe for nonessential caches, but removing the wrong files can prevent updates from installing correctly. Use built-in tools rather than manually deleting system folders.
Deleting update files is usually safe when using built-in tools, but avoid manual deletions in system folders. If in doubt, revert using a restore point.
Is it safe to run DISM cleanup daily?
Daily DISM cleanup is not recommended. Run DISM steps only when you are sure there is space pressure or update issues. Frequent cleanup can destabilize the component store.
Don't run DISM every day. Use it when you have space pressure or update problems.
Will cleanup affect future updates?
Properly scoped cleanup should not affect future updates. However, aggressive resets can remove metadata needed for servicing. Always ensure recent backups and consider performing a test update after cleanup.
Cleanup should not affect future updates if done carefully; back up first and test updates afterward.
Can Storage Sense replace manual cleanup?
Storage Sense can automate routine cleanup, but it may not catch all update leftovers. Combine it with periodic manual checks or Disk Cleanup for best results.
Storage Sense helps, but combine with manual checks for thorough cleanup.
Do I need third-party tools for Windows 11 cleanup?
Third-party tools are not required for Windows 11 cleanup. Built-in options provide safe, effective cleanup for most users. Use trusted sources if you explore alternatives.
You don't need third-party tools; built-in options are usually enough.
How much space can I reclaim?
Space reclaimed varies by system and usage. Some devices see noticeable gains after thorough cleanup, while others may see smaller improvements. The key is incremental improvement over time.
Results vary; expect improvements but not guaranteed amounts.
Watch Video
What to Remember
- Identify safe cleanups first and avoid critical system files.
- Use Storage Sense and Disk Cleanup as your first-line tools.
- DISM cleanup reduces the component store but requires caution.
- Back up data before major cleanup operations.
- Schedule regular maintenance to keep Windows 11 lean.