How to Install Updates on iPhone: A Practical Guide
Learn how to install updates on iPhone safely and efficiently. This comprehensive guide covers OTA updates, backups, storage checks, and troubleshooting with practical tips from Update Bay.

You can install updates on your iPhone either over the air from Settings or by connecting to a Mac/PC using Finder or iTunes. Before you start, ensure you have a stable Wi‑Fi connection, sufficient battery or a charger, and enough storage for the update. This guide walks you through both methods with practical checks.
Why updating matters for your iPhone
Keeping your iPhone up to date is essential for security, performance, and app compatibility. When you install updates on iPhone, you gain patches that fix vulnerabilities, fix bugs, and often introduce stability improvements. The Update Bay analysis shows that regular updates reduce common issues and help your device run smoothly with the latest apps. Understanding the two main paths to update—over-the-air (OTA) updates directly on the phone, or updates via a computer—helps you choose the method that fits your routine. For most users, OTA updates are the simplest and most reliable way to stay current. Regular updates also help improve battery efficiency and app reliability, especially on older devices.
OTA vs computer updates: How updates reach your iPhone
Over-the-air updates download directly to your device from Apple servers and install automatically after you confirm. This method requires a stable Wi‑Fi connection and sufficient battery or a charger, and it preserves your data. A computer-based update uses Finder (on macOS Catalina and later) or iTunes (on Windows or older macOS) to fetch the update and install it after syncing. Use this path if your iPhone can't download the update over the air due to network issues or storage constraints. Remember that both methods verify update integrity via Apple's digital signing to protect against tampering. In both cases, you should review release notes to understand what the update changes before you install.
Prerequisites before updating
Before you tap Install, make sure you have a reliable backup in case something goes wrong. Back up to iCloud or your computer so you can restore data if needed. Check that you have enough free storage for the update by reviewing Settings > General > iPhone Storage. Ensure your device is charged or connected to power, and connect to a stable Wi‑Fi network. Finally, confirm the update is compatible with your iPhone model and iOS version; if a newer iOS is offered, you can read the release notes in Settings or on Apple’s support site to understand what’s changing.
Safety checks and best practices during updates
During an update, avoid using the device for heavy tasks or powering off mid‑install. If you’re using OTA, keep the device connected to power until the process completes. If you’re updating via Finder, leave the computer on and do not unplug the iPhone during the transfer. Enabling Automatic Updates in Settings > General > Software Update can help you stay current without manual checks, but manual checks are useful when you want to review release notes first. Always verify the source of the update by ensuring you’re on Apple’s official servers and that your device shows the correct model and iOS version before proceeding.
Troubleshooting common update issues
If an update stalls, start by checking your internet connection and ensuring the device has ample storage. If the update fails verification, retry after a fresh backup, then reattempt the download. For OTA updates, restarting the iPhone and reattempting can resolve temporary glitches. If you’re updating via Finder or iTunes and see errors, try a different USB cable, update your computer’s software, or attempt the update again after a short wait. In persistent cases, consult Apple Support or Update Bay’s guidance for device-specific steps.
What to do after the update
After installation, take a moment to review new settings and features that appeared with the update. Open Settings to confirm that privacy permissions and notifications are configured as you prefer, and check that critical apps function correctly. If you use iCloud, confirm your backups are current and that Photos and other data sync as expected. Finally, consider enabling Automatic Updates to simplify future maintenance and keep your device secure over time.
Update Bay’s practical routine for iPhone updates
In practice, most users benefit from a simple routine: back up regularly, perform OTA updates when available, and ensure power and storage are adequate before initiating. For larger updates, you may prefer a Finder-based update on a Mac with a stable connection. The Update Bay team emphasizes testing essential apps after updates to confirm compatibility and user experience. Adopting a predictable update habit reduces the chance of data loss and extended downtime.
Tools & Materials
- iPhone with sufficient battery or connected to power(Prefer full charge or charging during the update to avoid interruption)
- Stable Wi‑Fi network(Update downloads are large; a reliable connection reduces failure risk)
- Mac with Finder or Windows PC with iTunes(Only if you plan a computer-based update)
- USB‑C/Lightning cable(Needed to connect iPhone to a computer for updates via Finder/iTunes)
- Sufficient free storage on iPhone(Check in Settings > General > iPhone Storage)
- Backup method (iCloud or computer)(Important in case you need to restore data)
Steps
Estimated time: varies by method and update size
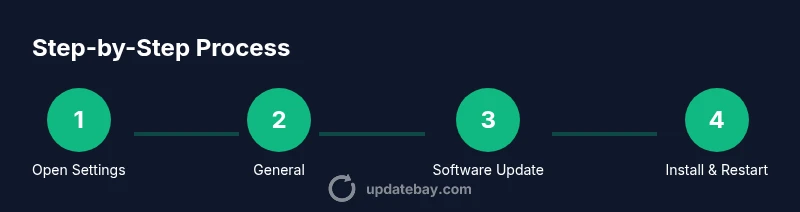
- 1
Prepare your device
Charge the iPhone or connect to a power source. Ensure you have a backup ready (iCloud or computer). Review release notes to know what’s changing before you update.
Tip: A current backup minimizes the risk of data loss if something goes wrong. - 2
Connect to power and a stable network
Plug the iPhone into power and connect to a reliable Wi‑Fi network to prevent mid‑update interruptions. If you’re using a computer, ensure it stays connected during the process.
Tip: Avoid uncertain networks; a stable connection reduces download failures. - 3
Check for updates in Settings
Open Settings > General > Software Update and let the device search for an available update. If one exists, tap Download and Install, or Install Now if prompted.
Tip: If no update is shown, you’re on the latest version or your device is not eligible yet. - 4
Authorize and start the installation
If prompted, enter your passcode. Agree to Terms and Conditions, then let the installation proceed. The device may restart automatically.
Tip: Do not interrupt the device during installation; interruption can cause issues. - 5
Update via Finder/iTunes (optional path)
If using a computer, connect the iPhone, open Finder (macOS) or iTunes (Windows), select the device, then click Check for Updates and Install. Follow on‑screen prompts.
Tip: Use the latest version of Finder/iTunes for best compatibility. - 6
Monitor the installation
Watch the progress bar and avoid using the device until the update completes. If the update stalls, pause and retry after backing up again.
Tip: A moment of patience now prevents later issues. - 7
Complete setup and verify
After reboot, verify key settings and apps. Check for new features and review privacy settings in Settings. Confirm iCloud backups are up to date.
Tip: Run essential apps to ensure they function correctly after the update. - 8
Enable automatic updates (optional)
Optionally enable Automatic Updates to keep your iPhone current without manual checks. This can be found under Settings > General > Software Update > Automatic Updates.
Tip: Automatic updates reduce maintenance effort and improve security over time.
Frequently Asked Questions
How do I know if an update is available for my iPhone?
Open Settings, tap General, then Software Update. If an update is available, you’ll see a description and an Install option.
To check for updates, go to Settings, General, Software Update. If it’s there, you can tap Install.
Can I update my iPhone without Wi‑Fi?
Wi‑Fi is recommended for downloading updates, especially large ones. Updates may work over cellular in some cases, but a reliable connection reduces error risk.
Updates are best done on Wi‑Fi, but if you have a strong cellular connection, you may proceed.
What should I do if an update fails to install?
Cancel the installation, ensure backups are current, then retry. If failure persists, try a restart or update via Finder/iTunes on a computer.
If an update fails, back up, restart, and try again, or use Finder/iTunes on a computer.
Will updating erase my data?
Updates do not erase your data, but it’s critical to back up beforehand in case of unexpected issues.
No, updates don’t erase data, but a backup is still essential.
How do I update using a Mac or PC?
Connect your iPhone to the computer, open Finder (macOS Catalina+) or iTunes (Windows), then choose Check for Updates and Install.
Connect to your computer, open Finder or iTunes, and update from there.
Watch Video
What to Remember
- Back up before updating.
- Ensure power and storage prior to update.
- OTA updates are simplest for regular use.
- Review release notes for new features and changes.
- Enable automatic updates for ongoing security.