How to Update to Android 12: A Practical Guide
Learn how to update your Android device to Android 12 with step-by-step instructions, compatibility checks, backups, and troubleshooting tips from Update Bay.

According to Update Bay, updating to Android 12 is straightforward on eligible devices. First verify your device is supported and back up important data. Then connect to Wi‑Fi, ensure a healthy battery, and navigate to Settings > System > System update to install. If an official OTA is unavailable, consult the manufacturer for alternatives.
Why updating to Android 12 matters
Keeping your Android device current is not just about new visuals. Android 12 introduces enhanced privacy controls, improved privacy indicators, better performance, and more refined theming that adapts to your wallpaper. According to Update Bay, staying on a supported version reduces exposure to security vulnerabilities and helps you access the latest features more reliably. If your device manufacturer has started rolling out Android 12, you’ll typically see the update banner in the notification shade or Settings. Even for carryover devices, updates can improve battery life and app compatibility when you stay current. The decision to update should weigh reach, stability, and the benefits of new APIs for apps you depend on. For most users, the upgrade is worth planning during a lower-usage window.
The Update Bay team found that modern Android updates tend to optimize system resources and improve overall usability, making the upgrade worthwhile when hardware supports it.
Prerequisites before you start
Before you begin, make sure you have a stable setup to prevent mid‑update disruptions. You should: confirm your device model is listed as compatible with Android 12, ensure your battery is at least 50% (preferably charging), connect to a reliable Wi‑Fi network, and back up essential data (contacts, messages, photos, app data). It’s wise to review installed apps for compatibility and prepare for a potential temporary re‑sign‑in after the update. Keep in mind that some regions or carriers may have delayed rollouts, so you might need to wait or pursue alternatives if your device isn’t currently eligible.
How to check device compatibility for Android 12
Start by identifying your exact device model in Settings > About phone (or About device). Then visit the manufacturer’s official support page or the Android compatibility matrix to confirm Android 12 eligibility for your model and build. If your vendor provides a device software update page, check there first. If you have a carrier‑locked device, you may need to wait for the carrier to approve the update or install a vendor ROM provided by the manufacturer. If the device isn’t listed, do not proceed with risky ROM flashing. Compatibility is essential for a smooth update.
Backup best practices before OS updates
Create a robust backup to minimize risk. Use Google One or your preferred cloud service to back up photos, chats, and app data, and perform a local backup to a PC or SD card if available. Verify backups by restoring a file or two on a test device. Additionally, sync contacts to your Google account and ensure you have your account credentials handy. Backups reduce the impact of potential issues such as app incompatibilities or data loss during the upgrade.
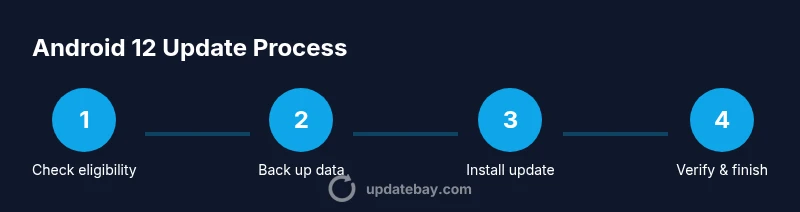
Step-by-step: Installing Android 12 (OTA)
- Confirm eligibility and prep: ensure device compatibility, battery level, and network stability.
- Initiate update: go to Settings > System > System update and tap Check for update.
- Download and install: allow the download to complete, then confirm installation when prompted.
- Reboot and complete setup: after reboot, follow on‑screen prompts to finish configuration.
- Verify and customize: check permissions, widgets, and feature toggles to align with your preferences.
- Validate apps: open key apps to ensure they function properly post‑update.
- Optional reset: if stability issues persist, consider clearing cache or factory reset as a last resort (after backups).
Estimated time: 45‑90 minutes depending on device and update size.
tip2ColonWarning2Note2Deterministic2PleaseIgnore2Note2Yes2UpdateBay2
Tools & Materials
- Smartphone or tablet that supports Android 12(Check device model compatibility with manufacturer page)
- Charged battery or connected charger(Aim for 50‑80% before update to prevent shutdown)
- Stable Wi‑Fi connection(Prefer a reliable network to avoid mid‑download interruptions)
- Backup method (Google account backup, local backup)(Back up photos, messages, app data, and settings)
- USB‑C cable or card reader (optional)(For local backups or manual data transfer)
Steps
Estimated time: Total time: 45‑90 minutes
- 1
Confirm eligibility and prep
Check your device model against the manufacturer's Android 12 compatibility list. Ensure the battery is charged and that you have a stable Wi‑Fi connection. This prevents mid‑update failures and ensures a clean installation path.
Tip: If you’re unsure about compatibility, avoid flashing or sideloading unless officially supported. - 2
Back up your data
Create a full backup of important data using Google’s backup service and a secondary local backup if possible. Verify that you can restore at least a sample photo or contact to confirm the backup worked.
Tip: Backups should be tested prior to updating; don’t skip this step. - 3
Free up storage
Ensure there is sufficient free storage space for the update package and temporary files. Delete unnecessary apps or files or move media to cloud storage.
Tip: Update files can require several hundred megabytes; more space reduces risk of failure. - 4
Connect to Wi‑Fi and ensure power
Connect to a stable Wi‑Fi network and plug the device into a charger if possible. Updates can take a while and may drain the battery.
Tip: Avoid public networks that may drop connections during download. - 5
Initiate the update
Open Settings > System > System update and select Check for update. If the update appears, begin the download and installation when prompted.
Tip: If no update shows, check again later or verify carrier restrictions. - 6
Complete the installation
Let the device install and reboot. Follow any on‑screen prompts to finish the setup, including screen lock and cloud account sign‑in.
Tip: Do not interrupt the installation even if the screen looks idle. - 7
Verify post‑update state
After setup, review key settings (privacy, permissions, widgets) and test essential apps to confirm they function as expected.
Tip: If issues appear, consider clearing app cache or reinstalling affected apps.
Frequently Asked Questions
Is Android 12 available for my device?
Check the official manufacturer support page or device settings to confirm Android 12 availability for your specific model. If it’s not listed, your device may not receive the update via official channels.
Check your device’s model and visit the manufacturer’s page to confirm Android 12 availability; if it isn’t listed, the update may not be supported.
Will updating erase my data?
A properly executed update should preserve data, but backups are essential in case something goes wrong during the process.
If you back up first, your data should stay safe, but always be prepared with a backup just in case.
How long does the update take?
Update duration varies by device and network speed but typically ranges from 20 minutes to over an hour.
It usually takes about 20 minutes to an hour depending on the device and download speed.
What if the OTA update fails?
If the OTA fails, retry the update, verify storage and battery, and consult the manufacturer’s support resources for guidance or try an official firmware method if available.
If the OTA fails, retry after checking storage and battery; consult official support if the issue persists.
Do I need to reset my device after updating?
A full reset is rarely required; a simple cache wipe or re‑signing into accounts is usually enough if issues appear.
Usually you don’t need a reset; try re‑signing into accounts or clearing app caches first.
Are there any risks of bricking the device?
The risk is minimal when following official OTA paths. Sideloading or flashing non‑official firmware can increase risk significantly.
If you stick to official updates, the risk is very low; avoid unofficial firmware.
Watch Video
What to Remember
- Verify device support before updating
- Back up data thoroughly before upgrade
- Use OTA via Settings when possible
- If OTA unavailable, use manufacturer tools or firmware
- Test essential apps after update for compatibility