Why can't update to Windows 11? Troubleshooting guide
A comprehensive troubleshooting guide to diagnose and fix why you can't update to Windows 11, covering TPM/Secure Boot, CPU compatibility, storage, and driver issues with actionable steps.

Most often, 'why can't update to windows 11' happens because your PC doesn't meet Windows 11's minimum requirements. The quickest fixes are to enable TPM 2.0 and Secure Boot in the BIOS, ensure the CPU and RAM are supported, and free up disk space. Run the Windows Update Troubleshooter, update drivers, and consider the Installation Assistant if your device remains blocked.
Why the Windows 11 upgrade can fail on your PC
According to Update Bay, the most frequent blockers are on-device requirements and firmware settings rather than mysterious software bugs. The Update Bay team found that many systems fail because they are not meeting TPM 2.0, Secure Boot, CPU, or RAM requirements, or because the system drive is nearly full. You should check the official minimums and compare them to your current specs. Also confirm that Windows 11 is being installed from an official source and that your edition supports an upgrade from Windows 10 or Windows 8/8.1. In practice, users often overlook BIOS/UEFI settings, such as TPM state, Secure Boot mode, and BIOS firmware version. If these are disabled or outdated, the update triggers a compatibility block even when hardware seems close to the limit. The latency you experience during updates can also reflect a failing storage device or a problematic driver. Begin by listing your PC's main specs: CPU model, RAM size, storage capacity, TPM status, Secure Boot status, and BIOS version. Then review the official compatibility list from Microsoft for your device family. We will cover the diagnostic steps that translate these checks into actionable fixes.
Confirm your device meets the official requirements
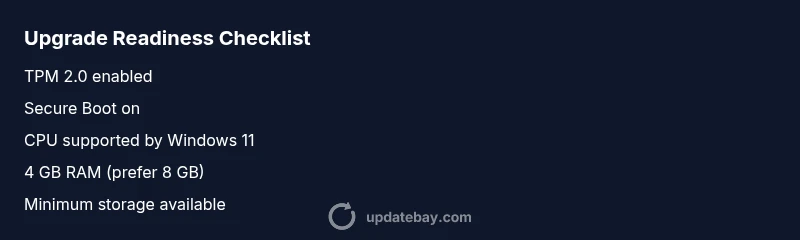
Windows 11 has explicit minimums for secure and modern hardware. The most common blockers are TPM 2.0 presence or enablement, Secure Boot, and CPU compatibility. RAM and storage also play a role; many systems meet one requirement but fail another. Use built-in tools like the PC Health Check app or Microsoft’s compatibility lists to verify your device meets the necessary thresholds. If a component falls short, you’ll need to plan an upgrade (hardware-based) or decide to stay on Windows 10 until a future change makes your device eligible. The goal of this step is a clear, quantified picture of what’s missing and what can be upgraded cheaply versus what requires new hardware.
How to test TPM, Secure Boot, and BIOS settings
To troubleshoot effectively, you must verify TPM status, Secure Boot state, and BIOS firmware. Start by opening the TPM management console (tpm.msc) to check if TPM 2.0 is present and enabled. If TPM is disabled, enter the BIOS/UEFI settings and enable TPM (sometimes called PTT or fTPM) and ensure Secure Boot is set to On. If your system doesn’t show TPM 2.0, confirm that your motherboard supports it and update BIOS if a newer version exists. After enabling these features, save changes and reboot. If Windows still won’t upgrade, re-run the compatibility check to confirm the changes took effect.
Free up space, upgrade RAM, and refresh drivers
Insufficient disk space can block an OS upgrade even if the hardware is technically compatible. Clear temporary files, uninstall unused applications, and consider moving large media to external storage to reclaim space. 4 GB of RAM is the bare minimum for Windows 11; more RAM improves upgrade reliability. If you have upgradeable RAM, install additional modules and verify they’re recognized by Windows. Update essential drivers—graphics, storage controllers, and network adapters—directly from the manufacturer’s site, not through Windows Update alone. Outdated drivers can trigger compatibility checks and cause upgrade failures.
Using official tools and workarounds
Microsoft provides tools to help with upgrade readiness. Run Windows Update Troubleshooter to fix common issues blocking updates, and ensure all pending Windows updates are installed before attempting a Windows 11 upgrade. If your device remains blocked, consider using the Windows 11 Installation Assistant from Microsoft’s official site. This tool validates system readiness and can perform the upgrade in a controlled manner. Always back up important data before starting the upgrade process to mitigate data loss from unexpected failures.
Final checks and how to avoid future issues
After a successful or failed attempt, document the error codes you encounter and keep an eye on your firmware and driver updates. Enable automatic updates where possible, monitor storage health, and set up regular backups or system images. If you’re in a managed environment (enterprise or school), consult your IT administrator before attempting an upgrade, as group policies and device management profiles can block Windows 11 deployment. If problems persist, it’s reasonable to involve professional help to avoid damaging data or voiding warranties.
Steps
Estimated time: 60-90 minutes
- 1
Audit system requirements
Gather your PC’s CPU, RAM, storage, and firmware details. Compare against Microsoft’s Windows 11 requirements and the official compatibility list to identify gaps.
Tip: Document the exact CPU model and BIOS version before changes. - 2
Enable TPM and Secure Boot
Enter BIOS/UEFI, locate TPM (or PTT/fTPM) and Secure Boot, and enable both. Save and reboot, then re-run the compatibility check.
Tip: If TPM 2.0 isn’t listed, verify hardware support or contact the OEM. - 3
Check CPU compatibility
Validate that your processor is supported by Windows 11. If not, you’ll need hardware changes or consider staying on Windows 10 for now.
Tip: Some devices may only support Windows 11 via upgrade in enterprise channels. - 4
Free space and memory
Clear up disk space and determine if you have at least 4 GB RAM. If possible, add RAM and free up 20 GB or more to reduce upgrade risk.
Tip: Move personal files to external storage during the upgrade window. - 5
Update drivers
Update critical drivers (graphics, storage, network) from the manufacturer’s site; avoid relying solely on Windows Update for essential components.
Tip: Back up before driver changes to avoid boot issues. - 6
Try official upgrade tools
Run Windows Update Troubleshooter and then the Windows 11 Installation Assistant if eligible. Follow on-screen prompts step-by-step.
Tip: Backup data; perform the upgrade process in a stable environment.
Diagnosis: Windows update to Windows 11 is blocked or ends with compatibility or preparatory errors.
Possible Causes
- highTPM 2.0 not enabled or missing
- highSecure Boot disabled or not supported by hardware
- highCPU not on the Windows 11 supported list
- highInsufficient RAM or disk space
Fixes
- easyEnable TPM 2.0 and Secure Boot in BIOS/UEFI; update BIOS if available
- mediumVerify CPU compatibility against the official Microsoft list; plan upgrades if needed
- easyFree up disk space and upgrade RAM to meet minimum requirements
- easyRun Windows Update Troubleshooter and install all pending updates
- easyUse Windows 11 Installation Assistant for eligible devices
Frequently Asked Questions
What are the minimum system requirements to upgrade to Windows 11?
The minimums include a 64-bit CPU, 4 GB RAM, 64 GB storage, TPM 2.0, and Secure Boot. Some devices may require newer firmware or a supported edition.
Windows 11 requires a 64-bit processor, 4 gigabytes of RAM, at least 64 gigabytes of storage, TPM 2.0, and Secure Boot.
Why is TPM 2.0 needed for Windows 11?
TPM 2.0 provides hardware-based security features required by Windows 11. If TPM is missing or disabled, upgrading will be blocked.
TPM 2.0 is a security requirement for Windows 11; ensure it’s enabled in BIOS.
What if my CPU isn’t on the supported list?
If your CPU isn’t on the supported list, upgrading may not be possible. You can stay on Windows 10 and monitor future hardware options or consider upgrading the device.
If your CPU isn’t supported, you probably can’t upgrade; you may need a new PC or continue with Windows 10.
How do I enable TPM 2.0 and Secure Boot?
Enter BIOS/UEFI, enable TPM (or PTT/ftPM) and Secure Boot, save changes, and reboot. If you can’t find TPM, consult the device manual or vendor support.
Enable TPM and Secure Boot in your BIOS; check your motherboard manual if needed.
Is it safe to use the Windows 11 Installation Assistant?
Yes, when downloaded from Microsoft. It validates system readiness and performs the upgrade, but back up data first and expect a longer installation.
Yes, from Microsoft; just back up your data before starting.
If issues persist, should I contact support?
If you’ve followed the steps and still can’t upgrade, contact your device manufacturer or Microsoft Support. Have error codes handy to speed up diagnosis.
If it still won’t upgrade, contact support with any error codes you’ve seen.
Watch Video
What to Remember
- Verify TPM 2.0 and Secure Boot are enabled
- Confirm CPU and memory meet Windows 11 requirements
- Free up space and update drivers before upgrading
- Use official Microsoft tools and back up data