Update Address: A Practical 2026 How-To Guide
Learn how to update your address across accounts, services, and records with a practical, security-minded approach for 2026. Step-by-step guidance, checklists, and tips to avoid common mistakes and protect your personal data.

To update your address, identify all records that store your address, collect proof of residency, and systematically revise each account or record—from banks and government services to utilities and retailers. Start with the most critical accounts, then verify changes via confirmations and mail-forwarding options. This update reduces missed deliveries and protects your identity across channels.
What updating your address means in practice
Updating your address isn't just about changing the place where mail gets delivered. It touches billing, account security, notifications, and legal documents. When you update address, you help ensure that invoices arrive, that you receive important notices, and that your identity remains protected against fraud. According to Update Bay, a comprehensive address update plan minimizes lost mail, reduces misdirected shipments, and speeds up service restoration if records drift out of sync. The process covers both physical mailing address and the address attached to accounts (billing, login, emergency contacts).
In practice, an address update touches several layers:
- Contact details on government records and tax documents
- Financial records such as banks, credit card issuers, and loan services
- Service providers including utilities, telecoms, and insurers
- Retail and online services that use shipping or billing addresses
A well-executed update creates a single, auditable trail. It reduces the risk of mail being sent to the wrong place and improves the chances that renewal notices, tax forms, and important alerts reach you on time.
Address types and where updates matter
Different systems treat address data differently. A residential street address is not the same as a billing address for a credit card, and some apps may store only a user profile contact address. Here’s how updates typically matter:
- Government and tax agencies require proof of residency and usually have formal processes to update
- Banks and lenders rely on a current address for statements, notices, and fraud monitoring
- Employers need a current address for payroll, benefits, and compliance records
- Utilities and telecoms use the address for service provisioning and billing
- Online retailers and apps use your address for shipping and personalized offers
Knowing where to update minimizes back-and-forth and speeds up completion.
Build a master address-change plan
A master plan helps you stay organized during what can feel like a sprawling task. Start with a central inventory that lists all places where your address is stored. Then designate quick-wins (those you can update in minutes) and long-lead items (those that require identity verification or physical documents).
Create a simple two-column log: service/entity and required steps. Include a column for proof needed (if any), the expected update time, and a confirmation method (email, SMS, portal). This approach makes it easy to track progress and avoid missing critical records.
Coordinate updates across services and accounts
Coordinate updates so you don’t miss key services. Begin with critically important accounts, such as government portals, banks, and healthcare providers. Once those are updated, tackle recurring services in batches (utilities, telecom, payroll) and finally online retailers and apps. If possible, do this in a single session or two focused sessions to preserve consistency and reduce confusion. Always use official portals and verify URLs before entering personal information.
Security and privacy considerations
When you update your address, you expose new data to potential phishing attempts and identity fraud. Prepare by enabling two-factor authentication on sensitive accounts and using a password manager to keep strong, unique credentials. Be cautious about sharing your new address in public or semi-public channels; prefer official messages and secure forms. Keep an eye on unusual activity in your accounts for several weeks after updates.
Verifying and validating updates after you apply changes
After making changes, validate updates with confirmations from each service. Look for updated inbox notices, account profile changes, or status indicators in the service portal. If you don’t receive confirmations within the expected window, contact support and request a status update. Maintain a central log of all confirmations and any correspondence related to address changes.
Common mistakes and how to avoid them
A frequent error is updating only some accounts and leaving others unchanged, which can cause missed deliveries and service disruptions. Don’t forget professional organizations, membership clubs, and loyalty programs. Failing to provide proper proof can stall updates, so collect documentation before you start. Finally, avoid rushing through the process; take time to verify each update to prevent future headaches.
Tools & Materials
- Proof of address documents(Utility bill, bank statement, or government-issued document dated within the last 90 days)
- List of accounts and records(Create a master inventory of places where your address is stored (banks, government portals, utilities, retailers))
- Access credentials(Current usernames, passwords, and 2FA devices or backup codes)
- Secure device(Laptop or phone with updated security software for official portals)
- Logbook or digital notes(Record confirmations and dates of updates for auditing)
- Mail forwarding option(Optional service from your postal provider to catch mail during the transition)
- Identity protection plan (optional)(Consider monitoring services if many records were updated recently)
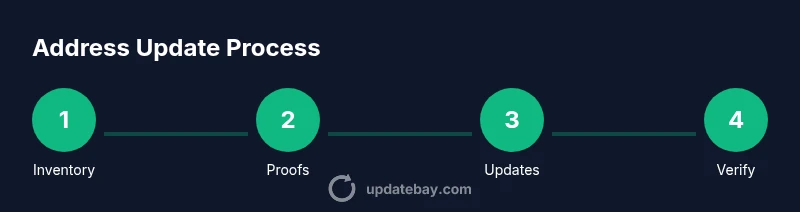
Steps
Estimated time: Total time: 2-4 hours
- 1
Create a master address-change inventory
Identify every record that stores or uses your address. This includes government portals, banks, employers, utilities, healthcare providers, and major online retailers. Document the current address on each item and note how updates will be delivered (portal, mail, or phone).
Tip: Use a simple spreadsheet to track status and required proofs; update it as you confirm each item. - 2
Collect proof of residency
Gather documents that prove your new address. Prepare several copies if needed and ensure dates are recent. Some services will accept electronic versions; others require physical copies.
Tip: Keep proofs organized by service type to speed up submissions. - 3
Prioritize updates for critical services
Begin with government portals, banks, and payroll, followed by healthcare and insurers. Prioritizing these reduces risk of missed notices and ensures continuity of essential services.
Tip: If possible, batch updates by service category to streamline the process. - 4
Update addresses on top-priority services
Go to the official portal for each service and submit the new address. Use strong authentication, and confirm via the advised channel (email or SMS).
Tip: Double-check the address format (street, city, state, ZIP) before submitting. - 5
Continue with additional services in batches
Proceed with utilities, telecom, and employers. Update payroll and tax forms where applicable. Record confirmations as they arrive.
Tip: Keep a running wall chart or checklist to prevent skipping items. - 6
Set up mail forwarding if offered
Enroll in postal mail forwarding to capture any stragglers as records catch up. This reduces the chance of lost mail during the transition.
Tip: Test forwarding by sending a short letter or using a mail-forwarding test option if available. - 7
Verify all updates and log results
Check confirmations for each service and update your master log. If any item lacks a confirmation, contact support and request an update status.
Tip: Take screenshots of confirmations for your records. - 8
Review and maintain your address records
Set reminders to review address information annually or after major life events. Keeping data current reduces future headaches and identity risks.
Tip: Schedule a yearly address audit in your calendar.
Frequently Asked Questions
How long do address updates take to propagate across services?
Update propagation varies by service; some changes appear immediately, while others require confirmations or manual review. Plan for several days to a couple of weeks for full completion.
Updates can show up right away for some services, but others may take days. Plan for a couple of weeks to ensure everything is updated.
Do I need proof of address when updating records?
Many services require proof of address, especially banks and government portals. Have documents ready and be prepared to submit scans or photos if the portal allows.
Most services will require proof of address. Gather the documents in advance to speed up the process.
Should I set up mail forwarding during the transition?
Mail forwarding helps catch items sent to your old address while updates propagate. It’s a good safety net but not a replacement for updating all records.
Yes, consider postal mail forwarding as a safety net during the transition.
What if a service won’t let me update online?
Some services require a phone call or in-person verification. Use official contact channels, and follow their documented process for address changes.
If online updates aren’t available, contact support through official channels and follow their steps.
How can I verify updates were completed?
Look for updated profile details, confirmation emails, or portal status indicators. Save confirmations and note the date of each update.
Check confirmations in each service and save the evidence you receive.
Are there risks to updating many addresses at once?
Bulk updates can reduce time but increase risk of errors. Move methodically, verify each update, and keep your master log current.
Bulk updates can be efficient, but verify every item and keep a log to avoid mistakes.
Watch Video
What to Remember
- Audit every address-bearing record you own
- Gather proof of residency before updates
- Prioritize critical services first and verify confirmations
- Maintain a secure update log for accountability
- Use mail forwarding to bridge gaps during transitions