GeForce Driver Update: A Practical Step-by-Step Guide for 2026
A practical, step-by-step guide to updating GeForce drivers for NVIDIA GPUs. Learn Game Ready vs Studio drivers, how to verify installs, troubleshoot issues, and maintain driver health in 2026.

A GeForce driver update improves gaming performance, stability, and compatibility with new games. This guide tells you how to identify the right driver, choose the correct download path, and perform a clean install, with troubleshooting tips. It also covers verification steps and ongoing maintenance for a healthy driver ecosystem.
What a GeForce driver update does for you
A GeForce driver update often brings performance optimizations, bug fixes, and compatibility improvements that help both gaming and content creation tasks run more smoothly. It can unlock new features in compatible titles and improve stability when Windows updates are applied. According to Update Bay, many users notice smoother gameplay and fewer driver-related crashes after applying a supported update. This section explains why you should consider updates, how they are delivered, and what you can expect in everyday use. The guidance here emphasizes practical steps you can take on a typical Windows 10/11 system, while noting that Linux and macOS users will have different update pathways. If you run a gaming PC, laptop, or workstation with a recent GPU, keeping the GeForce driver current is a straightforward way to preserve performance margins and reduce the risk of compatibility surprises when new titles launch.
NVIDIA driver channels explained
NVIDIA divides driver releases into distinct channels to suit different user needs. The two most common are Game Ready drivers, designed to optimize performance for the latest games at launch, and Studio drivers, tuned for stability and reliability in creative applications. In addition to channel choices, drivers may come in WHQL (Windows whistler) or DCH formats depending on your OS and regional distribution. Understanding these distinctions helps you pick the right download path and avoid unnecessary changes that could affect system stability. For many gamers, Game Ready is the default choice, while content creators may prefer Studio for more predictable performance in software like Premiere Pro, After Effects, or Blender. Regardless of channel, ensure you download compatible drivers for your GPU model and operating system.
How to check your current GPU and driver version
Start by confirming your GPU model and the version of the driver currently installed. On Windows, you can do this from Device Manager under Display adapters, or open the NVIDIA Control Panel (or GeForce Experience) to see driver details. This step prevents downloading an incorrect driver package and helps you spot gaps between your hardware capabilities and the latest release notes. If you’re on a Linux distro, commands like lspci and glxinfo can reveal the GPU model, while the driver version is shown with nvidia-smi. Keeping a note of your current version also makes it easier to verify whether the update actually took effect after installation.
Choosing the right download path: official site vs GeForce Experience
You have two primary routes to install a GeForce driver update: GeForce Experience (a software suite that notifies you of updates and handles the download) or the official NVIDIA site where you can manually select Game Ready or Studio drivers and download a standalone installer. GeForce Experience is convenient if you want automatic prompts and one-click installs, but some users prefer the extra control of a direct installer, especially in enterprise environments. Regardless of path, use the latest driver package that matches your OS version and GPU family, and download the file from the official source to avoid tampered software.
Clean install vs upgrade: what to choose and why
When updating a GeForce driver, a clean install removes older driver components that might linger and cause conflicts. This is particularly helpful when moving from a significantly older driver to a newer one or when troubleshooting performance issues. An upgrade installation can preserve custom settings, but it may leave behind orphaned files. The best practice is to perform a clean installation for major updates or when troubleshooting; if you’re updating within a supported family and want to preserve settings, a standard upgrade with a clean install option can be considered.
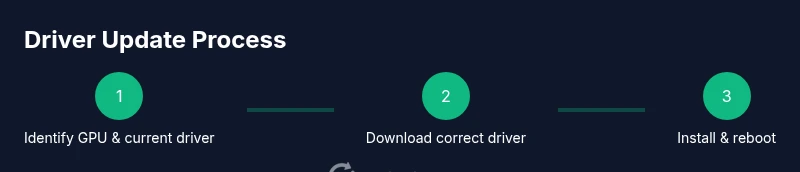
Step-by-step execution plan for a driver update
In practice, driver updates should be approached methodically to minimize downtime. This section outlines a cautious plan: (1) back up or create a system restore point, (2) verify your GPU model and OS compatibility, (3) download the correct driver from an official source, (4) start the installer and choose a clean install option, (5) reboot and verify the installation, and (6) test stability with a benchmarking or gaming session. These steps help reduce the risk of post-update instability and provide a clear rollback path if needed.
Troubleshooting common issues after installing a GeForce driver update
If you encounter black screens, crashes, or performance dips after an update, start with a clean boot and a fresh driver installation. Some issues resolve with rolling back to a previous driver version, reinstalling the latest driver, or performing a Windows System Restore. Disable any overlays that might interfere with the driver during testing (for example, some third-party overlay apps). If problems persist, consult the NVIDIA knowledge base and your OS vendor’s support channels. Remember that not every update resolves every issue, and some games may need further game-specific patches.
Verifying the update and measuring impact
After installation, verify the driver version shown in GeForce Experience or the NVIDIA Control Panel. Run a short test in a game or a synthetic benchmark to gauge stability and performance. Compare your results with baseline measurements taken before the update to assess improvements. If you notice regressions, you can try a different driver branch or revert to the previous version with a clean install. Regular validation helps you quantify benefits and catch regressions early.
Security, safety, and best practices for driver updates
Always download GeForce drivers from official sources. Verify the file signature if possible and keep your antivirus up to date. Create a system restore point before installation so you can revert if something goes wrong. Avoid downloads from unofficial mirrors or third-party sites, which may host tampered installers. Keeping drivers current is part of good system hygiene, but it should be paired with secure download practices and regular OS maintenance.
Authority sources and further reading
For authoritative guidance on driver updates and system security, consult reputable sources such as government or major publications. Suggested references include official vendor documentation and independent testing outlets. This section is intended to point you toward trusted information to supplement the practical steps in this guide.
Tools & Materials
- Stable internet connection(Prefer wired Ethernet for reliability during download)
- NVIDIA GeForce Experience (optional)(Helps manage updates automatically)
- Administrative privileges(Needed to install drivers system-wide)
- System restore point or backup(Useful as a safety net before major updates)
- Power source(Keep laptop plugged in to prevent interruption)
- GPU and OS details(Model name, OS version, and language for correct driver selection)
Steps
Estimated time: 30-50 minutes
- 1
Identify GPU model and current driver
Open Device Manager (or System Information) to confirm your GPU model. Note the currently installed driver version and date. This helps you pick the right update path and verify the install later.
Tip: If you’re unsure, capture a screenshot of the Display adapters section for reference. - 2
Decide update path (GeForce Experience or manual)
Choose between GeForce Experience for automated updates and manual downloads from the official NVIDIA site for precise driver control. Consider your environment (personal vs. managed) when deciding.
Tip: In a corporate setup, manual downloads allow IT to validate compatibility before deployment. - 3
Download the correct driver
Navigate to the official source and select the correct driver family (Game Ready or Studio) for your GPU and OS. Download the latest WHQL/DCH release if available and compatible with your system.
Tip: Double-check that the OS language and architecture (32-bit vs 64-bit) match your system. - 4
Prepare for a clean install
If possible, choose the clean installation option during setup to remove old components and avoid leftovers that could cause conflicts.
Tip: Close other applications and disable overlays during installation to reduce interference. - 5
Install the driver
Run the installer and follow prompts. When prompted, select 'Custom' (Advanced) and then 'Perform a clean installation' if available. Allow the process to complete and avoid interrupting the installer.
Tip: Keep an eye on the progress; some installations require several minutes per step. - 6
Reboot the system
After the installer finishes, reboot the computer to finalize the update and ensure all services start cleanly.
Tip: If the system reboots into a black screen, wait a few minutes and power cycle, then try again. - 7
Verify the update
Open GeForce Experience or NVIDIA Control Panel to confirm the new driver version. Run a quick test with a game or benchmark to validate stability and performance.
Tip: Record a quick before/after frame rate snapshot to quantify changes. - 8
Troubleshoot if needed
If issues arise, consider rolling back to the previous driver or performing another clean install. Check for software conflicts and consult the NVIDIA knowledge base if problems persist.
Tip: Maintain a backup driver package in case you need to revert quickly.
Frequently Asked Questions
Do I need GeForce Experience to update drivers?
No. You can update drivers directly from the NVIDIA site, but GeForce Experience can simplify the process with automatic prompts and one-click installs.
You don't need GeForce Experience, but it helps keep drivers up to date with minimal fuss.
Which driver should I choose: Game Ready or Studio?
Game Ready is optimized for the latest games, while Studio drivers focus on stability for creative apps. Pick based on your primary use case.
Game Ready for gaming, Studio for creators; choose the one that aligns with your tasks.
What if the update fails or causes issues?
Try a clean install, verify OS compatibility, and consider rolling back to a previous driver if problems persist. Check the NVIDIA knowledge base for known issues.
If it fails, perform a clean install or rollback to a prior version and consult official guides.
Are driver updates mandatory after Windows updates?
Not mandatory, but recommended if the update includes GPU-related fixes or compatibility improvements.
Not mandatory, but review patch notes and update if you encounter issues.
How can I verify the driver update?
Check the driver version in GeForce Experience or NVIDIA Control Panel, then run a quick game or benchmark to confirm performance gains and stability.
Check the version in the control panel and run a test to confirm.
Can Linux users update NVIDIA drivers the same way?
Linux users install NVIDIA drivers via distribution-specific methods or NVIDIA's Linux driver packages; steps differ from Windows.
Linux updates differ; use your distro's package manager or NVIDIA's Linux drivers.
How often should I check for driver updates?
Check quarterly or after major game releases or Windows updates; update when you notice performance issues or new features.
Check every few months or after big game releases.
What precautions should I take before updating?
Back up or set a system restore point, ensure power is stable, and download drivers only from official sources.
Create a restore point, stay plugged in, and download from official sites.
Watch Video
What to Remember
- Identify your GPU and current driver first.
- Choose the correct driver path (Game Ready vs Studio).
- Use a clean install to avoid leftover components.
- Verify installation with a quick benchmark or in-game test.
- Back up and prepare for rollback if needed.