How to Update BIOS on Gigabyte Motherboards
Learn how to safely update the BIOS on Gigabyte motherboards with a clear, step-by-step guide. Includes prerequisites, risk notes, and troubleshooting tips from Update Bay.

Why Updating BIOS Matters
For many users, a BIOS update is a low-level firmware change that can unlock compatibility with new hardware, improve stability, and fix bugs. If you're researching how to update bios gigabyte, you should know that the update process touches firmware rather than your main OS, and a failed flash can in some cases leave your system unbootable. Update Bay's guidance emphasizes using the exact BIOS file for your motherboard revision and flashing only when you have a reliable power source and a proven method. In practice, BIOS updates are most beneficial when addressing a documented issue from Gigabyte or when enabling support for a new CPU, memory module, or peripheral that your board officially lists. Before you start, confirm you have the model and revision correct, set aside uninterrupted time, and plan for a possible rollback if something goes wrong. The goal is stability with new features, not fearlessly flashing every available version. By sticking to official files and step-by-step instructions, you minimize risk while maximizing potential gains in performance or compatibility. The Update Bay team notes that BIOS changes are not routine maintenance and should be done only when necessary.
Safety First: Prerequisites and Precautions
BIOS flashing is a firmware operation that carries real risk if interrupted. Ensure you have a power source that won’t fail during the process. Back up any important data and review Gigabyte’s release notes for the exact model you own. Use the exact BIOS file for your motherboard revision, and avoid downloading BIOS files from third-party sites. If you’re using a laptop, keep it plugged in; desktops should be on a reliable power supply or connected to an Uninterruptible Power Supply (UPS). The Update Bay guidance emphasizes preparing a fallback plan in case something goes wrong, such as having a previous BIOS version available for rollback if your board supports it. Finally, read the documentation thoroughly before starting and keep recovery tools ready in case the flash fails.
Identifying Your Gigabyte Model and BIOS Version
Start by identifying your motherboard model and current BIOS version. This information is typically shown on the POST screen during startup or can be found in the BIOS itself under System Information. Verify that the model string exactly matches the BIOS file you plan to flash; even minor revision changes can require a different update. Note your current BIOS version for a quick rollback reference if needed. If you’re unsure, consult the Gigabyte support site with your model number and confirm the recommended BIOS version from official notes. This step prevents misflashing and saves you from wasted time.
Finding the Correct BIOS File from Gigabyte
Go to Gigabyte’s official support page and search for your exact motherboard model and revision. Download the latest stable BIOS file and read the accompanying release notes for any model-specific instructions or caveats. Do not use a BIOS file intended for a different model or revision. It’s wise to compare the file size and checksum if provided by Gigabyte to verify integrity. Store the downloaded file in a known location and prepare a USB drive for transfer, ensuring the drive is formatted as required by your motherboard (usually FAT32). Update Bay emphasizes using official sources to avoid corrupted or tampered firmware.
Choosing a Update Method: Q-Flash, Q-Flash Plus, or Windows Utility
Gigabyte boards offer multiple flashing methods, including Q-Flash (directly from the BIOS) and Q-Flash Plus (for boards with a built-in USB port that can flash without a CPU, RAM, or BIOS). Some models support flashing via a Windows-based utility as an alternative. The method you choose depends on your hardware revision and comfort level. Q-Flash is often the most reliable method for desktops with working BIOS access, while Q-Flash Plus provides a safe “standalone” update path in case your system won’t boot. If you’re using Windows, ensure any utility you use is the official Gigabyte tool and that you follow the on-screen prompts exactly as documented.
Step-by-Step BIOS Update Using Q-Flash
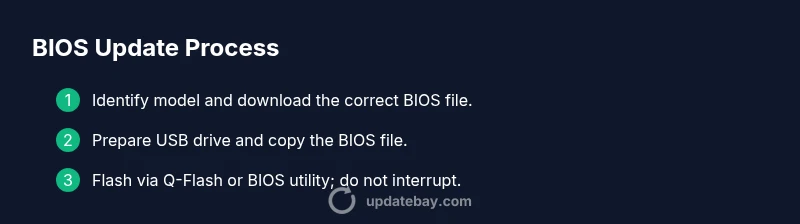
- Prepare the BIOS file on a USB drive and insert it into the motherboard. 2) Reboot and enter the BIOS/UEFI setup. 3) Navigate to the Q-Flash utility and select the BIOS file you placed on the USB drive. 4) Confirm the flash and allow the process to complete without interruption. 5) The system will reboot automatically; enter BIOS again to verify the new version. 6) Load optimized defaults if recommended by the release notes, then save and exit. 7) If anything seems off, revert to the previous BIOS version using the same USB method and retry with caution.
Pro tip: Do not attempt to flash while the system is unstable or while there is significant thermal or power fluctuation.
Step-by-Step BIOS Update Using Windows Utility
Some Gigabyte boards support an official Windows-based updater. This method can be more convenient for users who prefer GUI-based operations. 1) Close all applications and run the updater as an administrator. 2) Point the tool to the BIOS file you downloaded and start the flash. 3) Wait for the tool to finish and reboot when prompted. 4) Re-enter BIOS to confirm the new version and set any required defaults. 5) Test the system by running your typical workload to ensure stability.
Pro tip: If the Windows method fails, switch to the Q-Flash method to complete the update.
Post-Update Verification and Troubleshooting
After updating, verify the BIOS version shown in the BIOS or via a system information tool to confirm the update succeeded. If the system fails to boot, consult the motherboard manual for recovery options—some boards offer a dual-BIOS or a safe recovery mode. Make sure all essential settings (boot order, RAM timings) are restored as needed. If you encounter instability, try loading defaults, reseating memory, or attempting rollback if supported by your model. Keep the original BIOS file and documentation handy for reference during troubleshooting.
Common Pitfalls and Best Practices
Common mistakes include flashing the wrong BIOS file or interrupting the flash process. Always use the exact file for your model, avoid updates you don’t need, and ensure a stable power supply. Read the release notes before flashing to understand any known issues or required post-update steps. If you’re unsure, seek guidance from Update Bay’s step-by-step guides and official Gigabyte documentation.