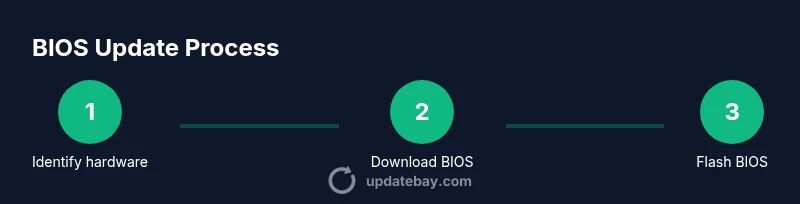
How to Update BIOS on Windows 11
Learn how to update BIOS on Windows 11 safely with a practical, step-by-step approach. Identify your motherboard, download the correct BIOS, prepare power and storage, then flash using vendor tools. Includes safety tips, common pitfalls, and a clear checklist for success.

According to Update Bay, updating BIOS on Windows 11 is a careful, vendor-guided process that starts with identifying your motherboard or system maker, downloading the latest BIOS, and choosing a flashing method. Prepare for potential power loss, back up important data, and read release notes before proceeding. Follow the official steps exactly to minimize risk.
Understanding BIOS and UEFI: Why Update Matters
BIOS (Basic Input/Output System) and its modern successor, UEFI (Unified Extensible Firmware Interface), initialize hardware and boot your operating system. A BIOS update can improve hardware compatibility, fix firmware bugs, improve power management, and sometimes resolve boot issues. However, flashing firmware is one of the riskiest maintenance tasks on a computer—an interrupted update can leave a system unbootable. The Update Bay team emphasizes that BIOS updates should be performed only when they address a documented problem or enhance compatibility with new hardware, rather than as routine maintenance. Before you begin, verify your system model, current BIOS version, and the exact motherboard or OEM revision to ensure you download the correct file. Always consult the official changelog or release notes for your model so you understand what changes the update will bring.
Safety First: Risks and Precautions
During a BIOS update, power stability is paramount. A power loss or system crash can brick the motherboard, requiring hardware service to recover. Use a reliable power source, and if you’re on a laptop, connect to AC power and rotate through a fresh battery before starting. Create a full data backup and note down your current BIOS version in case you need to verify after flashing. Disable any overclocking profiles or third-party firmware utilities that could interfere with the update. If your motherboard supports a dual-BIOS or recovery feature, enable it according to the vendor’s instructions. The goal is to reduce interruption risk and preserve a known-good state in case something goes wrong.
How BIOS Updates Work: A Quick Overview
A BIOS update replaces the firmware that starts your PC, so it’s more delicate than a typical software patch. Most vendors provide one of three methods: a Windows-based updater, a USB-flash utility accessed from the BIOS, or a dedicated flashing tool in Windows. Each method has steps that are vendor-specific, but the core idea remains the same: verify compatibility, create a recovery plan, load the new firmware, and confirm the update after reboot. Always use the exact BIOS file for your board revision; a mismatched file can cause boot failures. Release notes often include instructions about enabling features like security mitigations or NVMe support, so read them carefully.
Identify Your System’s BIOS/UEFI Version
Start by identifying your current BIOS version and motherboard model. On Windows, you can run msinfo32 to see BIOS Version/Date, or use a command prompt entry like wmic bios get smbiosbiosversion. For laptops or prebuilt systems, this information is often found in BIOS screenshots or the system’s documentation. If you’re unsure of your board model, check the case labeling, the OEM’s support page, or use a system information tool. Documenting the exact model prevents downloading an incorrect BIOS file, which is a common source of failed updates.
Where to Get the Latest BIOS: Official Sources
Always download BIOS updates from the official vendor site (motherboard maker or OEM). Navigate to Support or Downloads, locate your exact model, and open the BIOS/ firmware section. Read the release notes to confirm supported OS versions and hardware configurations. Avoid third-party download sites, which may host tampered files. After download, verify the file’s checksum if the vendor provides one, and prepare the file for flashing according to the vendor’s instructions. Update Bay recommends saving a copy of the compatibility notes for future reference.
Update Methods: USB BIOS Flash vs Windows Update Utility
There are two common paths to update BIOS on Windows 11. USB-based flashing runs directly from the motherboard firmware interface and is often the most universal method; Windows-based utilities can be more convenient but rely on the OS and vendor software. USB flashing reduces dependency on Windows, but you must create a bootable USB drive with the exact BIOS file and follow their flash procedure. Windows utilities typically provide a guided wizard and safety prompts, but you still must have power stability and a recovery plan. Choose the method your motherboard supports and follow the vendor’s exact steps.
Step-by-Step Overview: What Happens During a BIOS Flash
A BIOS update generally follows this sequence: prepare the update file, create a recovery USB or ensure the Windows tool is ready, reboot into the flashing environment, initiate the flash, and wait for completion with no interruptions. After flashing, the system may reboot several times and require you to enter BIOS to re-apply settings like boot order or XMP profiles. Post-update, verify the BIOS version, re-enable any custom profiles, and run basic hardware checks to ensure the system is stable. If something seems off, have your recovery option ready (USB fallback, dual BIOS, or vendor support).
Step-by-Step Overview: Non-Destructive Checks and Backups
Beyond the flash itself, preparation is crucial. Create a rescue plan, back up important data, and ensure you can re-enter the BIOS after the update. If your vendor provides a rollback option, learn how to revert to the previous version if the update introduces instability. It’s also wise to note down default BIOS settings in case you need to reset them after updating. Remember, a well-documented pre-update state dramatically reduces recovery time if issues arise.
Troubleshooting and Recovery: What If Things Go Wrong
If the flashing process fails, do not power off mid-step unless the vendor’s recovery guidance explicitly instructs you to. Wait for a recovery timer to elapse or use the built-in recovery feature if available. In some cases, you may need to re-flash from USB or use a back-up firmware image. If you cannot boot, consult the vendor’s recovery procedures or contact technical support with your exact motherboard model and BIOS version. Keeping a spare recovery USB and a documented plan will help you recover quickly.
Final Checklist and Best Practices
Before you begin, confirm you have the exact BIOS file for your model and revision, a reliable power source, and a recovery plan. Disable overclocking profiles, disconnect unnecessary peripherals, and close nonessential software. After the flash, verify the version, restore settings, and run a basic hardware check (memory, storage, and CPU temperature) to ensure everything operates normally. With careful preparation and vendor-guided steps, BIOS updates can improve hardware compatibility while minimizing risk.
The Update Bay Approach: Best Practices for BIOS Updates
Update Bay advocates a cautious, well-documented approach to BIOS updates. Always prefer vendor-provided tools and official download sources; never use random third-party flash utilities. Maintain a rollback option where possible, keep a current backup, and schedule updates during a maintenance window to avoid mid-operation power loss. By combining vendor instructions with thorough preparation, you maximize the chance of a successful update and a stable system after reboot.
Final Checklist Before You Flash
- Confirm your exact motherboard/OEM model and BIOS version.
- Download the correct BIOS file from the official source and verify checksums.
- Prepare a reliable power source and unplug nonessential peripherals.
- Create a recovery USB drive or enable dual-BIOS recovery if available.
- Read release notes to understand what the update changes and any post-flash steps.
Tools & Materials
- Official BIOS update file (exact model revision)(Download from vendor's official support page; verify model and revision match your hardware.)
- USB flash drive (8-32 GB, USB 2.0/3.0)(Format as FAT32 if using USB boot method; label clearly.)
- Stable power source or UPS(Ensure continuous power during the flash; do not rely on battery alone for desktops.)
- Screwdriver and static-safe wrist strap (optional)(Use if you need to access the motherboard or install hardware changes safely.)
- Documentation of current BIOS settings(Record boot order, fan curves, and XMP/OC settings for easy restoration.)
- Vendor flashing tool (Windows or BIOS USB method)(Only use tools provided by the motherboard/OEM vendor.)
- Checksum/verification utility(Used if vendor provides a hash for validating the BIOS file.)
Steps
Estimated time: 40-90 minutes
- 1
Identify your hardware
Confirm your motherboard or OEM model and the current BIOS version. Capture screenshots or notes, and locate the exact revision number to ensure you download the correct BIOS file.
Tip: If you’re unsure, check the system documentation or use a system information tool. - 2
Download the official BIOS file
Visit the vendor’s support page, select your model, and download the latest BIOS package. Read the release notes to understand changes and prerequisites.
Tip: Verify the file name and checksum if provided. - 3
Prepare the flashing medium
If using USB, format it as FAT32 and copy the BIOS file as instructed by the vendor. If using a Windows utility, ensure it’s ready and compatible with your OS.
Tip: Label the USB clearly to avoid confusion during flashing. - 4
Back up data and settings
Create a full data backup and note BIOS settings like boot order and wake timers. This reduces recovery time if something goes wrong.
Tip: Consider a system restore point where available. - 5
Enter the flashing environment
Restart and access the BIOS/UEFI or the vendor’s flashing tool. Follow the vendor’s instructions to select the BIOS file for flashing.
Tip: Do not press any keys to interrupt the boot sequence while the flash is in progress. - 6
Initiate the flash
Start the update process exactly as instructed by the vendor. Do not power off or unplug during the flash unless explicitly guided.
Tip: If the process seems to stall beyond the vendor’s stated time, wait or consult support. - 7
Verify and configure
After reboot, verify the BIOS version and reconfigure necessary settings like boot order and XMP profiles. Run basic hardware checks to ensure stability.
Tip: Keep vendor support contact handy in case you need assistance. - 8
Create a recovery plan
If your motherboard supports recovery, familiarize yourself with the procedure in case the flash fails. Save a copy of essential recovery steps.
Tip: Practice recovery steps with a test scenario if possible.
Frequently Asked Questions
Is updating BIOS on Windows 11 always necessary?
No. BIOS updates are not required for Windows 11. They’re recommended when a vendor issues fixes for hardware compatibility, security vulnerabilities, or specific system issues. Always read the release notes to determine if the update applies to your setup.
BIOS updates aren’t mandatory for Windows 11. Only update if the vendor notes a need for your hardware, and read the release notes first.
What are the risks of flashing the BIOS?
The primary risk is a failed flash due to power loss or interruption, which can leave the motherboard unbootable. Following vendor instructions, using a stable power source, and having a recovery plan mitigate these risks.
The main risk is a failed flash from power loss. Use stable power and follow vendor steps to reduce risk.
Can I downgrade or revert a BIOS update if something goes wrong?
Some vendors offer a rollback option or provide a previous BIOS version, but downgrades aren’t always supported. Check the vendor’s documentation for rollback support and procedures before updating.
Rollback might be possible with some vendors, but not always. Check official docs first.
Should I update BIOS from Windows or via USB?
Both methods are valid if supported by your motherboard. USB flashing is widely compatible and can be safer if Windows stability is a concern, while a vendor Windows tool can be more convenient.
Both methods work; USB is very safe, Windows tool is convenient if supported.
What pre-checks should I perform before flashing?
Back up data, record current BIOS settings, ensure a stable power source, and confirm you have the exact BIOS file for your model and revision.
Back up data, note BIOS settings, ensure power stability, and verify the exact BIOS file.
What happens if the BIOS update fails and I can’t boot?
Use the vendor's recovery procedure or a spare recovery USB if available. Contact vendor support with your model and BIOS version for guided recovery.
If it fails, use the vendor recovery steps or contact support for help.
Watch Video
What to Remember
- Identify your exact hardware before downloading BIOS.
- Use official vendor tools and boot media for flashing.
- Prepare power, data backups, and a recovery plan.
- Verify the BIOS version after flashing and reconfigure settings.