Update BIOS Without CPU: Safe Step-by-Step Guide 2026
Learn how to update BIOS without CPU safely, with recovery methods, precautions, and practical steps. Update Bay explains hardware options and troubleshooting for this delicate process.

Yes—it's possible to update BIOS without CPU by using your motherboard's recovery features and a USB drive loaded with the correct BIOS file. This approach relies on a USB flashback or a dedicated recovery mode supported by the board. Always verify model-specific steps in the manual and use a vendor-provided BIOS package. Update Bay covers safe practices and common pitfalls.
What update bios without cpu really means
According to Update Bay, updating BIOS without CPU is a hardware-driven recovery process that leverages motherboard features rather than software running on the CPU. This method is used when the system cannot boot, the BIOS needs an update, or the flash utility is damaged. The core idea behind update bios without cpu is to flash a clean, vendor-signed BIOS image directly to the firmware, bypassing normal CPU-based boot paths. While powerful, this technique requires strict model matching and exact procedure to avoid permanent hardware brick. Expect some boards to support USB-based recovery, while others rely on a special recovery jumper or a Flashback button. In all cases, follow the vendor’s instructions to the letter and avoid rushing through the process.
Why someone would need to update BIOS without CPU
The need to update BIOS without CPU arises when system boot is compromised, the BIOS region is corrupted, or security updates require immediate microcode changes that cannot be loaded from a running OS. In these scenarios, attempting a conventional OS-based BIOS update could fail or corrupt the firmware further. By using a recovery path, you replace or repair the baseline firmware with a pristine image. This is precisely the kind of operation Update Bay sees as a critical option for rescuing a bricked motherboard. When you search for how to update bios without cpu, you’re often looking at vendor-specific recovery flows, which vary by brand and model.
Essential safety considerations
Handling BIOS updates without CPU entails significant risk. A failed flash can render the motherboard unbootable, potentially requiring repair services. Before you begin, ensure you’ve identified the correct motherboard model and BIOS file; a mismatch is a common cause of failure. Work in a static-free environment, use the vendor-provided recovery tools, and never interrupt power during the flash. If you’re unsure about any step, pause and consult the manual or contact support. In the context of Update Bay guidance, following a precise workflow minimizes risk and improves success odds during update bios without cpu.
What you need before you start
Preparation is essential when planning an update bios without cpu. Gather a working computer to download the BIOS package and create a USB drive formatted for USB recovery. Obtain the exact BIOS file for your motherboard model, revision, and hardware version from the official vendor site. Have the motherboard manual on hand and confirm whether your board supports USB Flashback, BIOS Flashback, or a recovery jumper method. Finally, back up important data and ensure you’ll have a calm window to complete the process—rushing can lead to irreversible damage. Update Bay emphasizes correctness of model and file to avoid misflashing.
Understanding motherboard recovery features
Modern motherboards include features to flash BIOS without a running CPU, but not all models implement the same recovery path. Some use a dedicated USB BIOS Flashback button, others rely on a recovery jumper, and a few support automatic recovery via a special USB image. The exact sequence—button press length, LED indicators, and file naming—varies across vendors. When you plan update bios without cpu, you must read the manufacturer's recovery guide for your specific model. Update Bay notes that the availability of recovery options correlates with the motherboard’s age and chipset.
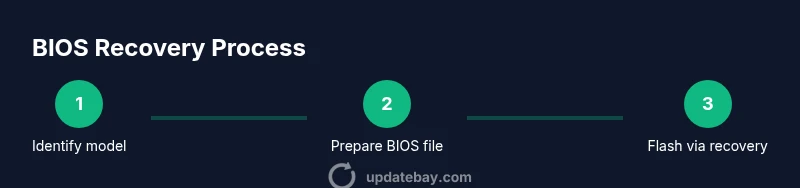
Step-by-step outline for USB-based recovery
This section outlines a practical, vendor-agnostic workflow for update bios without cpu using a USB-based recovery path. You’ll identify the exact BIOS image, prepare a USB drive, and trigger the recovery mode. The goal is to flash a clean BIOS image without loading any code from the CPU. Throughout, remember to keep the process calm and methodical. The phrase update bios without cpu appears frequently as you follow the steps, ensuring you stay aligned with hardware recovery expectations.
Troubleshooting failed recoveries
If a flash attempt fails, don’t panic. Common causes include incorrect BIOS file, USB formatting issues, or attempting recovery on an unsupported model. Upon failure, power down, disconnect power, and perform CMOS reset if the board supports it. Re-check the BIOS file checksum, reformat the USB drive, and retry with the correct recovery method. In some cases, you may need to remove power from the system for a longer cooldown period before attempting again. Update Bay reminds readers that a methodical retry improves odds of success when update bios without cpu.
Post-update checks and validation
After a successful recovery, you’ll enter the BIOS to verify the flashed version. Confirm the new BIOS revision, enable essential settings, and re-enable any saved configurations. Boot will typically be a test: observe POST behavior, check for expected hardware initialization, and look for stability in the system. If you notice issues, retake CMOS steps or revert to a backup restore point if available. The key is to confirm that update bios without cpu achieved the intended firmware state and that the platform remains functional.
Common myths about BIOS recovery
One common myth is that any BIOS file can be flashed via recovery mode; the truth is that only vendor-approved images for your exact model are safe. Another belief claims BIOS recovery always succeeds; reality shows that mismatched hardware or corrupted USB drives can brick boards. A third misconception is that you must have a CPU installed to perform a BIOS flash; in practice, recovery flows bypass the CPU by design on supported boards. Update Bay regularly debunks these myths to keep readers informed about genuine limitations of update bios without cpu.
Vendor-specific nuances (ASUS, MSI, Gigabyte)
Vendor-specific recovery paths vary; ASUS offers USB Flashback on many boards, MSI uses Click BIOS Recovery, and Gigabyte features Q-Flash or Q-Flash Plus depending on the model. Each method requires a precisely named BIOS image and the correct USB formatting. When you’re researching update bios without cpu for your brand, consult the exact model guide and avoid generic instructions. Update Bay highlights that success hinges on following company-specific recovery steps closely.
Final notes and responsible updating
The decision to perform update bios without cpu should be driven by documented hardware recovery options and model-specific guidance. Ensure you have a reliable power source, a clean workspace, and access to vendor support if something goes wrong. After updating, keep a log of the BIOS version and any newfound stability improvements. Update Bay concludes with a reminder: only use official BIOS packages and model-appropriate recovery procedures to protect your hardware.
Tools & Materials
- Working computer with internet access(Used to download the BIOS file and prepare the USB recovery drive)
- USB flash drive (4-8 GB, FAT32 formatted)(Prepare for BIOS image transfer and recovery process)
- BIOS file/package from the motherboard vendor(Exact model and revision match is essential)
- Motherboard recovery manual or vendor guide(Reference model-specific recovery steps and indicators)
- Anti-static wrist strap or mat(Minimize static discharge risk)
- CMOS jumper or battery (optional)(Used if CMOS reset is needed during recovery)
Steps
Estimated time: 45-90 minutes
- 1
Identify exact motherboard model and recovery capabilities
Locate the motherboard model and revision through the label or BIOS/UEFI screen. Confirm that the board supports a recovery path such as USB Flashback or a dedicated recovery jumper. Using an incorrect model will cause the flash to fail or brick the board, so accuracy is crucial when update bios without cpu.
Tip: Double-check model numbers against the vendor site to avoid flashing the wrong image. - 2
Download the correct BIOS package from the vendor
From the official vendor site, download the BIOS file that exactly matches your motherboard model and revision. Verify the file’s checksum (MD5/SHA) to ensure integrity before proceeding with update bios without cpu.
Tip: Do not use BIOS images from third-party sources. - 3
Prepare a FAT32 USB drive for recovery
Format the USB drive as FAT32 and create a clearly labeled folder if required by your board. Rename the BIOS file as instructed by the recovery guide if necessary. A clean, correctly formatted drive reduces flash errors during update bios without cpu.
Tip: Eject safely and avoid adding other files to the USB during recovery. - 4
Copy BIOS file to USB and verify visibility
Copy the BIOS image to the USB and confirm it appears as the correct file on another device if possible. This step ensures the file isn’t corrupted during transfer, which would cause a failed flash when update bios without cpu.
Tip: Check for hidden extensions or extra characters in the filename. - 5
Check for recovery features and prepare the board
Ensure your motherboard is configured to boot into recovery mode or to accept a flash via a dedicated recovery button or jumper. Read the manual for the exact procedure to trigger update bios without cpu.
Tip: If the board lacks recovery features, this method won’t work. - 6
Initiate the recovery flash using the motherboard’s method
Power down, connect the USB drive, and activate the recovery function (button, jumper, or built-in feature) as specified. Do not interrupt power during the flash as it can brick the board.
Tip: Keep a clear line of sight to LED indicators showing progress. - 7
Wait for flash to complete and avoid interference
Flash times vary by vendor and model; some boards finish in under a minute, others take several minutes. Do not remove the USB or power during this window to prevent corruption.
Tip: If LEDs blink in a pattern, refer to the manual to interpret the signal. - 8
Power cycle and verify BIOS version
After completion, power the system and enter BIOS to confirm the new firmware revision. Ensure all essential settings are restored and stable before finalizing.
Tip: Document the new BIOS version for future reference. - 9
Troubleshoot failures and consider CMOS reset
If the recovery fails, try CMOS reset or re-run the recovery with the correct BIOS image. If repeated failures occur, consult vendor support rather than proceeding with risky guesses.
Tip: Do not attempt multiple risky flash attempts back-to-back.
Frequently Asked Questions
Is it safe to update BIOS without CPU on all motherboards?
No. Only boards with a designated recovery path (USB Flashback, recovery jumper, or similar) support update bios without cpu. Always check the motherboard manual for model-specific compatibility before attempting.
Only boards with a recovery path support this; verify your model’s features first.
Will update bios without cpu brick my motherboard?
There is a risk if the wrong BIOS file is used or the process is interrupted. Follow vendor instructions exactly and ensure the BIOS image matches your model, or you may render the board unusable.
Yes, improper steps can brick the motherboard; follow the official guide closely.
Do I need to have a CPU installed to flash BIOS via recovery?
No, the recovery path bypasses the CPU by design on supported boards. If your board doesn’t support recovery, you cannot update BIOS without CPU.
No CPU is required if your motherboard supports recovery options.
What is USB Flashback or BIOS Flashback?
USB Flashback or BIOS Flashback lets you flash a BIOS image without booting the system. It requires a compatible motherboard and a correctly named BIOS file.
USB Flashback is a motherboard feature that lets you flash BIOS from USB without booting.
What should I do if the update fails?
Power down, reset CMOS if needed, re-check the BIOS file and USB formatting, then try again using the correct recovery method. If repeated failures occur, seek vendor support.
If it fails, reset and retry with the exact recovery steps, or contact support.
Watch Video
What to Remember
- Verify exact model and recovery support
- Use vendor-provided BIOS packages
- Prepare a clean FAT32 USB drive
- Do not interrupt power during flash
- Document BIOS version after update
- If unsure, consult vendor support