Update Android System: A Safe Step-by-Step Guide
Learn how to safely update the Android system with practical steps, backups, and verification to protect data, optimize security, and maintain app compatibility.

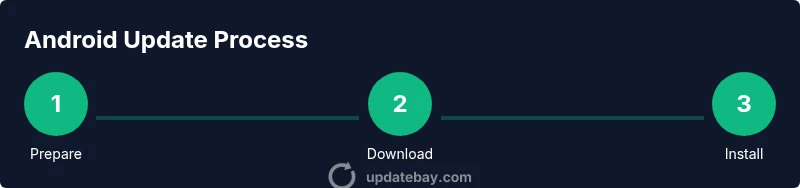
By following these steps, you will update your Android system safely, preserving data, apps, and settings. The guide covers prerequisites, backing up, confirming device eligibility, connecting to a stable Wi‑Fi network, downloading the official OTA, installing with minimal downtime, and verifying post‑update functionality, app compatibility, and security patches. Also learn how to undo an update if problems arise.
Why Updating Android System Matters
Keeping the Android system current closes security gaps, improves device reliability, and ensures new features work smoothly. According to Update Bay, system updates are not optional; they patch vulnerabilities and fix bugs. Running an up-to-date OS reduces risk from malware and protects data across apps, cloud synchronization, and payments. In addition to security, updates can enhance battery efficiency and performance optimizations, though not every update delivers dramatic changes. Before updating, it helps to understand that updates can involve changes to settings and app compatibility. Users should plan downtime and verify compatibility with essential apps. Update android system updates are typically delivered as over-the-air (OTA) packages by device manufacturers or carriers, sometimes requiring several reboots. By understanding the update cadence for your device, you can stay protected and enjoy smoother operation without surprises.
How Android Updates Work: OTA vs. Carrier Roles
Android updates come in several flavors. The most common path is an official OTA (over-the-air) release from the device maker or Google, which you download directly on the phone. Carriers may also push updates, sometimes adding their own tweaks or bloatware. OTA packages can include security patches, feature refinements, and bug fixes. The timing and availability depend on your device model, region, and software channel. In practice, you might see a notification with a brief changelog, followed by a download and install sequence. Understanding this flow helps you anticipate downtime and reduces frustration if a carrier delay occurs. Always use the official update to minimize risk and ensure proper integration with existing apps.
Prerequisites Before You Update
Before you start, ensure your device is ready for a system update. Charge the battery to at least 50% and keep it plugged in if the process requires it. Free up storage space; most OTA packages need several hundred megabytes to a couple of gigabytes. Back up important data, such as contacts, photos, and app data, either to your Google account or a local backup. Verify you’re using a genuine device and that you have an active internet connection. If you’re on a corporate device, check with your IT administrator for any policy restrictions. Finally, note the update window; some updates require additional reboots and may briefly affect your availability.
Checking Device Eligibility and OTA Availability
Device eligibility varies by manufacturer, carrier, and Android version. Start by identifying your device model and current OS version in Settings > About phone. Then check for updates via Settings > System > Software update (path may vary by maker). If an update is available, you’ll usually see a detailed changelog and a size estimate. If nothing appears, your device may already be up to date, or your carrier may have scheduling constraints. In some cases, you might need to install a limited preview or beta program for access to newer features. Always verify you’re on an official build to avoid counterfeit software.
Backing Up Your Data Safely
Backups are the safety net if something goes wrong during an update. Use Google Backup to save app data, settings, and device data to your Google account. For extra peace of mind, copy critical files and photos to a local drive or cloud storage. If your device allows, enable automatic backups so future updates won’t catch you unprepared. After updating, you can restore or verify that essential data remains intact and apps retain their settings. Remember, a verified backup speeds recovery if you encounter issues post-update.
Connecting to a Reliable Network and Managing Data Usage
A stable Wi‑Fi connection is strongly recommended for Android system updates. Prefer a secure network with adequate bandwidth to avoid interruptions. If you must use mobile data, limit background activity and monitor data usage since OTA packages can be sizable. Where possible, use a trusted, private network rather than public hotspots. You should also ensure your device is connected to power during the download to prevent mid‑download shutdown. Good network hygiene reduces the risk of corrupted downloads and failed installations.
Installing the Update: Step-by-Step
After download completes, you’ll see an installation prompt. Tap Install and let the device restart to begin the update process. The installation may take several minutes and will involve one or more reboots. Do not interrupt the process once it starts, as this may brick the device or leave the OS in an inconsistent state. After installation, your device will reboot to the home screen. Depending on the update, you may be asked to reconfigure certain settings or re-login to apps. A stable power source is essential throughout.
Verifying Update and Post-Update Tasks
Once booted, check the OS version to confirm the update installed correctly (Settings > About phone). Open a few essential apps to ensure they launch and remember to review app permissions—some may require re‑authorization after an OS change. Verify that security patches are active by reviewing the update notes. If you notice unusual behavior, check for app updates, clear caches, or perform a device restart. It’s also wise to run a quick battery and performance check to catch any regressions early.
Troubleshooting Common Update Issues
If an update stalls or fails, first ensure the device is on charge and connected to a reliable network. Restart the device and attempt the update again. If the issue persists, free up storage space, clear cache for the updater app, and retry. Some updates may fail due to incompatible apps or user profiles; consider performing a clean boot or safe mode test to isolate the culprit. If all else fails, contact the device manufacturer’s support or visit a service center for guidance. Avoid sideloading updates from untrusted sources, as that can compromise the device.
Update Bay Perspective and Best Practices
From Update Bay’s perspective, staying current with Android updates is a best practice for maintaining security and performance. The team recommends enabling automatic updates when possible and scheduling a quiet window for major upgrades. Regularly review update notes to understand changes in permissions, features, and battery behavior. By following official OTA instructions and keeping apps updated, you reduce risk and improve overall usability.
Tools & Materials
- Phone or tablet with at least 50% battery(Or keep plugged in during update to avoid interruption)
- Stable Wi-Fi network(Prefer 5GHz bands for faster downloads)
- Sufficient storage space(Free space of 1–2 GB recommended depending on OTA size)
- Backup options (Google account or local)(Back up contacts, photos, messages, and app data)
- Charger/USB cable(Useful if the charger is needed during update)
Steps
Estimated time: 60-90 minutes
- 1
Charge device and check storage
Plug in the device or ensure it has at least 50% battery. Make sure there is enough free storage for the OTA package and temporary files. A low battery or full storage can cause the update to fail.
Tip: Starting with a full battery reduces the risk of mid‑update shutdown. - 2
Back up important data
Back up essential data to Google Drive or your computer. Backups protect contacts, messages, photos, and app data if anything goes wrong during the update.
Tip: Verify the backup by restoring a small sample item to ensure the process works. - 3
Check for update availability
Open Settings and navigate to System updates to see if a new OTA is available for your device. If you’re on a company device, check with admin policies before proceeding.
Tip: If no update appears, your device may be up to date or awaiting carrier approval. - 4
Connect to a stable network
Ensure you are connected to a reliable Wi-Fi network. Avoid public hotspots during downloads to minimize the risk of interruption.
Tip: Use a charger while downloading if possible. - 5
Download the official OTA
Tap Download and wait for the OTA package to download completely. Do not cancel the download once started.
Tip: Monitor the progress and avoid switching networks during download. - 6
Install the update
Tap Install to begin the upgrade. The device will reboot and display a progress indicator. Do not power off during this phase.
Tip: Leave the device undisturbed until the reboot completes. - 7
Verify post‑update integrity
After boot, confirm the OS version shows the update. Open essential apps to ensure they run normally and re‑grant permissions if prompted.
Tip: Check security settings to confirm patches are active. - 8
Enable automatic updates
If available, enable automatic updates to streamline future upgrades. This reduces manual steps and helps maintain security.
Tip: Consider scheduling updates during off-peak hours.
Frequently Asked Questions
What should I do if the update fails to install?
If an update fails, ensure the device is charged and connected to Wi-Fi. Restart and retry, freeing storage if needed. If the problem persists, check for error codes and consult the manufacturer support page.
If the update fails, charge the device, retry on Wi‑Fi, and restart. If it still fails, check for error codes and contact support.
Will updating Android erase my data?
A normal OTA update should not erase your data, but backups are essential in case something goes wrong. Always back up before updating and review the changelog for any expected changes.
Usually updates don’t erase data, but back up beforehand to be safe and review what changes are expected.
How do I know if my device is eligible for an update?
Eligibility depends on the model, region, and carrier. Check Settings > System > Software update to see availability and confirm that your device is on a supported build.
Check Settings > System > Software update to see if the update is available for your device.
Should I enable automatic updates?
Enabling automatic updates helps keep your device secure with minimal effort. If you prefer control, schedule updates during low-usage periods.
Yes, automatic updates help keep your device secure; you can schedule them if you want.
What should I do if apps behave oddly after an update?
If apps misbehave after an update, try restarting, clearing cache for affected apps, or checking for updates to those apps. In persistent cases, re‑login or reinstalling the app can help.
Restart affected apps, update them, or re-login if needed. Reinstall if problems continue.
Watch Video
What to Remember
- Back up before updating to protect data.
- Use official OTA for safety and compatibility.
- Allow time for reboot and post-update checks.
- Enable automatic updates to stay current.