How to update npm version in VS Code
Learn how to update npm in Visual Studio Code with a practical, step-by-step plan. This guide covers global updates, Node Version Manager options, and troubleshooting tips for a smooth, reliable development workflow.

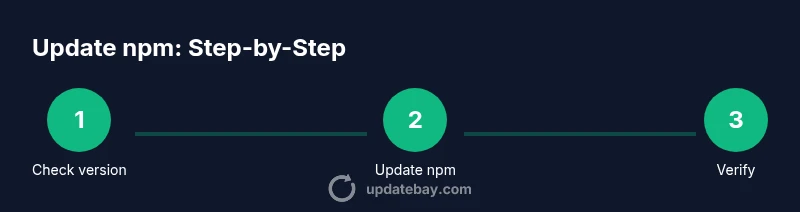
Today you will update npm to a newer version using VS Code's integrated terminal, ensuring Node.js is installed and you have internet access. Start by checking your current versions with npm -v and node -v, then pick a method: global npm update or leveraging nvm to manage Node and npm. Close and reopen the terminal after updating to refresh PATH.
Why updating npm version in VS Code matters
Keeping npm up to date is essential for reliability, security, and compatibility with modern JavaScript packages. According to Update Bay, developers who stay current with npm fare better in dependency resolution and get fewer install-time surprises. The Update Bay team found that many projects encounter obscure errors when their npm version lags behind the ecosystem, especially after major updates to popular libraries. In VS Code, you work against the same environment you use for development, debugging, and automation, so updating npm directly from the built-in terminal minimizes surprises. This section explains why staying current matters, what can break if you skip updates, and how to plan a smooth upgrade strategy that fits your workflow. You’ll learn about the difference between global and local npm, how Node.js versions influence npm, and why a deliberate update process matters more than a quick one-off command.
Whether you’re maintaining a small project or coordinating a multi-repo build, consistent npm versions across team members simplify scripts, CI configuration, and reproducible installs. In VS Code, you can verify your baseline with node -v and npm -v, decide on a method, and then proceed with confidence. The guidance here follows best practices used by Update Bay analysts in 2026, focusing on clarity, safety, and minimal disturbance to ongoing work.
Prerequisites and quick checks
Before updating, confirm your environment is ready. Ensure Node.js is installed (the npm you update will be the one bundled with your Node distribution). Open VS Code and launch the integrated terminal. Verify you have internet access and that you can run commands without permission obstacles. If you’re on Windows, keep admin rights in mind for global installations; on macOS and Linux, you may need to adjust ownership or use sudo for privileged updates. Finally, decide whether you want to update npm globally or manage versions with a tool like NVM (Node Version Manager).
Having these basics covered reduces the chance of surprises during the upgrade and helps you recover quickly if something goes wrong.
How npm versions are managed in VS Code
The integrated terminal in VS Code uses the current PATH, so the npm version you use is tied to the Node installation in your chosen environment. If you install Node through a version manager, npm updates are scoped to that Node version. You can update npm globally with npm install -g npm, or manage versions per-project by switching Node versions with a version manager like nvm. Some teams also explore Corepack for managing alternative package managers, but npm itself is updated via npm. In VS Code, you can test changes immediately in the terminal, ensuring consistency with your project tooling and CI pipelines. Update Bay analysis, 2026, notes that consistency is key for reproducible builds.
Update npm globally: Basic method
To update npm globally, open the VS Code terminal and run npm install -g npm. This command pulls the latest npm from the registry and installs it as the default npm version on your system. If you encounter permission errors on macOS or Linux (EACCES), prefix the command with sudo, or better, fix directory permissions so future updates don’t require elevated rights. On Windows, ensure your command prompt is run as administrator or use an elevated PowerShell session. After the install, verify the update by running npm -v to see the new version, and npm -v again to confirm stability. If your project scripts rely on a specific npm behavior, test a couple of installs in a sample directory to ensure compatibility.
Using Node Version Manager (nvm) to manage Node/npm
Using nvm gives you isolated Node/npm environments per project or per workflow. Start by installing nvm, then install a Node version that bundles a compatible npm (for example, nvm install node or nvm install 18). Switch to the desired version with nvm use, then update npm within that version’s context by running npm install -g npm. Finally, verify with npm -v and node -v. This approach allows you to switch contexts without affecting other projects. Pro tip: nvm makes testing updates safer by isolating changes from your default system Node.
Troubleshooting common issues during update
Permission errors, PATH mismatches, or stale terminal sessions are common culprits when updating npm. If you see EACCES, fix directory ownership or use a local prefix for global installs (npm config set prefix to a user-writable directory). Ensure the terminal you are using in VS Code is the one you expect (some shells remember older PATH entries). On Windows, running the terminal as an administrator can resolve many issues, but avoid permanently using elevated rights. If npm remains unavailable, reinstall Node.js from the official site to refresh the bundled npm. Finally, consult the project’s documentation to align with team-wide update policies.
Verifying the update inside the VS Code terminal
After updating, open a new terminal in VS Code and run node -v and npm -v to confirm the versions. Checking both is important because a mismatch can indicate multiple Node installations or a PATH problem. You can also run which npm (macOS/Linux) or where npm (Windows) to locate the executable being used. If the expected versions aren’t shown, revisit your PATH configuration or re-open VS Code to refresh environment variables.
Best practices and housekeeping after update
Document the npm version update in your project notes or changelog, especially for teams. Run npm install to verify the integrity of your dependencies, and consider running npm audit to catch potential vulnerabilities after updating. Favor a staged approach in CI: first run updates in a development branch, then in staging before production. Regularly review release notes for npm to stay ahead of breaking changes and deprecations. Finally, keep your Node versions synchronized across your development machines to avoid drift.
What changes across platforms (Windows/macOS/Linux)
Platform differences can affect how you install or grant permissions for npm. macOS and Linux often require sudo for global installs, while Windows may rely on administrative rights. In all cases, adjusting file permissions or using a per-user prefix can reduce friction. Always restart VS Code after major npm updates to ensure new executables are discoverable in the shell. If you manage multiple machines, consider a Node version manager like nvm to standardize environments across platforms.
Tools & Materials
- Node.js installed(Download from nodejs.org; npm ships with Node.)
- Visual Studio Code(Have VS Code installed and up to date.)
- Internet connection(Stable connection for npm registry access.)
- Integrated terminal in VS Code(Use the built-in Terminal for updates.)
- Administrative privileges (Windows) / sudo (macOS/Linux)(May be needed for global installs.)
- Node Version Manager (nvm) (optional)(Useful for managing multiple Node/npm versions.)
Steps
Estimated time: 20-30 minutes
- 1
Open VS Code and verify environment
Launch VS Code and open a new terminal. Run node -v and npm -v to confirm baseline versions before updating. This ensures you know what you are upgrading.
Tip: Document current versions for rollback reference. - 2
Choose update method
Decide whether to update npm globally or manage versions with a tool like nvm. Global updates are simplest; nvm helps you keep multiple Node/npm setups clean.
Tip: If you work across projects, consider using nvm to avoid conflicts. - 3
Update npm globally
In the VS Code terminal, run npm install -g npm. This pulls the latest npm from the registry and installs it as the default version on your system. If you encounter permission errors on macOS/Linux, prefix with sudo or fix permissions.
Tip: If you see EACCES, fix permissions or use a local prefix. - 4
Verify the global update
Close and reopen the terminal, then run npm -v to confirm the updated version. Also run node -v to ensure Node is still consistent.
Tip: Check that PATH reflects the new npm location. - 5
Handle common permission issues
If you encounter permission errors, adjust directory ownership or use a local npm global prefix. Do not run as root unless required.
Tip: Consider setting npm config set prefix '$(npm config get prefix)' to a safe location. - 6
Optional: update via Node Version Manager (nvm)
If you use nvm, install or switch to a Node version that includes a supported npm. Run nvm install node and nvm use node, then npm -v to verify.
Tip: nvm allows you to test the update in a separate environment. - 7
Restart VS Code
Restart VS Code to refresh PATH and ensure the terminal picks up the new npm. Reopen terminals within VS Code after restart.
Tip: A full restart avoids stale processes holding old npm paths. - 8
Test your project
Run npm install in a project to ensure compatibility with the updated npm. Observe dependency resolutions and potential breaking changes.
Tip: Keep a backup or use a test branch when updating in large repos.
Frequently Asked Questions
Do I need to update npm globally to get new features?
Not always. Updating npm globally is the simplest path for most users, but some projects rely on a specific local setup. Check compatibility and test.
Usually you’ll update npm globally for the whole machine; you can test a specific project to see if it requires a different setup.
What should I do if npm isn’t found in the VS Code terminal?
Ensure Node.js is installed and the PATH includes npm's location. Restart VS Code or run the terminal as administrator if needed.
If npm isn’t found, verify Node.js installation and PATH, then restart the editor.
Can I downgrade npm if the update causes issues?
Yes. You can install a specific version with npm install -g npm@<version>, then verify with npm -v. Always test before using in production.
You can downgrade npm by selecting a previous version and reinstalling globally.
Is updating npm different when using nvm?
When using nvm, you manage Node/npm per version. Install or switch to a Node version, then npm -v to verify.
With nvm, npm is tied to the active Node version; update via the active version.
What about npm security advisories after updates?
Always run npm audit after updating to catch vulnerabilities and ensure installed packages remain safe.
After updating, check for vulnerabilities with npm audit.
Does Corepack affect npm updates?
Corepack manages Yarn and PNPM; npm updates are handled via npm itself, not Corepack.
Corepack is for other package managers, not npm updates.
Watch Video
What to Remember
- Update npm to stay in sync with packages
- Choose global vs local based on project scope
- Restart the terminal to apply changes
- Consider Node Version Manager for safer version control