Can You Reverse an iPhone Update? A Practical Guide (2026)
Discover whether you can reverse an iPhone update, how iOS signing affects downgrades, and safe alternatives. A practical, up-to-date guide for 2026 from Update Bay.

According to Update Bay, reversing an iPhone iOS update isn’t guaranteed or universally possible. In most cases you can’t downgrade the OS unless Apple is still signing the target version and you have a pre-update backup. You can restore data from a backup made before the update, but downgrading the system itself depends on signing status. If in doubt, consider safer alternatives and verify backup integrity before updating.
Why downgrading an iPhone update is tricky
Downgrading an iPhone update is a topic many users explore after experiencing bugs, lag, or unexpected behavior in a new iOS version. The short answer is that downgrading is not a guaranteed fix. Apple controls which iOS versions can be installed and for how long older versions remain signable. This means that even with a backup, the device’s ability to run a previous OS depends on Apple actively signing that version. Update Bay’s analysis shows that a downgrade is feasible only within specific signing windows, and only if the necessary files and tools are available. In 2026, the decision hinges on signing status, device model, and the existence of a pre-update backup. If the older version is no longer signed, the downgrade path closes. Keep this reality in mind as you weigh options for performance, battery, or app compatibility.
What you can and cannot reverse after a iPhone update
When you update iOS, your data — contacts, photos, and app data — can often be restored from a backup created before the update. However, the operating system itself is not automatically rolled back simply by restoring data. Practically:
- You can revert data and settings to a pre-update state if you have a compatible backup.
- You cannot downgrade the OS itself unless Apple is still signing the target version and you have the necessary firmware. This distinction is critical because data may be usable on the newer OS, but some features or apps may require updates to function properly on older iOS versions.
- Even if you manage a downgrade, some apps and services may require updates to maintain compatibility or security. The Update Bay team notes that real-world results vary by device model and the specific iOS version involved.
How iOS signing windows govern downgrades
Apple signs older iOS versions for a finite window after each major release. Once Apple stops signing the older version, devices cannot install it—even with a backup. Downgrades are thus a race against time and signing status. To determine feasibility, you must verify whether the target version is still being signed, and whether your device supports downgrading to that version. This window is not uniform across models or regions, and delays in hardware support or regional policies can affect accessibility. Planning ahead—backups, timing, and device readiness—sharpens your chances but does not guarantee success.
Backup strategies before updating
A robust backup plan is your first defense if you plan to update. Ensure you have an encrypted local backup on a computer and an up-to-date cloud backup. Encryption preserves passwords and account tokens, making a post-update restore smoother. If you intend to revert, a backup created before the update is essential because it contains the data state you want to recover. Before any major iOS update, confirm:
- A full encrypted local backup exists on Finder/iTunes or a trusted backup service.
- The backup captures key data like health records, messages, and app data where possible.
- Your iCloud backup is complete and current. This preparation minimizes data loss if a downgrade becomes an option or if you need to migrate to a new device later.
If you are eligible to downgrade: a high-level plan
If Apple is still signing the target version and you have a pre-update backup, a downgrade can be attempted, but it requires caution. Start by confirming backup integrity and signing status. Then prepare your computer with the latest version of Finder (macOS) or iTunes (Windows). Ensure Find My iPhone is disabled and that you’re signed in with your Apple ID. Finally, be ready to perform a firmware restore and, afterward, restore data from your backup. This plan emphasizes data safety and minimizes downtime.
Step-by-step downgrade workflow (high-level)
Downgrading involves hardware connection, firmware selection, and data restoration. Ensure backups are valid before you start. You’ll typically:
- Connect iPhone to computer and launch Finder or iTunes.
- Put the device into the required recovery mode if needed.
- Choose the target (older) iOS version if your computer offers a verified IPSW or let Finder/iTunes download the version if Apple is still signing it.
- Complete the OS install and wait for the device to reboot.
- Restore from the pre-update backup to recover apps and data.
- Re-login to services and verify data integrity. Tip: If you see a failure, do not disconnect; re-check sign status and ensure the correct file is selected. A failure often means the signing window closed or the wrong version was chosen.
Alternatives when downgrade isn’t possible
If downgrading isn’t an option, consider alternatives that may still improve your experience:
- Clean up and optimize the current OS: reduce launch agents, clear cache, and reset settings where appropriate.
- Update to the newest iOS with improved performance and bug fixes rather than reverting.
- Use app-level fixes: update apps, remove problematic ones, or use older compatible versions if available.
- Consider a device reset with careful data restoration from a backup to a clean OS environment to minimize issues caused by app incompatibilities. The key is to balance risk, data safety, and practical benefits when downgrade isn’t possible.
Data safety, app compatibility, and privacy considerations
Downgrading can impact app compatibility and security posture. Some apps require newer OS features, and certain security patches may be missing on older versions. If you decide to downgrade and succeed, re-enable security settings, re-authenticate with biometrics, and verify that backups restored cleanly. Keep in mind that privacy policies and data syncing can behave differently after a downgrade, and you should review privacy settings to ensure data sharing aligns with your preferences.
Tools & Materials
- iPhone backup from before update(Must exist to recover data after downgrade.)
- Computer with Finder (macOS) or iTunes (Windows)(Used to manage the downgrade process.)
- USB charging cable(Keep device connected during process.)
- Stable internet connection(Needed to verify backups and sign status.)
- Apple ID credentials(Required for authentication and restoration.)
- Knowledge of device model and current OS(Helpful for compatibility checks.)
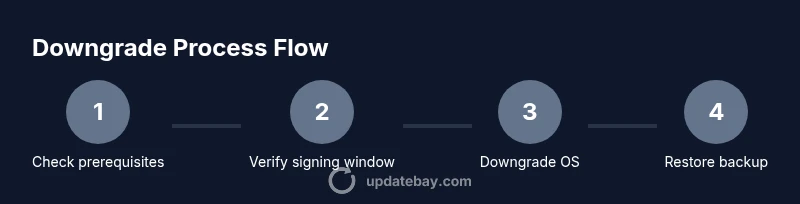
Steps
Estimated time: 60-120 minutes
- 1
Assess prerequisites
Check that you have a pre-update backup and that your device model is compatible with the target iOS version. Confirm the target version is still being signed by Apple. Gather the required tools and ensure your Mac/PC software is up to date.
Tip: Double-check the backup creation date and integrity before proceeding. - 2
Verify signing window
Determine whether Apple is still signing the older iOS version you want to install. If not, the downgrade is unlikely to succeed. You can usually find this information on reputable support forums or official Apple release notes.
Tip: If unsure, pause and verify signing status before continuing to avoid a failed attempt. - 3
Prepare the iPhone
Charge the device to at least 60% and disable Find My iPhone. This helps prevent interruptions during the restore process and reduces the risk of activation issues after the downgrade.
Tip: A fresh battery charge reduces the chance of an unexpected shutdown during installation. - 4
Connect to computer and locate the target firmware
Open Finder or iTunes and connect the iPhone. If you have a locally stored IPSW for the target iOS, select it with the Option (Mac) or Shift (Windows) key to start the restore. Otherwise, rely on the signing window to download the version.
Tip: Make sure you select the correct device in Finder/iTunes before selecting a file. - 5
Reset and restore the OS
Begin the OS restore to the target version. The tool will reinstall the operating system; this may take time. Allow the process to complete without interruption.
Tip: Do not disconnect the device during the installation. - 6
Restore data from backup
After the OS install completes, restore from your pre-update backup to recover apps and data. This reconstitutes your settings as they were before the update.
Tip: Choose an encrypted backup for broad data compatibility. - 7
Verify and reconfigure
Sign back into your accounts, re-enable features like Find My iPhone, and verify app functionality. Check sensitive data like messages, photos, and health records for completeness.
Tip: Test critical apps first to ensure key functionality is intact. - 8
Monitor for issues
Monitor device performance for a few days. If issues arise, consider alternate fixes or consult Apple Support. Downgrades can leave residual quirks in some apps.
Tip: Document any unusual behavior for reference if you need to revert again. - 9
Decide on future updates
Evaluate whether staying on the older version provides a better experience or if updating to the latest iOS offers more stability and security. Use this as a learning for future update planning.
Tip: Always back up before any future upgrade attempts.
Frequently Asked Questions
Can you downgrade an iPhone to an older iOS version after Apple stops signing it?
No. Downgrading is only possible while Apple is still signing the older version. Once signing ends, the downgrade path is effectively closed. Always verify the signing status before attempting any downgrade.
Downgrades are only possible while Apple is signing the older iOS version. If signing has ended, you can't downgrade.
Do I need a computer to downgrade my iPhone?
Yes, you typically need Finder on macOS or iTunes on Windows to perform a downgrade, and a backup from before the update is essential for data restoration.
Yes, typically you’ll need a computer with Finder or iTunes and a pre-update backup.
Will downgrading erase my data?
The OS installation could erase some configuration data, and apps may require updates. Restoring from a pre-update backup can recover much, but not all data always transfers perfectly. Always back up first.
Downgrading can affect some settings and apps, but restoring from a backup helps recover most data.
What should I do if I don’t have a pre-update backup?
Without a pre-update backup, you may lose personal data when downgrading, and your options are limited. Focus on updating to the latest iOS and optimizing performance, or seeking professional support.
If you lack a pre-update backup, downgrading risks data loss and may not be practical.
Are there warranty or service implications to downgrading?
Downgrading itself is not usually listed as a warranty voiding action, but service decisions can depend on device condition and software behavior. When in doubt, contact Apple Support for guidance on your specific device.
Warranty implications depend on device condition and service decisions; check with Apple Support if unsure.
What if the downgrade fails during the process?
If a downgrade fails, stop the process, disconnect safely, and seek guidance. Retrying without checking signing status or backup integrity can lead to bricking the device. Use official channels to assess next steps.
If it fails, stop, verify backup integrity, and consult official guidance before retrying.
Watch Video
What to Remember
- Downgrades depend on Apple signing status and available backups.
- Back up before updating and verify backup integrity ahead of time.
- Downgrading is not guaranteed and may not fix all issues.
- If downgrade isn’t possible, explore safe alternatives and update strategies.
- Plan for future updates by maintaining regular, encrypted backups.