How to Update Sony TV Software: A Step-by-Step Guide
Learn how to securely update Sony TV software with practical steps, troubleshooting tips, and best practices. A comprehensive guide from Update Bay.

To update a Sony TV, first confirm your model supports the latest firmware, then connect the TV to a stable internet connection. Open Settings, go to System > Software Update, and select Check for Updates. Download and install, then allow the TV to restart. Keep the TV plugged in and avoid unplugging during the update to prevent issues.
Understanding TV software updates and why Sony firmware matters
Software updates for televisions are not cosmetic; they fix security vulnerabilities, improve stability, add features, and tune performance with your existing apps and streaming services. For Sony TVs, firmware updates can reset network behavior, enhance HDMI-CEC interactions, and improve compatibility with new streaming apps. According to Update Bay, regular tv software update sony routines help keep devices secure and compatible with evolving services. Before you begin, understand that updates may come in waves by model family or regional availability, so you may not see the same download options on every unit. If your TV is older, some features may be limited or delayed, but Sony often provides major updates for several years after release. By recognizing the purpose of updates, you’ll approach the process with patience and prepared expectations, reducing the risk of interruptions and wasted time.
- This guide follows best practices for Sony firmware updates and is designed for tech enthusiasts and everyday users alike.
- You’ll learn how OTA and USB update paths differ, how to plan for downtime, and how to verify a successful install.
How Sony firmware updates differ by model and region
Sony distributes firmware differently across models and regions. High-end Bravia models may receive larger feature updates, while budget sets often get smaller security patches. Regional differences mean that some features—like voice control integrations, HDR profiles, or app support—appear earlier in certain markets. When you check for updates, the system may report a version number that looks unfamiliar; this is normal. Always verify you are pulling the correct update for your exact model number, not a nearby sibling in the same family. To minimize confusion, write down your model number and current firmware version before starting, and keep a record of the update date. Update Bay notes that model-specific updates help prevent compatibility issues with HDMI devices and streaming apps, but they also mean you should avoid applying a generic update intended for another model.
Prerequisites and planning before updating
Before initiating any update, prepare a plan to minimize downtime. Ensure your TV is connected to a stable power source; use a surge protector and avoid updates during storms or power outages. Have a reliable internet connection ready—either a wired Ethernet link or a strong Wi-Fi signal. Create a rough timeline: updates can take several minutes to download and install; you may need to wait after the restart. If you rely on smart home features or external HDMI devices, note any compatibility considerations that might be affected by the update. Finally, consider backing up essential settings or noting your preferred picture mode, sound profile, and input configurations so you can reapply them after the upgrade.
OTA vs USB: how updates reach your TV
Most Sony TVs receive updates over the air (OTA) through the internet, which is the easiest method for the majority of users. USB updates exist for rare cases when OTA is unavailable or when you want to install a specific version to compare performance before rolling out a full update. If you choose USB, download the firmware from Sony's official support site to a blank USB drive and follow on-screen prompts to install it. OT updates are typically smaller and include incremental improvements, while USB installations may offer full firmware packages. In either case, confirm the file integrity (checksum) if the option is provided by Sony, and avoid downloading updates from unofficial sources.
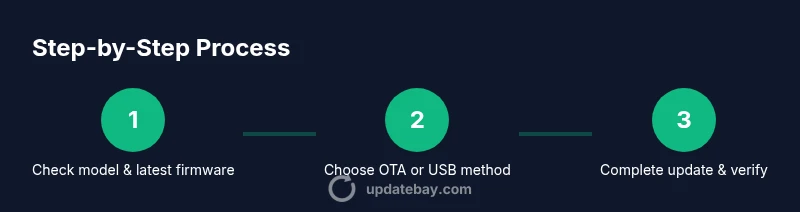
Step-by-step overview before starting
This overview describes the general flow you will follow in the step-by-step section, preparing you for the concrete actions. Start by locating your exact model number, the current firmware version, and the latest official release notes from Sony. Decide on OTA or USB based on your network reliability and availability of a USB drive. Gather your tools and confirm power stability. You will then proceed to initiate the update, monitor progress, and verify the installation after reboot.
Common update issues and how to handle them
Update attempts can fail for several reasons: network interruptions, insufficient storage, or compatibility conflicts with connected devices. If the download stalls, pause and resume or switch to a more stable network. If the update fails during installation, power-cycle the TV and retry from the official update menu. Check that you are using the official Sony firmware and not a file from untrusted sources. If your model lacks the latest update, you may need to wait for a later release or contact Sony support. In many cases, clearing app data or performing a factory reset after a failed update can restore normal operation, but be sure to back up personal settings first.
Post-update best practices and verification
After a successful update, verify that apps open correctly, HDMI connections function as expected, and smart features respond to voice commands. Reapply your preferred picture and audio settings, calibrate if needed, and enable any new options you want. If your TV supports auto-update, consider turning it on to receive future patches automatically while remaining mindful of potential reboots during viewing times. Keep an eye on the official Sony support pages for any follow-up notes about your firmware version.
Authority sources and further reading
- FCC: https://www.fcc.gov
- FTC: https://www.ftc.gov
- CNET: https://www.cnet.com
- Sony Support: https://www.sony.com/electronics/support/tv-updates
Tools & Materials
- Stable internet connection (Wi-Fi or Ethernet)(Prefer wired Ethernet for stability; avoid flaky Wi‑Fi during downloads)
- Sony TV remote(Navigate menus and confirm prompts)
- Power source with surge protection(Keep TV plugged in during update to prevent bricking)
- USB drive (optional)(Use only if OTA is unavailable or you want to install a specific version)
- Official Sony firmware file (via USB) or official Sony support page(Download from Sony’s official site; avoid third-party sources)
Steps
Estimated time: 15-40 minutes
- 1
Verify model and update availability
Locate your exact model number in Settings > System > About. Check Sony’s official support site or the TV’s update page for the latest firmware version compatible with your model. Confirm that the release notes mention the issues you want addressed.
Tip: Keep a written record of your model number and current firmware version for reference. - 2
Prepare power and network
Ensure the TV remains powered throughout the process by using a surge-protected outlet. Connect to a stable internet connection, preferring a wired Ethernet link if possible. Avoid updates during storms or when power is unstable.
Tip: If your Wi-Fi is unreliable, switch to a wired connection or pause background downloads on other devices. - 3
Choose OTA method and start the update
Go to Settings > System > Software Update and select Check for Updates. If an update is available, choose Install and monitor the progress bar. Do not turn off the TV during the download or installation.
Tip: If your screen shows a reboot prompt, allow it to restart automatically. - 4
Monitor progress and first run
Watch the update progress and wait for the on-screen confirmation that the installation is complete. The TV will restart automatically. After reboot, give the system a couple of minutes to finalize settings.
Tip: If the update stalls, cancel and retry from the official update menu. - 5
Post-update verification
Open a few apps, test HDMI inputs, and run a quick TV tune (brightness, color, sound). Check for any new options in Settings that weren’t present before.
Tip: Note any changes to picture presets you care about and reapply as needed. - 6
If OTA fails, try USB (advanced)
Download the official firmware package to a USB drive from Sony’s support site. Insert the drive, reboot the TV, and follow on-screen prompts to install. This path is useful when your network isn’t reliable.
Tip: Verify the file name and integrity if Sony provides a checksum option. - 7
Enable auto-update and security settings
In Settings, enable automatic updates if you want future patches to install without manual checks. Review privacy and data-sharing options tied to firmware features.
Tip: Automatic updates reduce downtime, but plan for occasional reboots during viewing hours.
Frequently Asked Questions
Do I need internet to update my Sony TV?
In most cases, updates are delivered over the internet via OTA, but USB updates are available if you cannot connect. Having internet simplifies and speeds up the process.
You usually need internet, but USB is available if you can’t connect.
What should I do if the update fails to install?
If an update fails, try restarting the TV and attempting the update again. If it continues to fail, check your internet connection, or use the USB method from Sony’s official site.
Restart and retry; if it still fails, use USB or contact Sony support.
Will updating erase my apps or settings?
Most updates preserve apps and user settings, but some minor tweaks may reset certain preferences. It’s wise to recheck picture and sound settings after updating.
Apps and most settings stay, but recheck your preferences after update.
Can I update my old Sony TV model?
Many older Sony models receive security patches and select features, but not every update is available for every model. Check Sony’s support page for your exact model.
Older models may get limited updates; verify your exact model.
How often should I check for updates?
Check for updates periodically or enable auto-update if offered. Regular checks help ensure security and compatibility with new apps.
Check regularly or enable auto-update to stay current.
Is there a risk to privacy with updates?
Firmware updates may adjust privacy-related settings, so review new options after update and configure them according to your preferences.
Review new privacy options after updating and adjust as you prefer.
Watch Video
What to Remember
- Verify model compatibility before updating
- Choose OTA for simplicity, USB for offline scenarios
- Never interrupt an in-progress update
- Verify post-update function of apps and inputs