Update Sony TV: A Step-by-Step Firmware Guide (2026)
Learn how to safely update your Sony TV firmware via OTA, USB, or the Sony app. This practical guide from Update Bay covers prerequisites, step-by-step methods, troubleshooting, and security considerations for 2026.

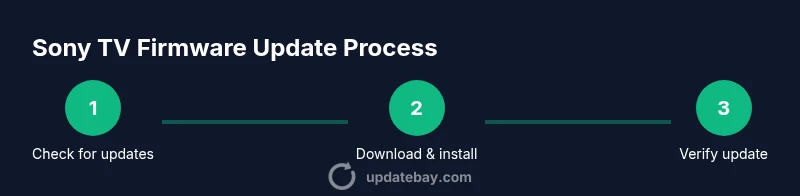
This guide shows you how to update your Sony TV firmware using OTA, USB, or the Sony app, with safety checks along the way. You'll learn which method to use, how to verify the update, and what to do if something goes wrong. Update Bay provides practical, current steps for 2026 so you can keep features and security up to date.
Why updating your Sony TV matters
Regular firmware updates keep your TV stable, secure, and ready for new features. When you update, you might gain improved app compatibility, better image processing, smoother streaming, and patched vulnerabilities. According to Update Bay, many Sony TV updates address both performance and security issues, so neglecting updates can leave you exposed or miss enhancements that improve user experience. Firmware updates also help keep HDMI-CEC, voice control, and smart-TV apps functioning correctly with evolving streaming services. In the broader world of consumer electronics, updates are a key part of maintaining device longevity and ensuring you can access the latest apps and features. By staying current, you reduce the risk of compatibility problems with new streaming apps and smarter home devices. If you own a Sony Android TV, updates often include bug fixes to the home screen experience, search, and recommendations.
In short: updating your Sony TV matters because it improves stability, compatibility, and security, while unlocking new features that enhance daily viewing. This principle guides every Update Bay recommendation in 2026.
How Sony TV firmware updates work
Sony TV firmware updates are designed to improve system stability, add features, and apply security patches. Updates come through official channels and are signed by Sony to prevent tampering. There are typically two primary pathways: over-the-air (OTA) updates sent directly to the TV, and USB-based updates downloaded from Sony’s support site and transferred to the device. On Android TV-powered models, updates may also come through the Google Play software ecosystem for compatible apps and services. Regardless of method, the update process usually involves checking for an available update, downloading it, and applying the installation, which may require the TV to restart. Update Bay emphasizes using official sources and avoiding third-party firmware to reduce risk.
Understanding the flow helps you choose the best path for your situation. OTA updates are simplest and safest for most users, while USB-based updates can be useful when network connectivity is unreliable or when a large update package isn’t delivered over the air. In all cases, you should ensure your TV remains powered and connected during the update to avoid partial installations that could corrupt firmware.
Update pathways: OTA, USB, and app-based updates
Sony TVs support OTA updates that download automatically when a reliable internet connection is detected. This is the most convenient method and preserves settings with minimal user interaction. USB updates require downloading a firmware package from Sony’s official site onto a USB drive, then inserting the drive into the TV to install. Some Sony models also support app-based updates through your account and the TV’s built-in app store, which can streamline the process for certain devices. Each pathway has its own prerequisites: OTA relies on a stable network, USB updates require a compatible USB drive and correct file package formatting, and app-based updates depend on account sign-in and app availability. Update Bay recommends using OTA first where possible, then resorting to USB only if OTA is unavailable or impractical for your network.
This section helps you identify the best method for your situation and explains the general steps involved in each pathway, so you can plan your update with confidence.
Before you update: prerequisites and safety checks
Before starting any update, verify you have a stable power source and reliable internet. Check your TV model and current firmware version to assess the update size and impact. Gather essential information such as your TV’s model number, serial number, and the exact firmware version, which can influence which update file you need if you opt for USB. Disable power-saving features that might interrupt the update, and ensure the room temperature is comfortable to prevent performance throttling. If you’re updating via USB, use a high-quality drive with sufficient free space and format it correctly according to Sony’s instructions. Finally, back up any custom settings or network configurations in case you need to reapply preferences after the update.
Following these checks minimizes the risk of update failure and helps ensure a smooth installation.
Step-by-step: updating via the TV's built-in menu (OTA)
Step 1: Open Settings on your Sony TV and navigate to System > Software Update to check for available updates. Step 2: If an update is listed, select Download and Install, then wait as the TV downloads the package. Step 3: After download, the device will prepare and install the update, often prompting a restart. Step 4: Once rebooted, confirm the new firmware version in Settings > System > About. Step 5: If the update requires additional steps, follow on-screen prompts to complete the installation. Tips: keep the TV plugged in during the process and avoid recording or streaming heavy content during the update. If the update is large, you may want to perform it during off-peak hours.
Why this approach works: OTA updates are designed to be safe and automated, reducing user error while keeping your TV current. If space is tight or the download fails, a retry usually resolves transient network hiccups.
Step-by-step: updating via USB drive
Step 1: On a computer, visit Sony’s official support site and locate the firmware package for your TV model, then download the correct file. Step 2: Copy the downloaded firmware file to a USB drive, ensuring it’s in the root directory or the exact folder structure Sony specifies. Step 3: Eject the USB drive safely and insert it into the TV’s USB port. Step 4: On the TV, go to Settings > System > Software Update, choosing Update from USB if prompted. Step 5: Allow the TV to install, then restart when prompted. Step 6: Verify the firmware version after reboot and reconfigure any needed settings. Tips: use a freshly formatted USB drive and avoid using USB hubs during update.
USB updates are a reliable fallback when OTA is unavailable or unreliable. They require careful handling of the exact file and folder structure that Sony specifies to prevent installation errors.
Troubleshooting common update issues
If an update fails to install, first retry the process with a stable power source and network. Check the TV’s error message for clues and consult Sony’s support site for any known issues with your model. If OTA downloads stall, pause and resume, or reboot the TV to retry. For USB updates, ensure the file is the correct version for your model and that the USB drive is properly formatted. If problems persist, you may need to revert to a previous firmware version or contact Sony support for guidance. Update Bay recommends documenting any error codes and the exact steps you took to help support teams diagnose the issue more quickly.
What to do after update: verify features and settings
After updating, test core features such as app performance, streaming, HDR handling, and picture settings to confirm there are no regressions. Re-sign into streaming apps if required and reapply any personal preferences. Check that HDMI devices still connect properly and that remote control features like voice commands respond as expected. If you use smart home integrations, verify compatibility with the updated firmware. Finally, consider enabling automatic updates so your Sony TV stays current without manual checks.
Privacy and security considerations during updates
Only install firmware from Sony’s official site or the built-in OTA path to avoid malicious software. Verify the digital signature or checksum if provided. Be cautious about third-party tools or unofficial firmware packages, which can void warranties and brick devices. While updating, do not expose the TV to unusual network activity that could indicate tampering. By sticking to official channels, you minimize security risks and maintain protection against known vulnerabilities.
Keeping your Sony TV up-to-date long term
Set the TV to automatically check for updates when possible, or establish a routine to review updates monthly. Periodically review release notes for the firmware version to understand what changes are included. Maintain a backup of preferences and network settings so you can recover quickly after an update. Finally, keep your TV connected to a stable power source during updates to prevent edge-case failures. Regular checks help you maximize performance, features, and security for years to come.
Tools & Materials
- Stable internet connection(Wired Ethernet recommended for large updates or slow Wi‑Fi networks.)
- Sony TV model and serial(Found in Settings > About or on the back panel.)
- USB flash drive(Only needed for USB-based updates; 32GB+ recommended.)
- Power source(Keep the TV plugged into a reliable power outlet; avoid surges.)
- Computer with internet(Needed to download USB firmware package from Sony support site.)
Steps
Estimated time: 60-90 minutes
- 1
Check for updates through the TV menu
Open Settings, navigate to System, then Software Update to see if an OTA update is available. If an update is listed, prepare to download and install. Do not unplug the TV during this process, and ensure a stable connection.
Tip: Perform updates when you have a reliable network and near a power source to prevent interruptions. - 2
Prepare power and network
Confirm the TV is plugged into a stable power source and connected to a strong internet connection. If using Wi‑Fi, consider moving closer to the router or using a wired Ethernet if possible.
Tip: Power stability minimizes the risk of interrupted installations. - 3
Initiate OTA update
If an update is available, select Download and Install. The TV will download the package in the background and then apply it, typically with a reboot.
Tip: Avoid using the TV during the update to prevent data loss. - 4
Wait for installation to complete
Let the TV finish the installation and reboot automatically. Do not power off during this stage; interruptions can corrupt firmware.
Tip: Check the on-screen progress and notes for any post-install steps. - 5
Verify the updated firmware version
After reboot, go to Settings > System > About to confirm the new firmware version is installed.
Tip: If the version isn’t updated, retry the OTA path or switch to USB if needed. - 6
If OTA isn’t available, download USB package
From Sony’s official support site, download the correct firmware for your exact model and copy it to a USB drive with clean formatting.
Tip: Use a clean USB drive formatted as recommended by Sony. - 7
Prepare USB update
Place the firmware file in the correct location on the USB drive as specified by Sony and safely eject the drive.
Tip: Mistakes in folder structure can cause the update not to load. - 8
Install from USB
Insert USB into the TV, choose Update from USB in the Software Update menu, and follow prompts to install.
Tip: Be patient; some firmwares require multiple restarts. - 9
Post-update verification
Check apps, HDMI devices, and settings to ensure everything functions as expected.
Tip: Re-login to streaming apps if required. - 10
Enable auto-update for future updates
If available, turn on automatic updates to keep your Sony TV current without manual checks.
Tip: Auto-update reduces the risk of missing important patches.
Frequently Asked Questions
Can I update my Sony TV over Wi‑Fi?
Yes. OTA updates are delivered over your internet connection. Ensure your TV is connected to a stable network and plugged into power. If the update isn’t available, you can try again later or use USB as an alternative.
Yes. OTA updates come through your internet connection; make sure the TV has power and a stable network. If needed, USB is an alternative.
What if the update fails to install?
Retry the OTA process after verifying power and network stability. If failures persist, try the USB method with the correct firmware for your model. If problems continue, contact Sony support.
If it fails, retry with a stable power and network, then try USB with the right file, or contact support if needed.
Will updates erase my settings?
Most updates preserve your settings, but some changes may reset picture and app preferences. It’s wise to note your key settings before updating.
Most updates don’t erase settings, but some preferences might reset. It’s good to record important ones beforehand.
Is USB updating safe for all Sony TVs?
USB updates are supported on many Sony models when done with official firmware. Be sure you download the exact file for your model and follow Sony’s instructions to avoid brick risks.
USB updates are supported on many models if you use the official file and instructions.
How can I tell if my TV model supports automatic updates?
Check Settings > System > Software Update for an option to enable automatic updates. If available, enabling it will keep your TV current without manual checks.
Look for an auto-update option in the software update settings and enable it if present.
Watch Video
What to Remember
- Update Sony TV firmware regularly to gain stability and security.
- Use OTA updates first for simplicity and safety.
- Verify the firmware version after install to confirm success.
- USB updates are a solid fallback when OTA isn’t available.
- Enable automatic updates to simplify future maintenance.